
This article goes through the steps you need to take to export the studies missing full text in Covidence, find full texts into EndNote and then upload them to Covidence.
Check with your institution which reference manager can link to your library as this will give you the best chance of retrieving the most full texts.
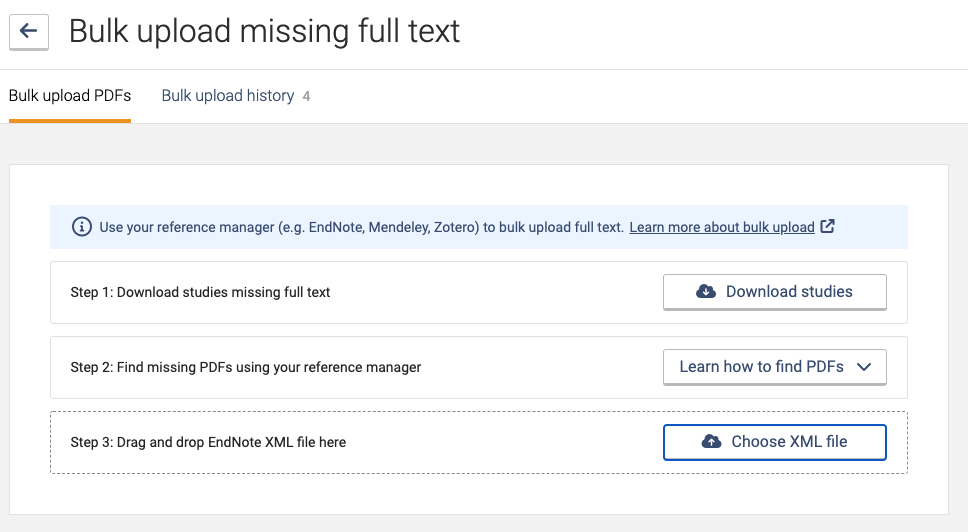
In Covidence:
Step 1: Download the studies missing full text from Covidence. You can navigate to this page by opening your review at the full text review stage and clicking "Bulk upload PDFs".
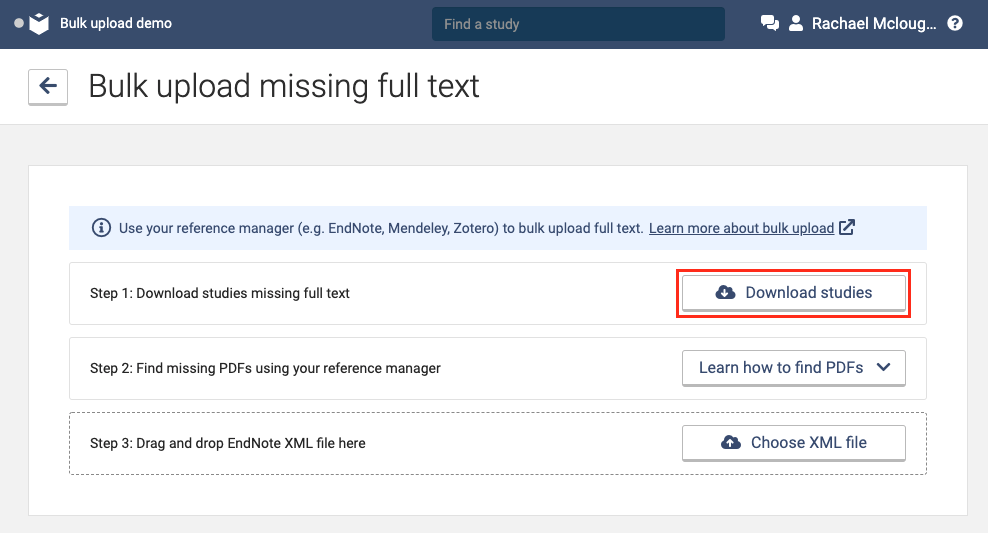
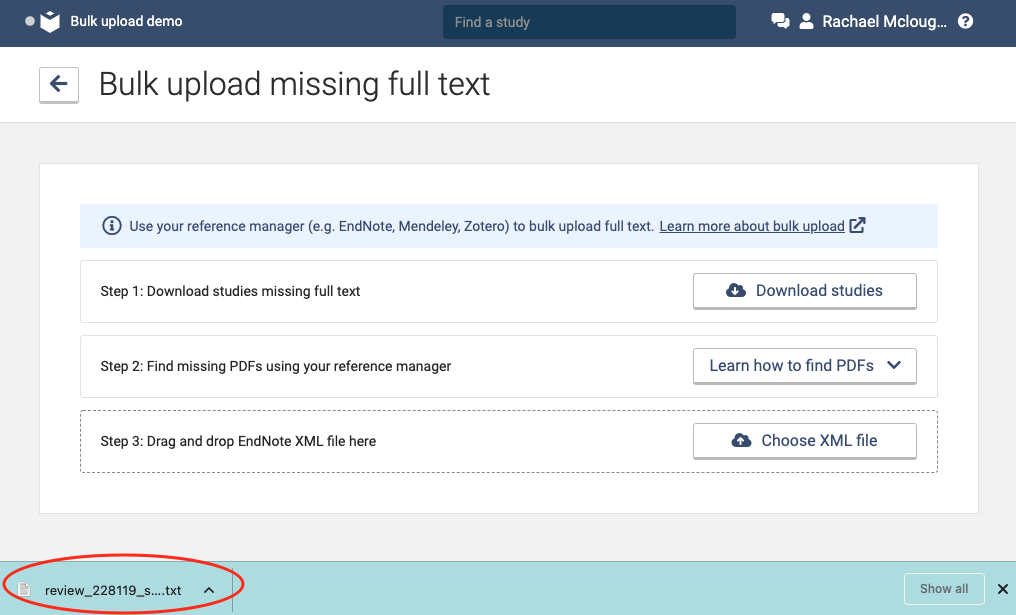
Step 2: Make a note of the name of the file so you can easily find the file for the next steps in EndNote.
In EndNote:
First of all, if you haven’t downloaded EndNote you can do that here. Make sure your organization has an EndNote subscription and use your institutional credentials to install EndNote.
If you have already downloaded EndNote but you haven't added your institutional credentials, then we recommend that you add them to have the best chance of finding the most full text articles.
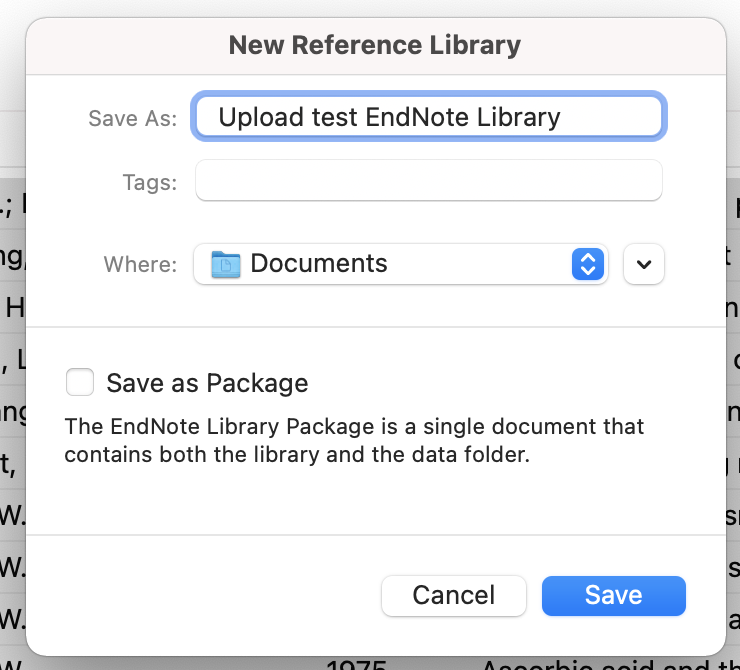
Step 3: Once in EndNote, you will need to create a library if you haven't already created a library you want to import your studies into. You can create a new library by clicking "File" and then "New". Name the library something you will remember and make a note of the location, later in this process you will need to locate this folder to upload the PDFs to Covidence.
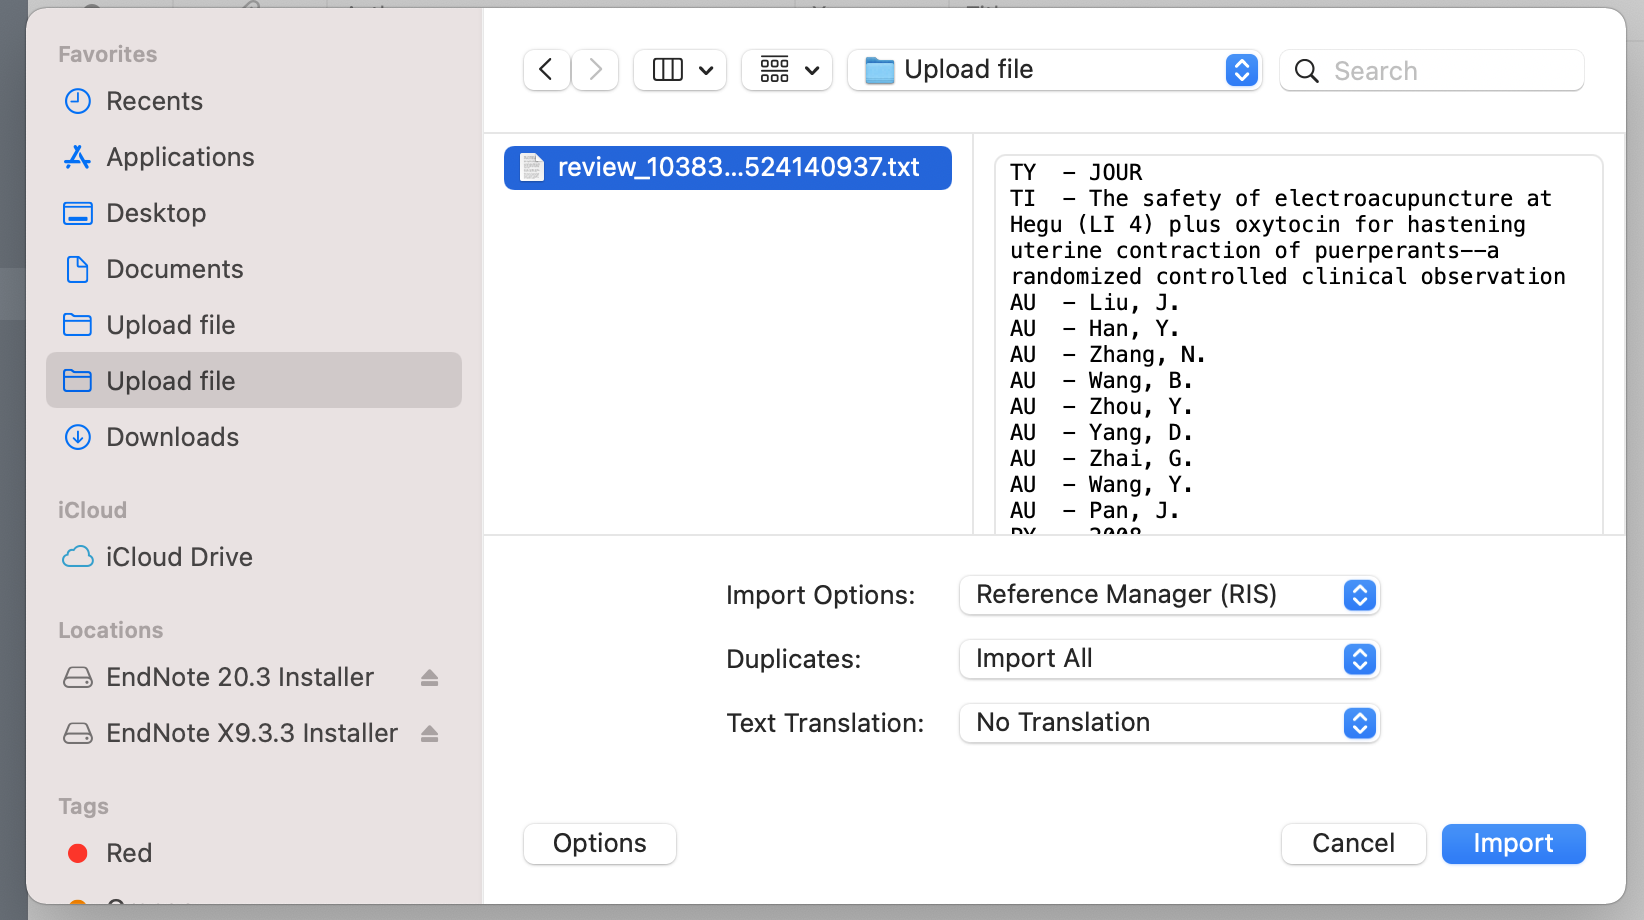
Step 4: Next you need to import your studies by clicking "File" and then "Import". Select the file which you downloaded from Covidence in step 1 and 2 above.

Make sure you choose the Import Option for Reference Manager (RIS) by clicking on "Options".
Step 5: (optional) Your imported studies can be found in the "Imported References" area of your EndNote Library. So you can easily find this list of studies later, you might want to create a group in EndNote, you can do this by clicking "Groups" and then "Create Group". You can then move all your studies from "Imported References" to your new group by clicking on the top study, clicking "Shift" and clicking the bottom study. You can then drag them to that group.
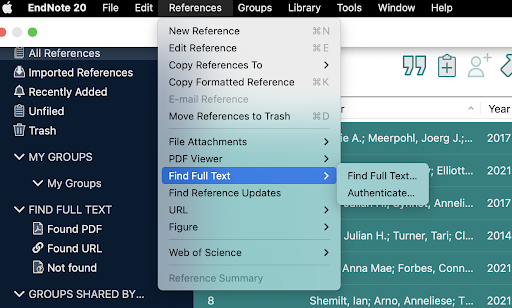
Step 6: Now you can find the PDFs and attach them to the corresponding study. This can be done manually or by using the automated find full text feature in EndNote. To use the automated feature, highlight all the studies by clicking on the top study, clicking "Shift" and clicking the bottom study. Then, under the References Menu, select "Find Full Text".
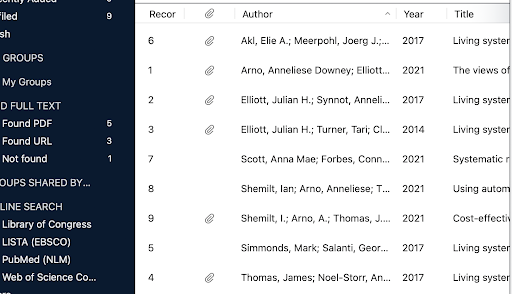
Step 7: EndNote will then try to find as many PDFs as possible.
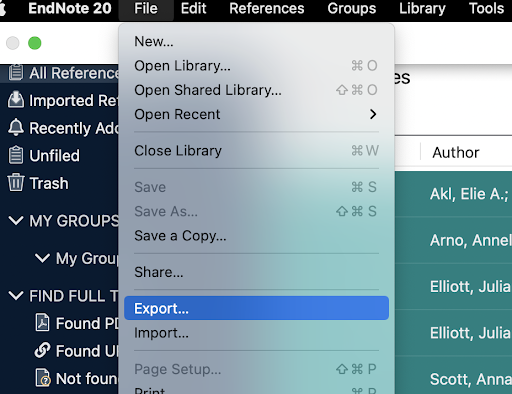
Step 8: Once you have attached the articles to the studies in EndNote, highlight all the studies by clicking on the top study, clicking "Shift" and clicking the bottom study. Then click "File" and then "Export".
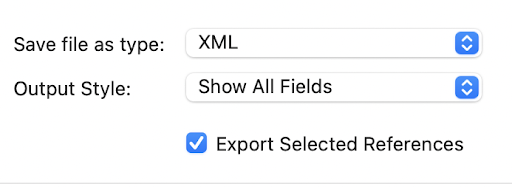
Step 9: Make sure you select the "EndNote XML" format and select "Show All Fields" when exporting.
Step 10: Name the file something you will remember and make a note of the location, because you will need to find it when uploading the XML into Covidence.

Step 11: If you open your documents you will see that the XML file has been downloaded (in this example, "Upload test EndNote Library.xml"). Your EndNote Library folder should be saved on your desktop, it will be named the same as your Library and end in .Data (in this example, "Upload test EndNote Library. Data"). Within your library folder you should also see a "PDF" folder, all the PDFs you have found will be downloaded into the "PDF" folder. There is no need to rename the pdf files or manipulate your folder structure after exporting out of your reference manager and, in fact this will cause issues when uploading to Covidence.

Step 12: Now you are ready to upload the XML file into Covidence at step 3 on the bulk upload page.
Step 13: Now you are ready to upload the “PDF” folder in step 4 on the bulk upload page.
For a detailed walkthrough on how to bulk upload PDFs, you can view this video.
Support
If you have any issues with using the tool, please check out our FAQs. If your query is not covered, please write to support@covidence.org and one of our experts will be happy to help you. When you write in, please include as much of the following information as possible:
- The name of your review
- Your browser name and version
- A screenshot of your reference manager account
- A screen recording of the steps you are taking