Accessing your data extraction template
From the Review Summary screen, you can start extraction by selecting the number of studies you want to extract or by clicking the Continue button.
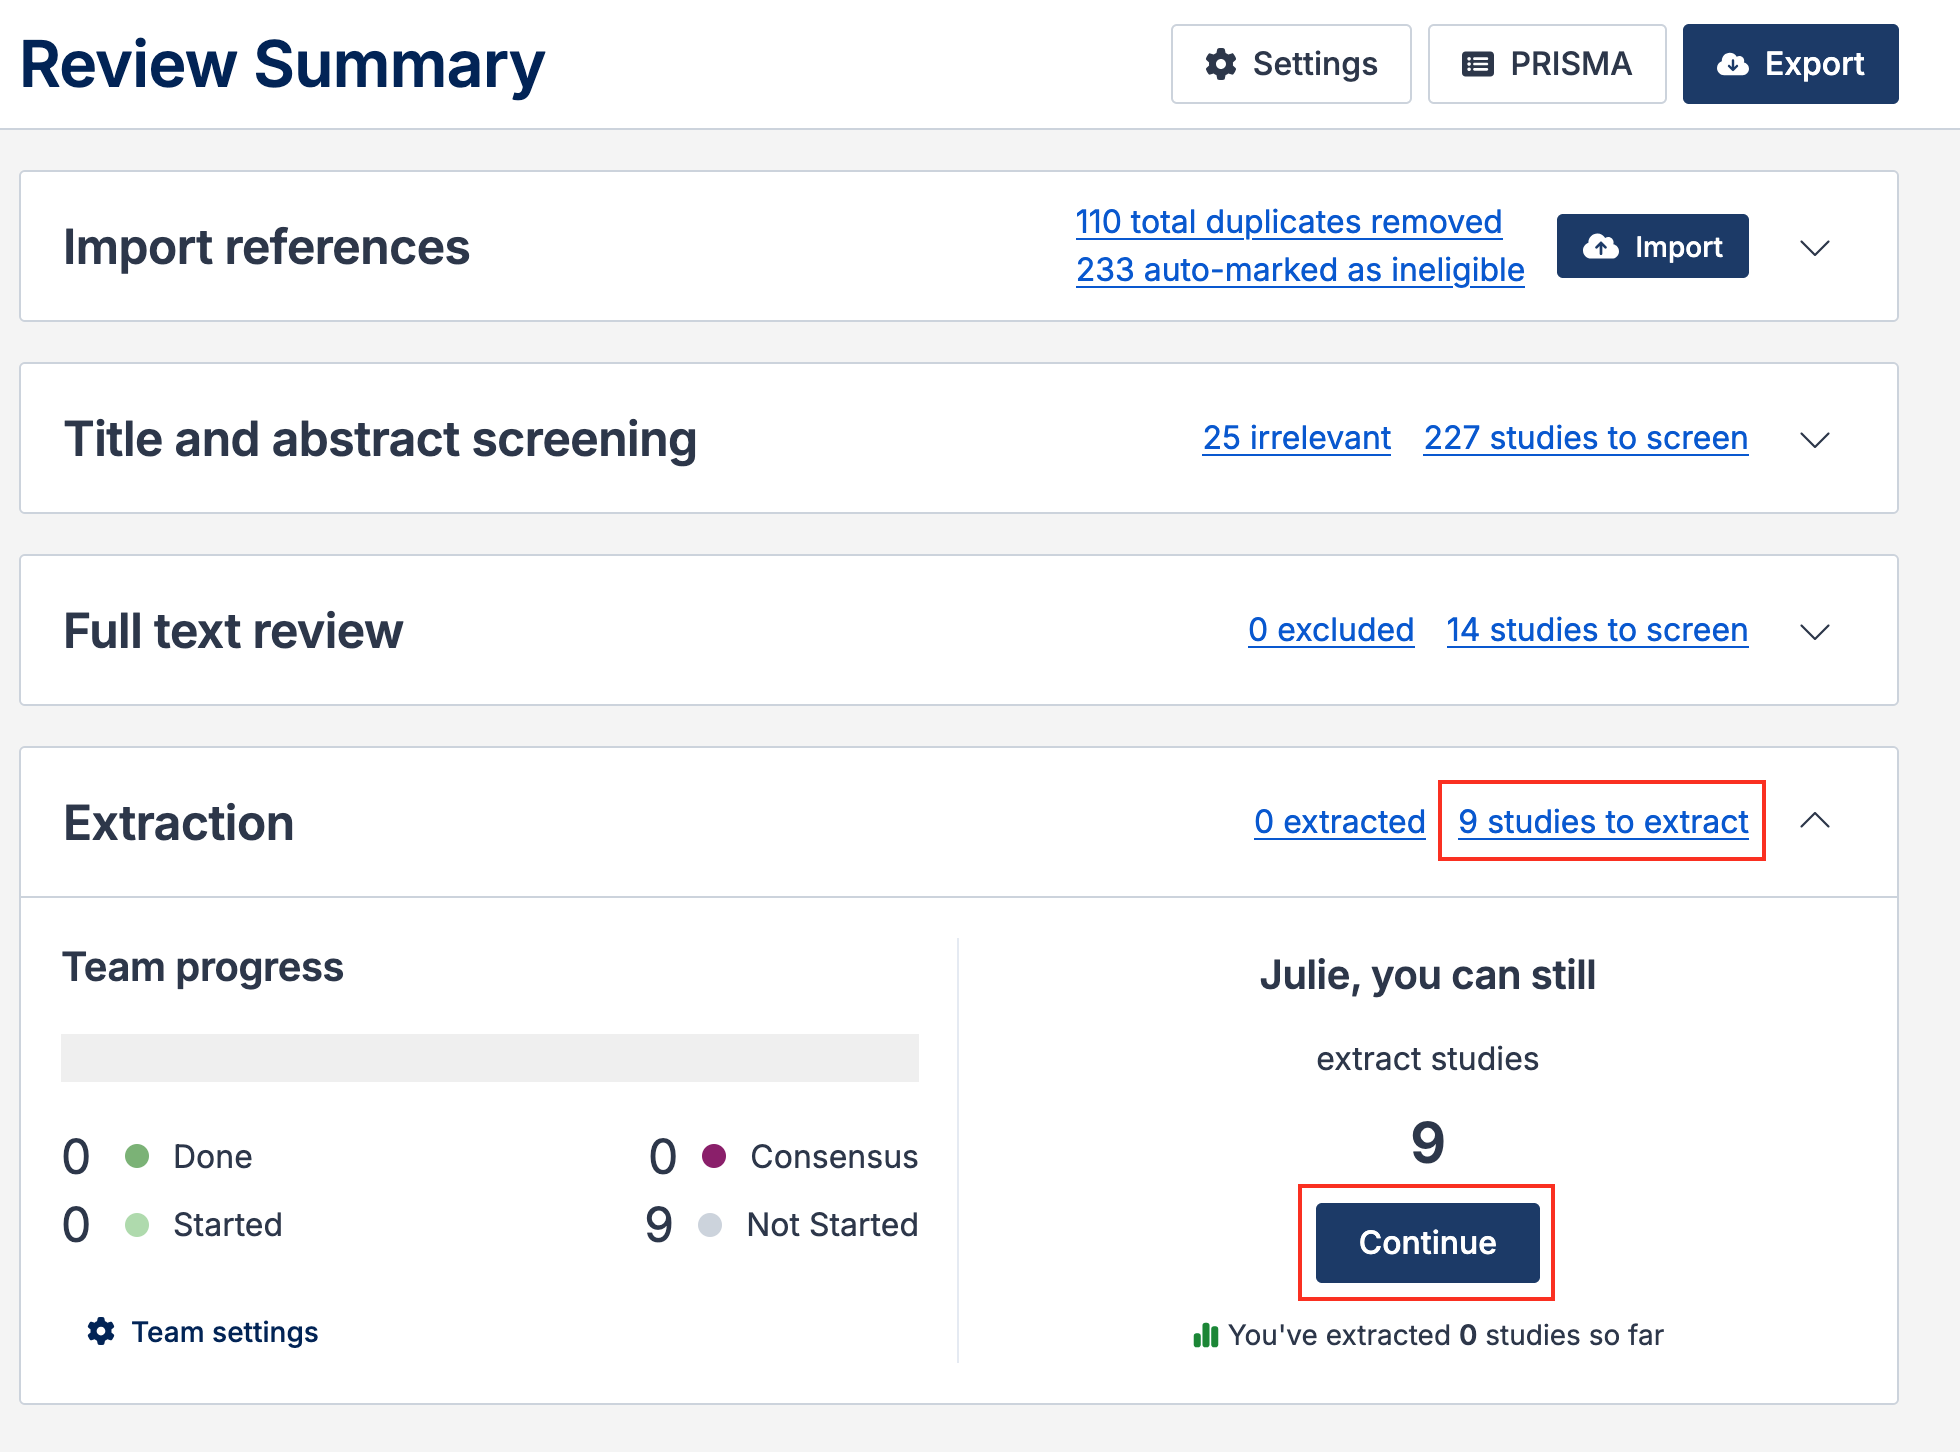
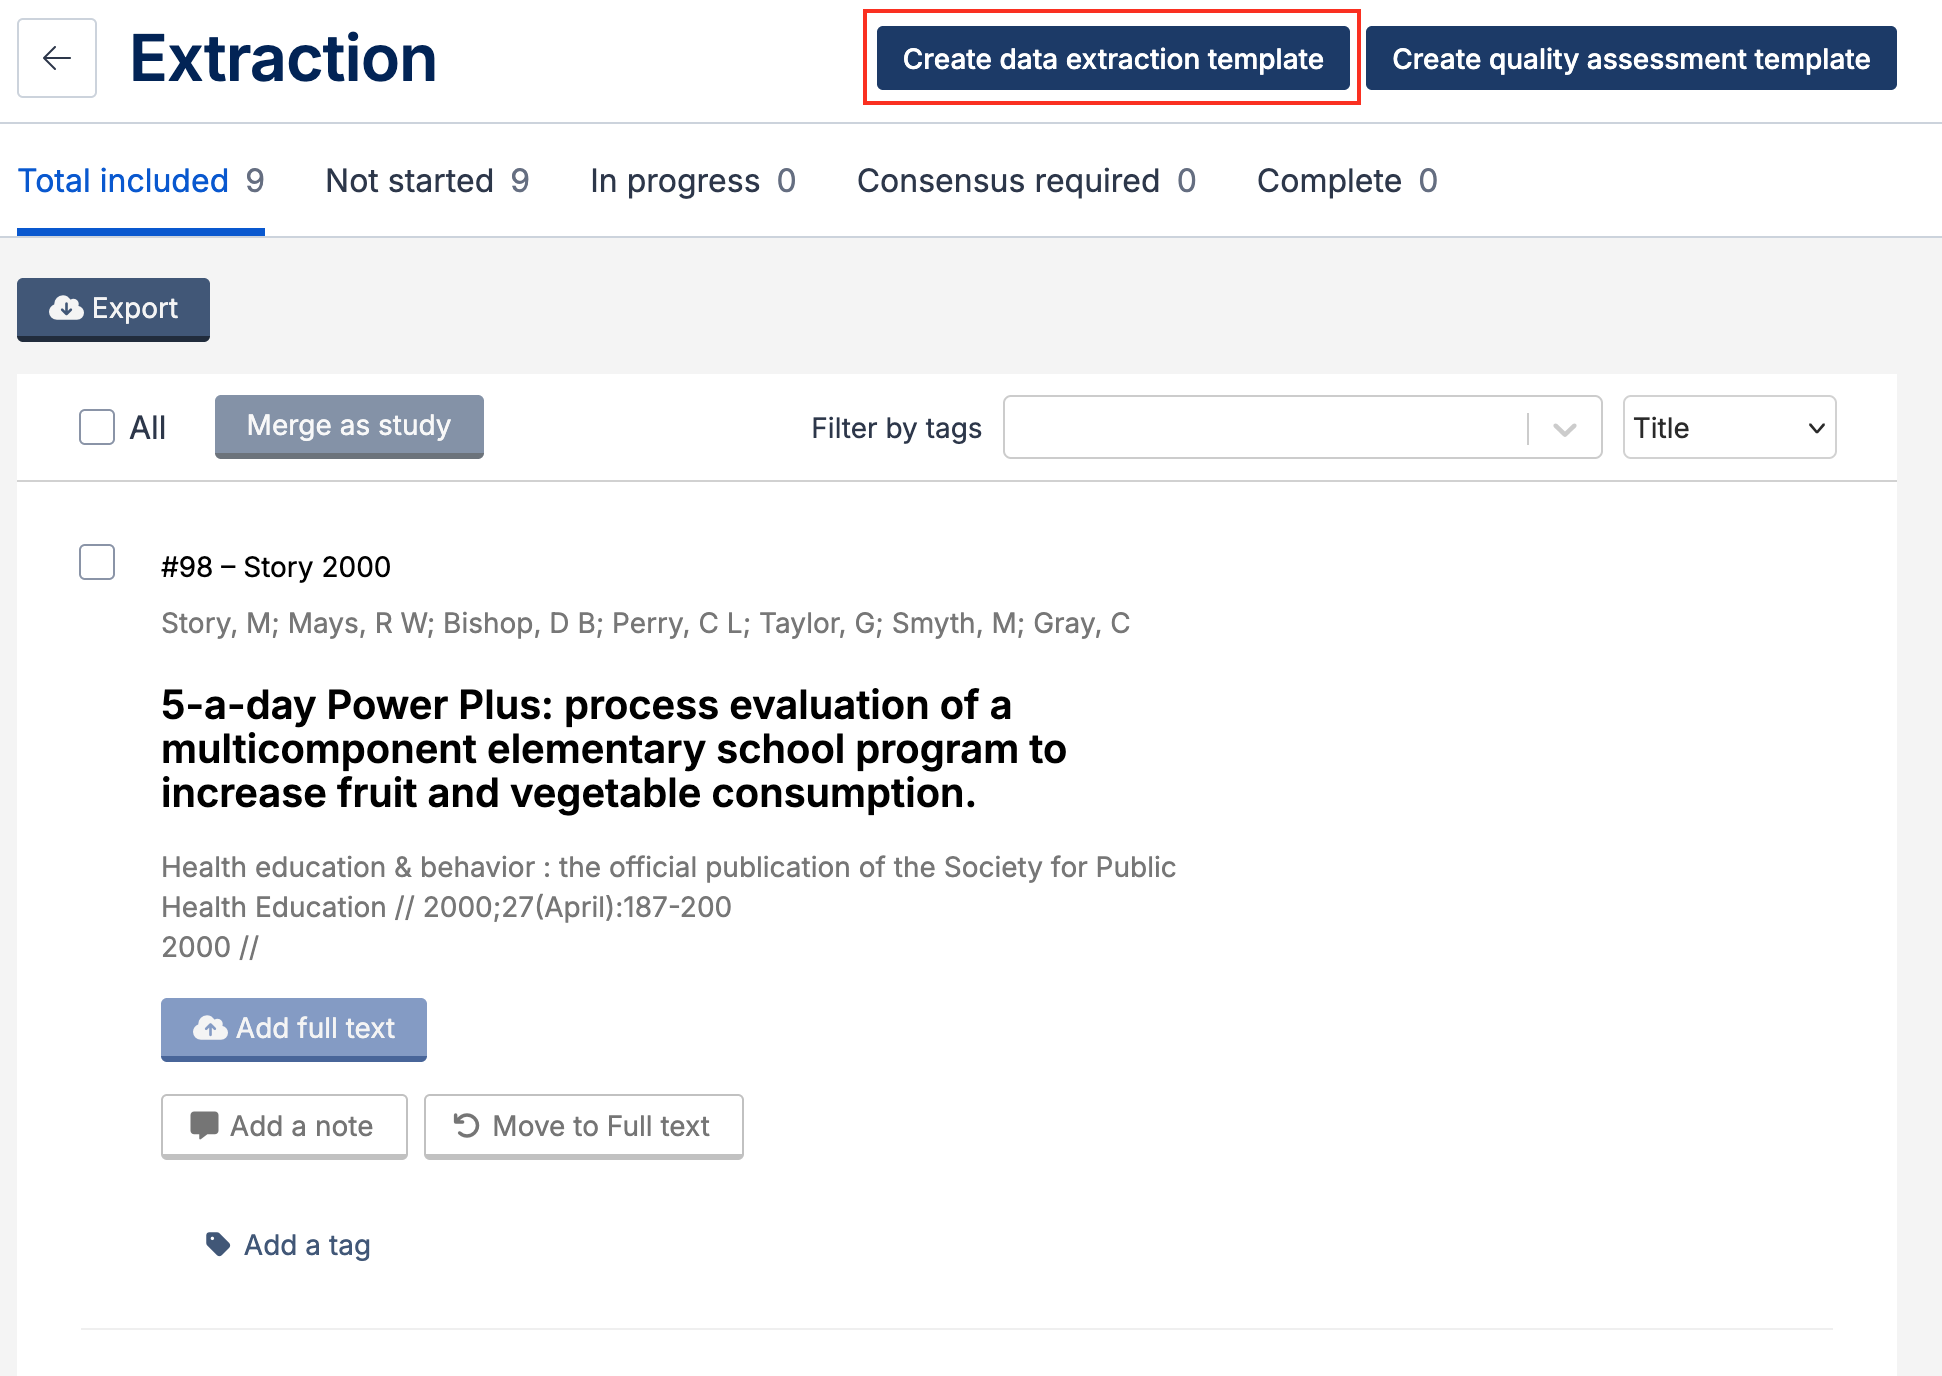
To open your template, click Create data extraction template, located above the list of included studies.
Layout
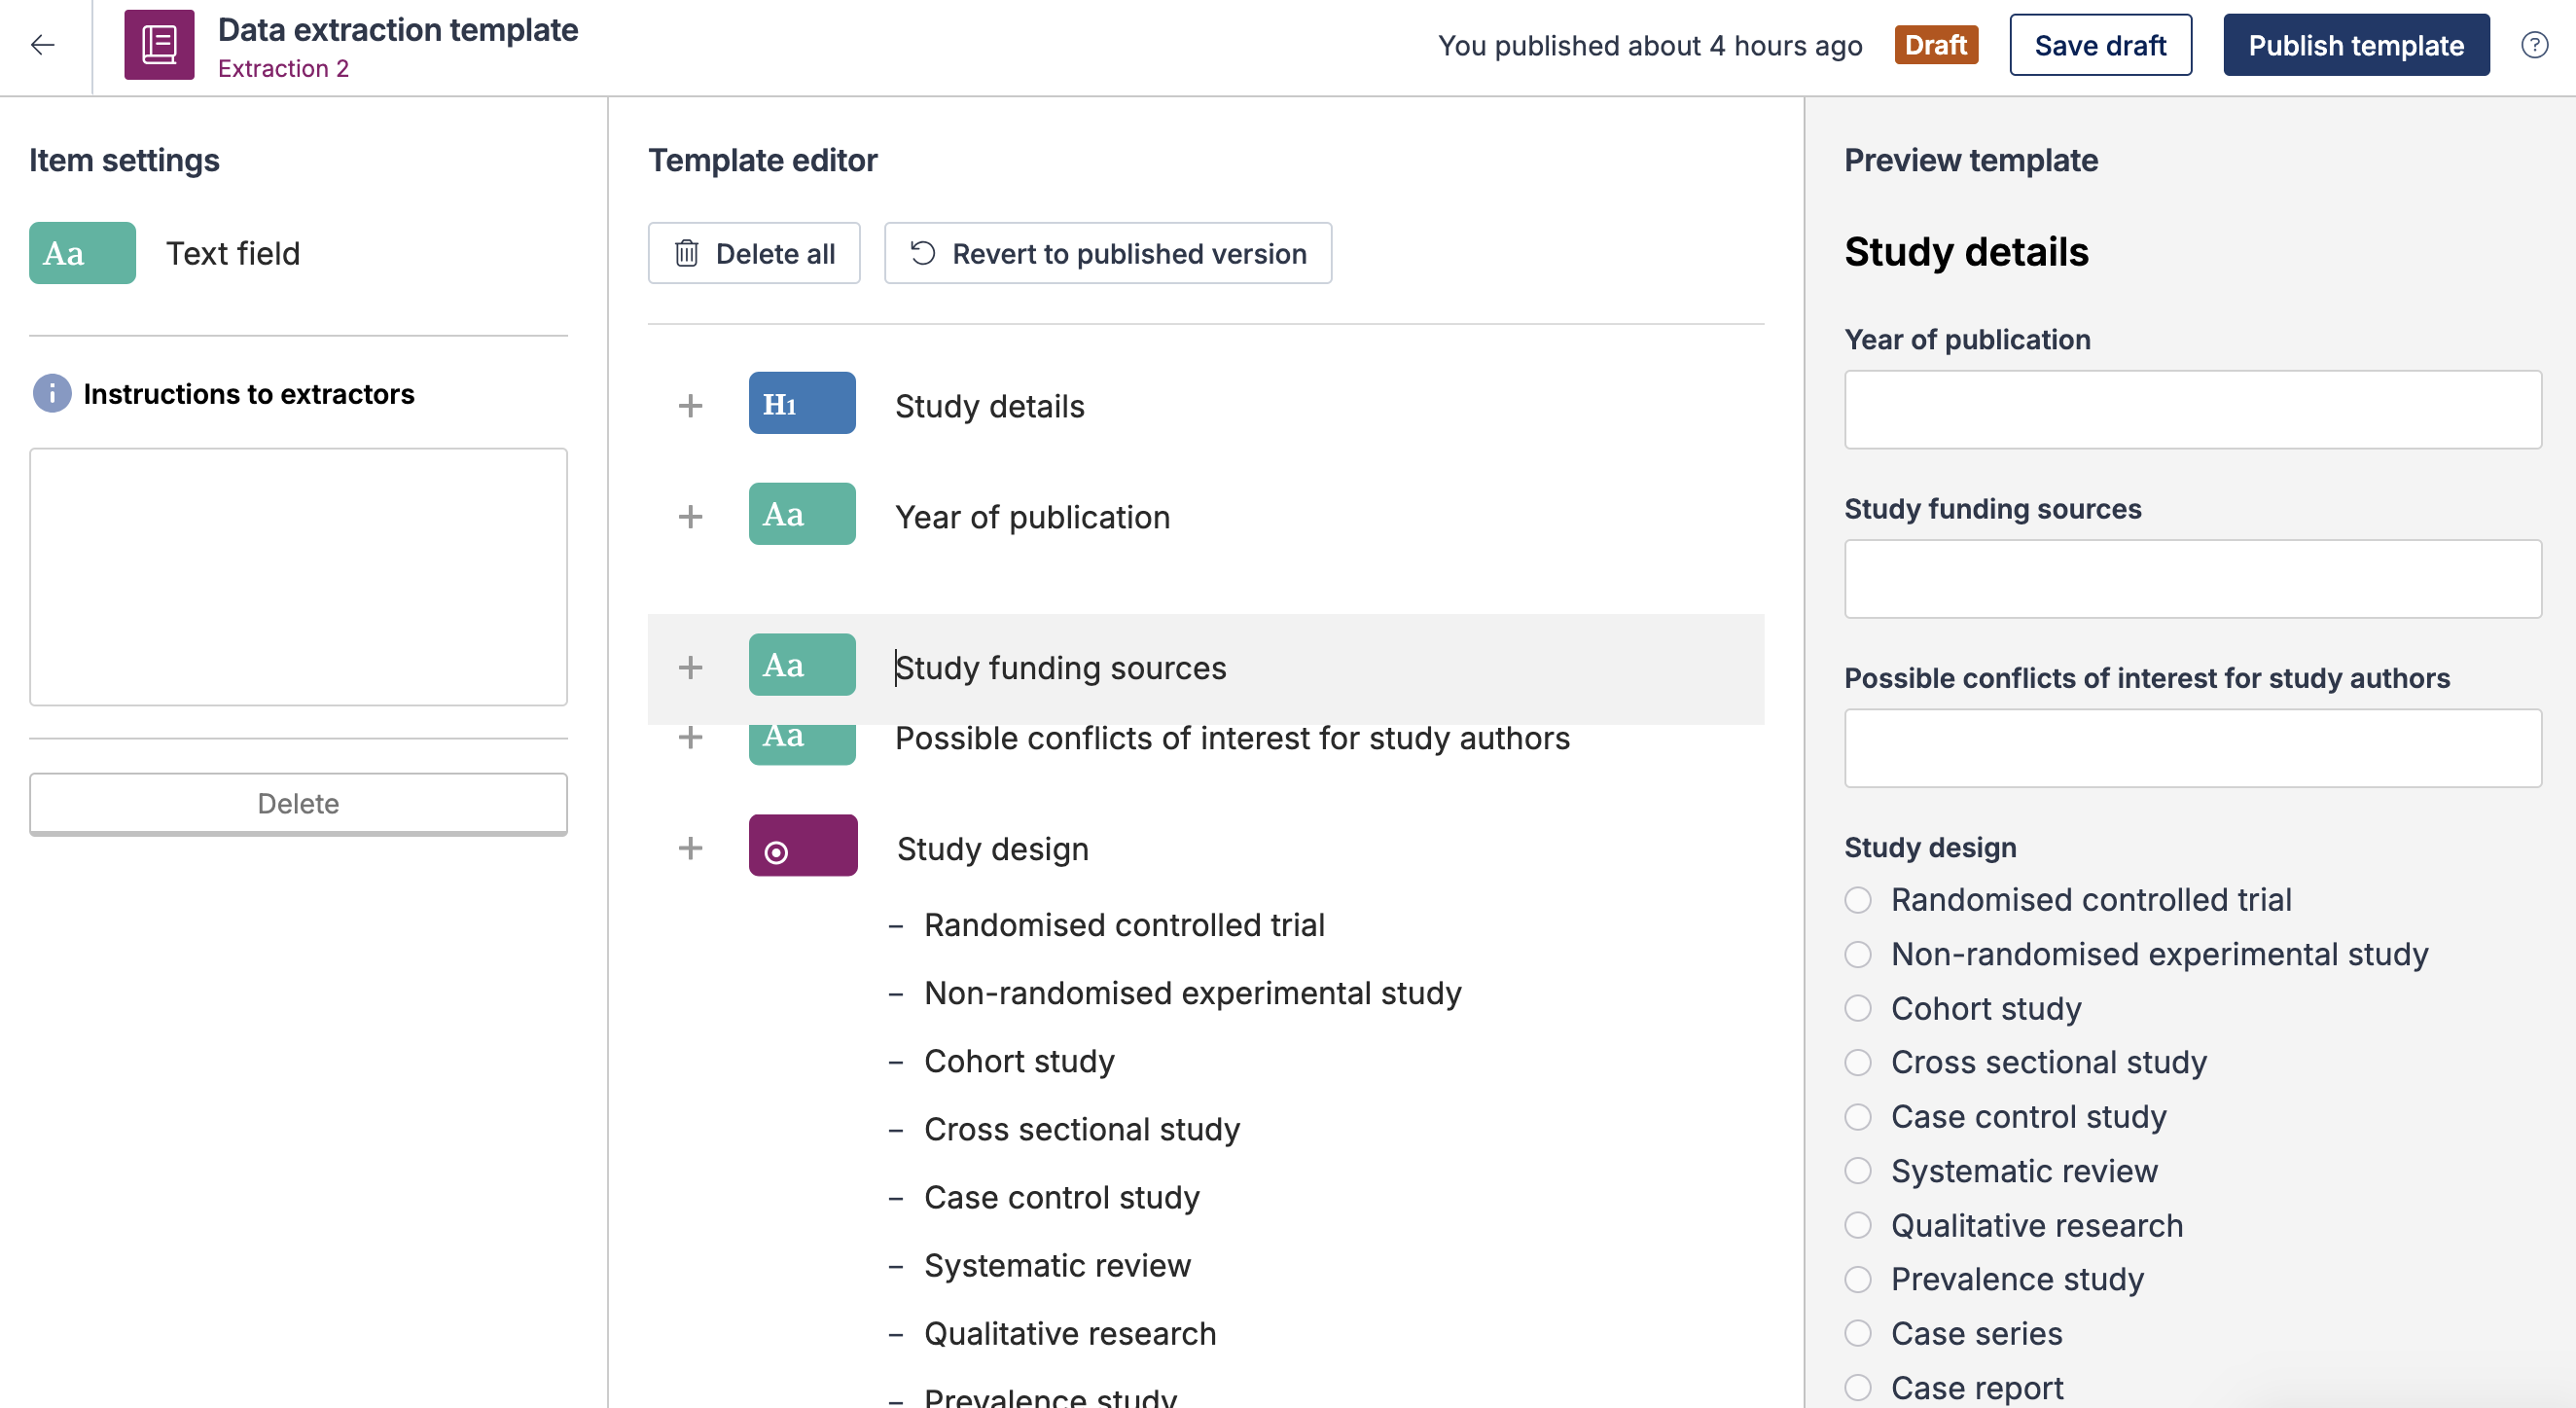
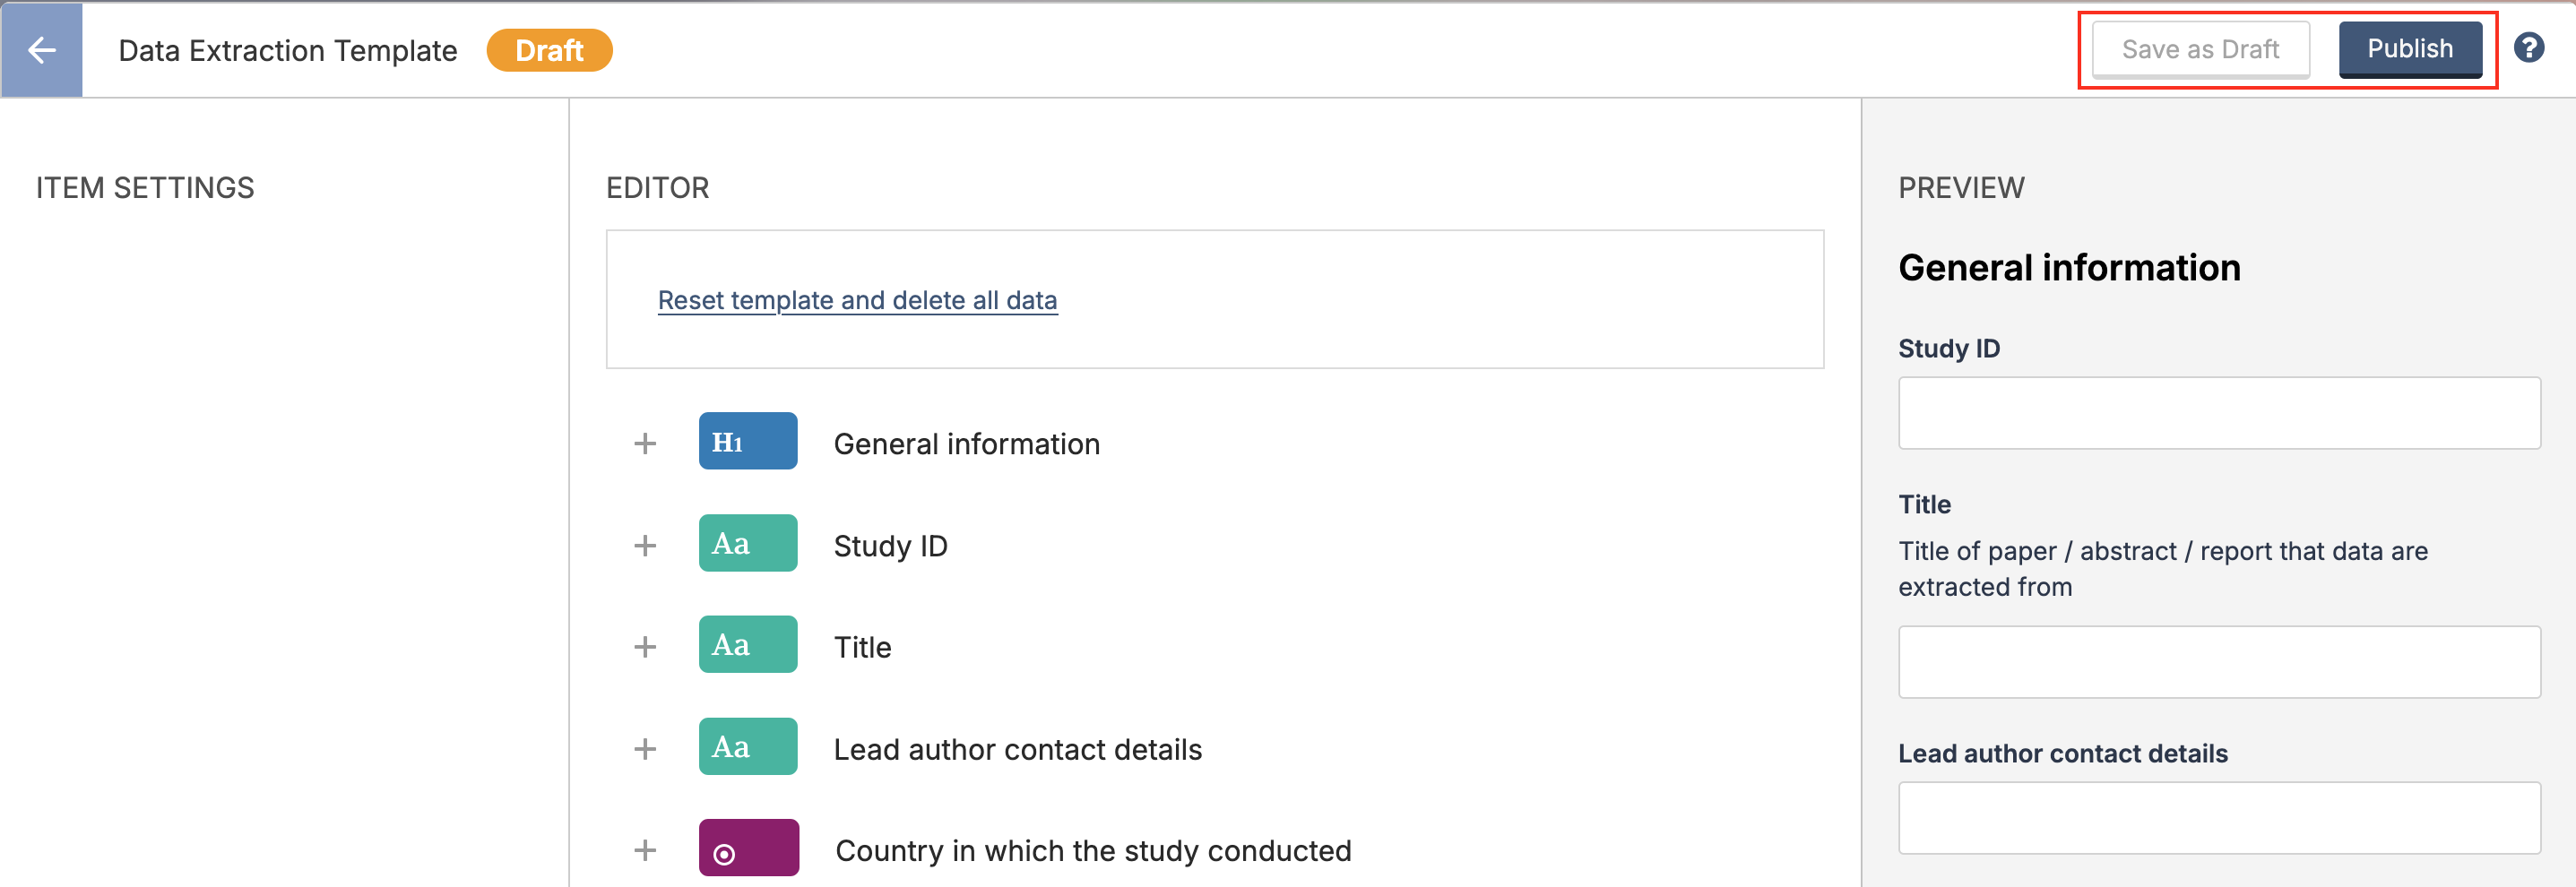
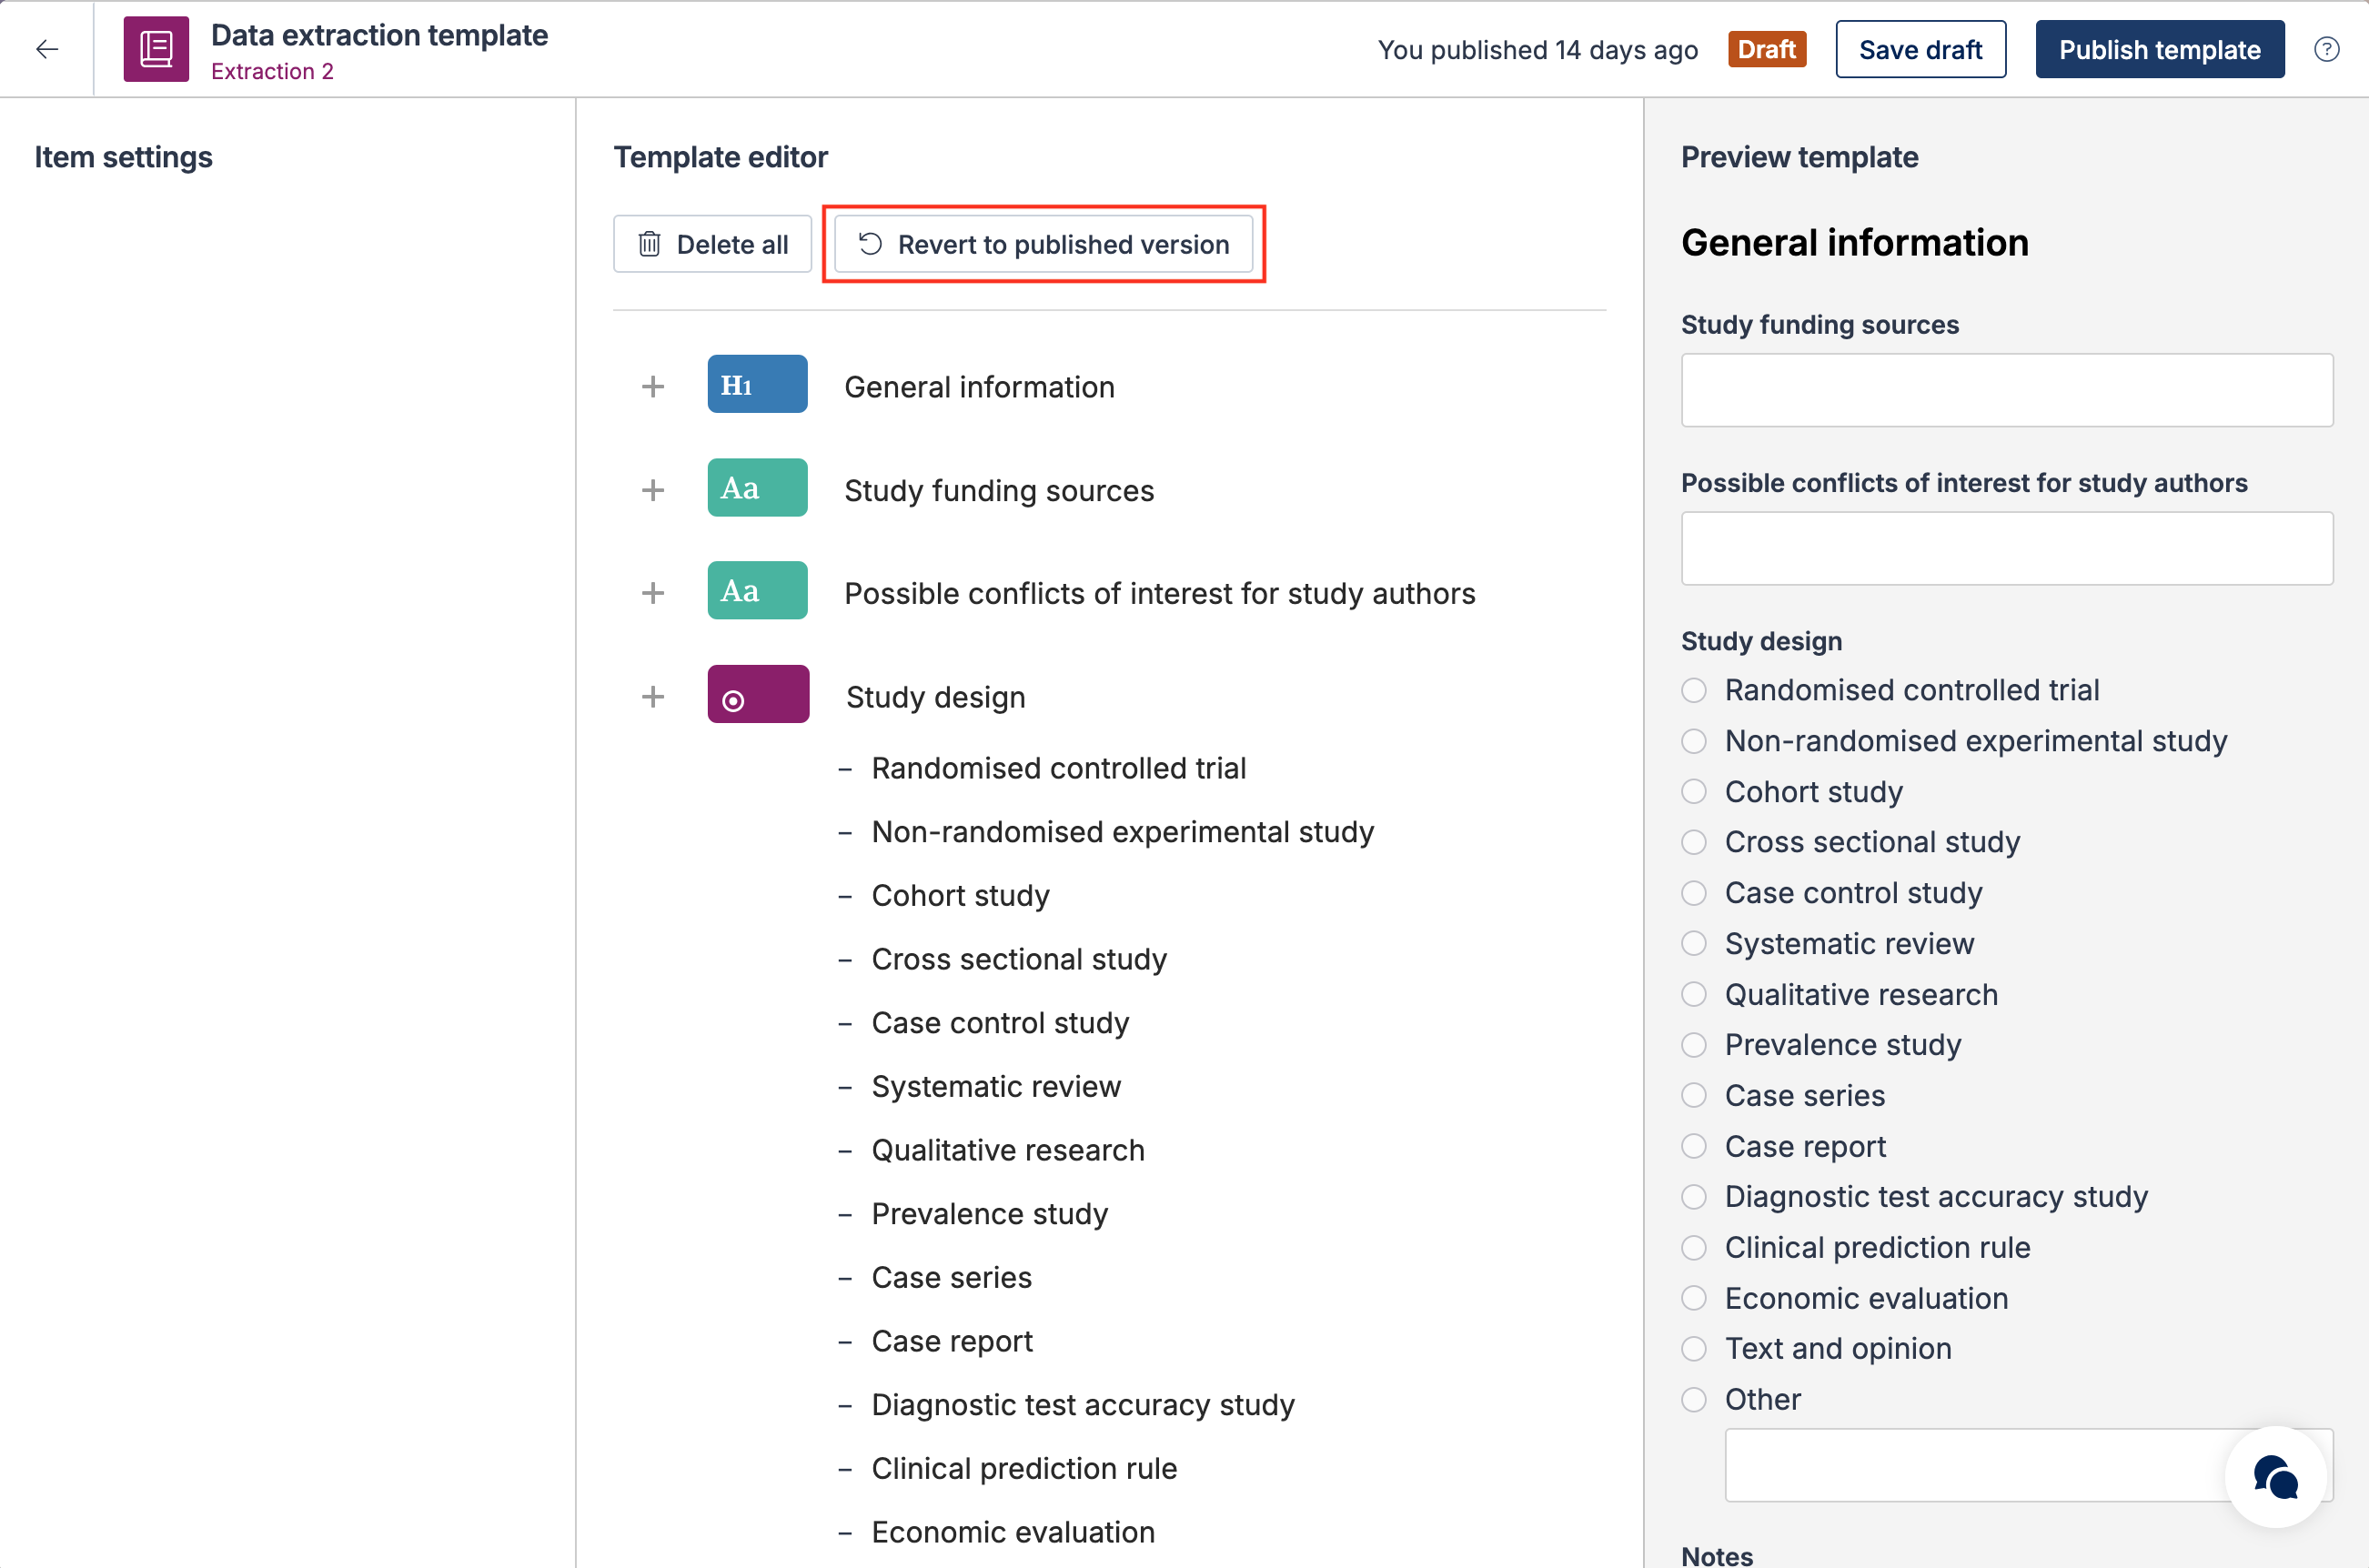
The Template editor is in the centre, where you can build and edit your template.
On the right, the Preview template shows how your extraction form will appear. Any changes you make in the editor are reflected here instantly.
On the left, Item settings let you adjust the details of each item. Select an item in the editor to update its settings, such as instructions for extractors.
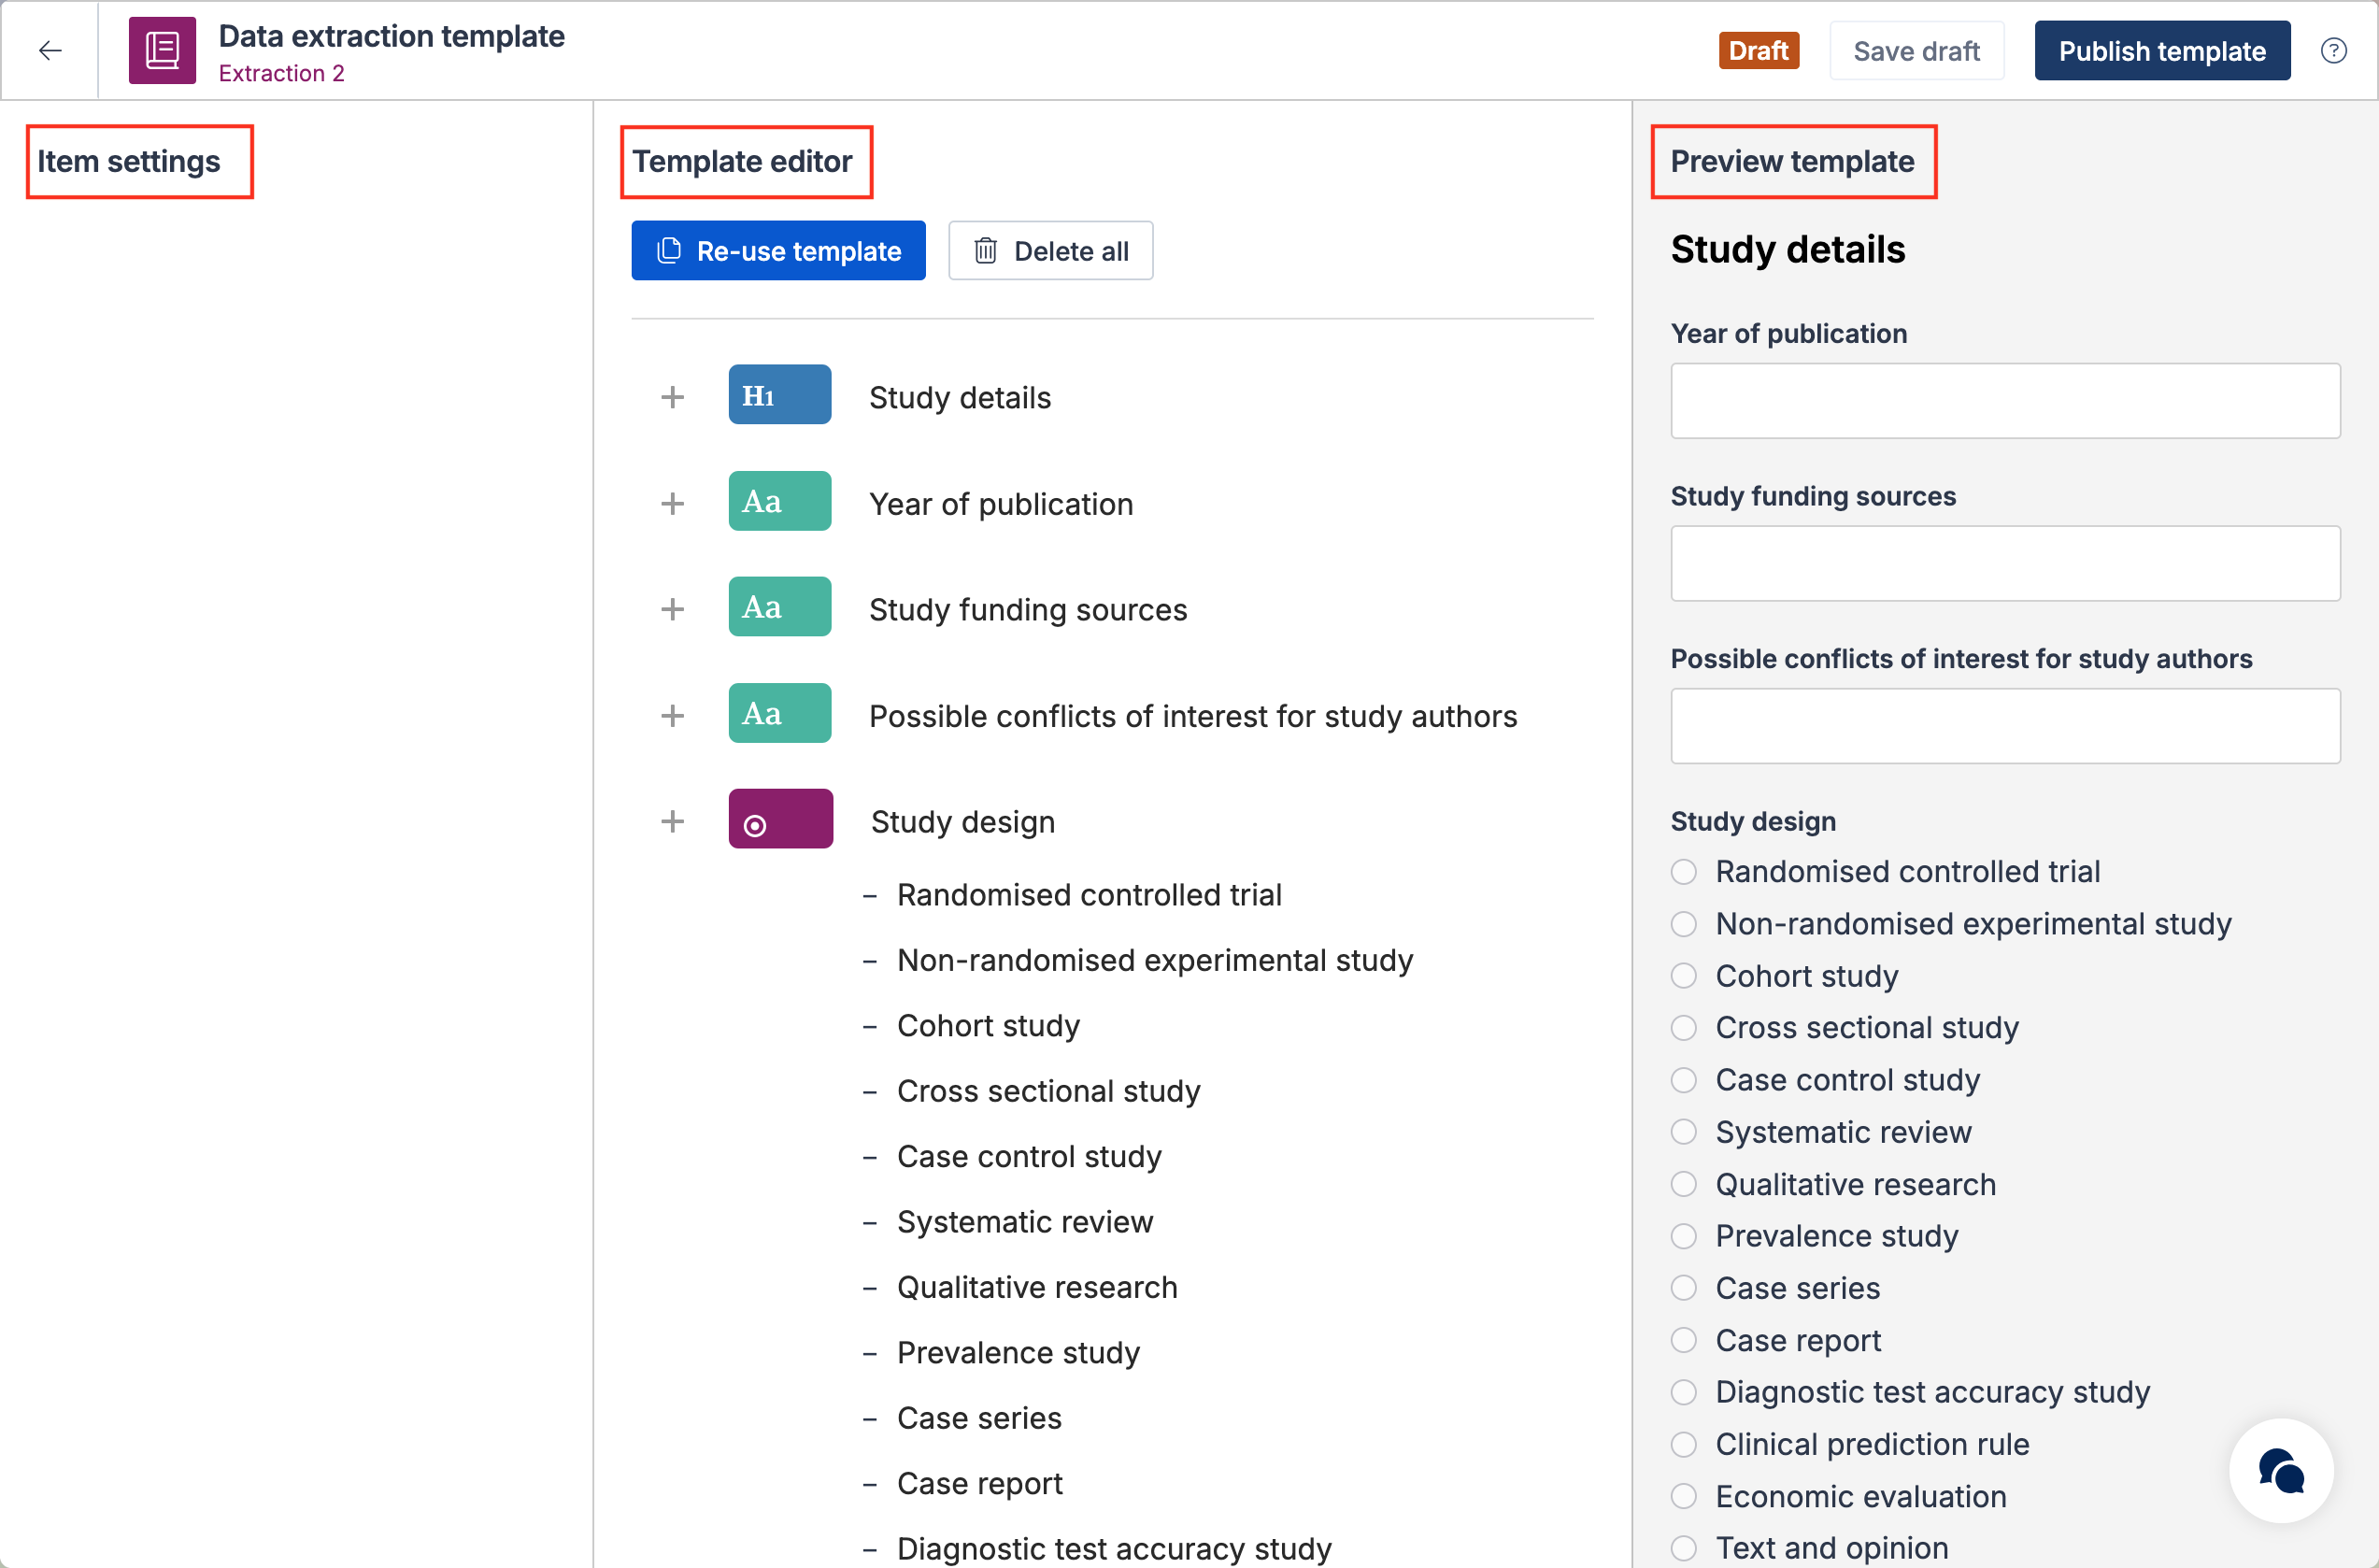
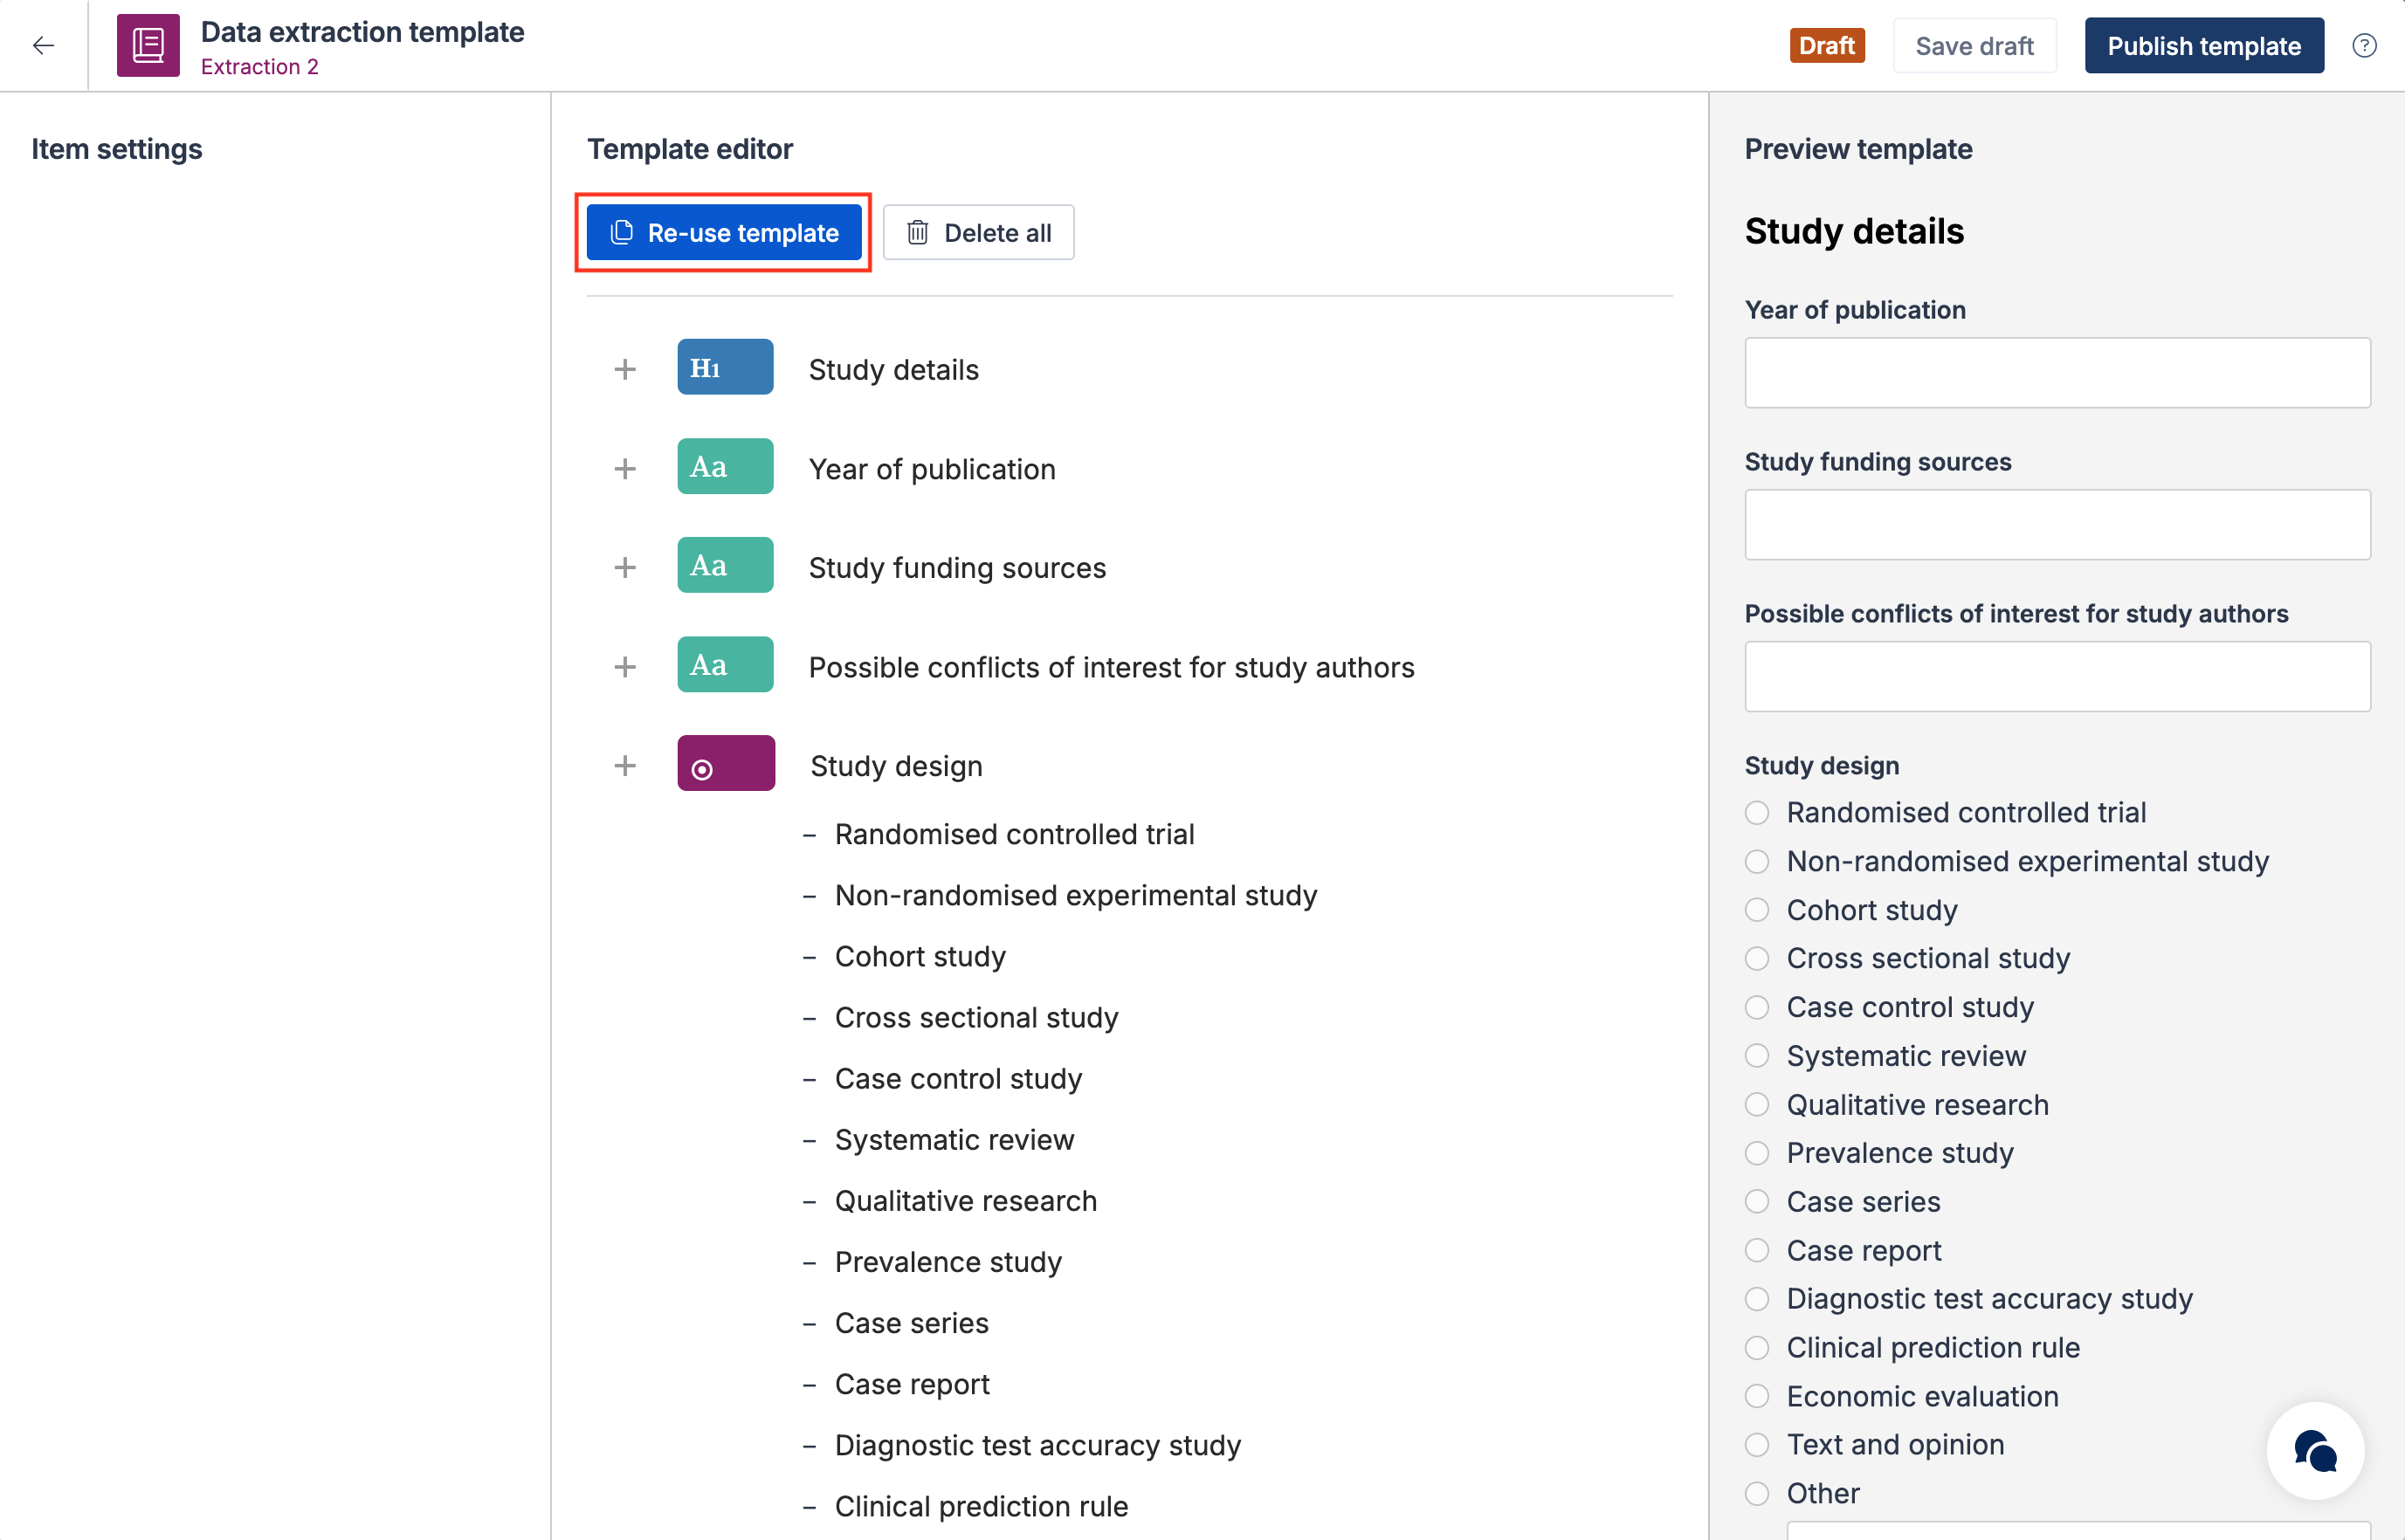
Example template
In the Template editor, you’ll see an example template to help you get started. You can edit it directly, or explore the different item types and see how they appear in the Preview template.
You can also choose to re-use a template from another review.
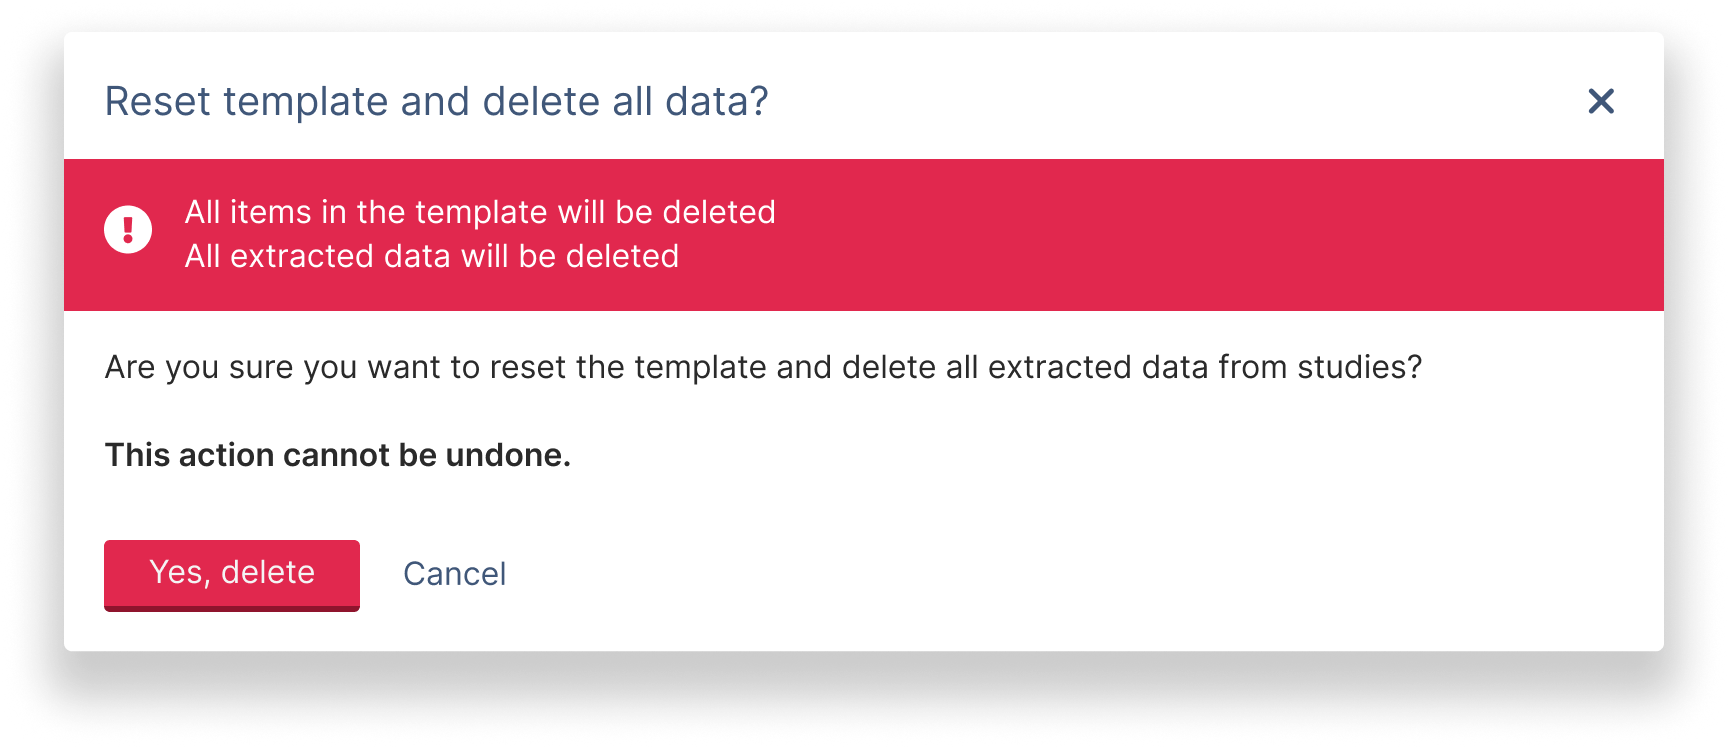
Alternatively, select Delete all to remove the example template and start from scratch.
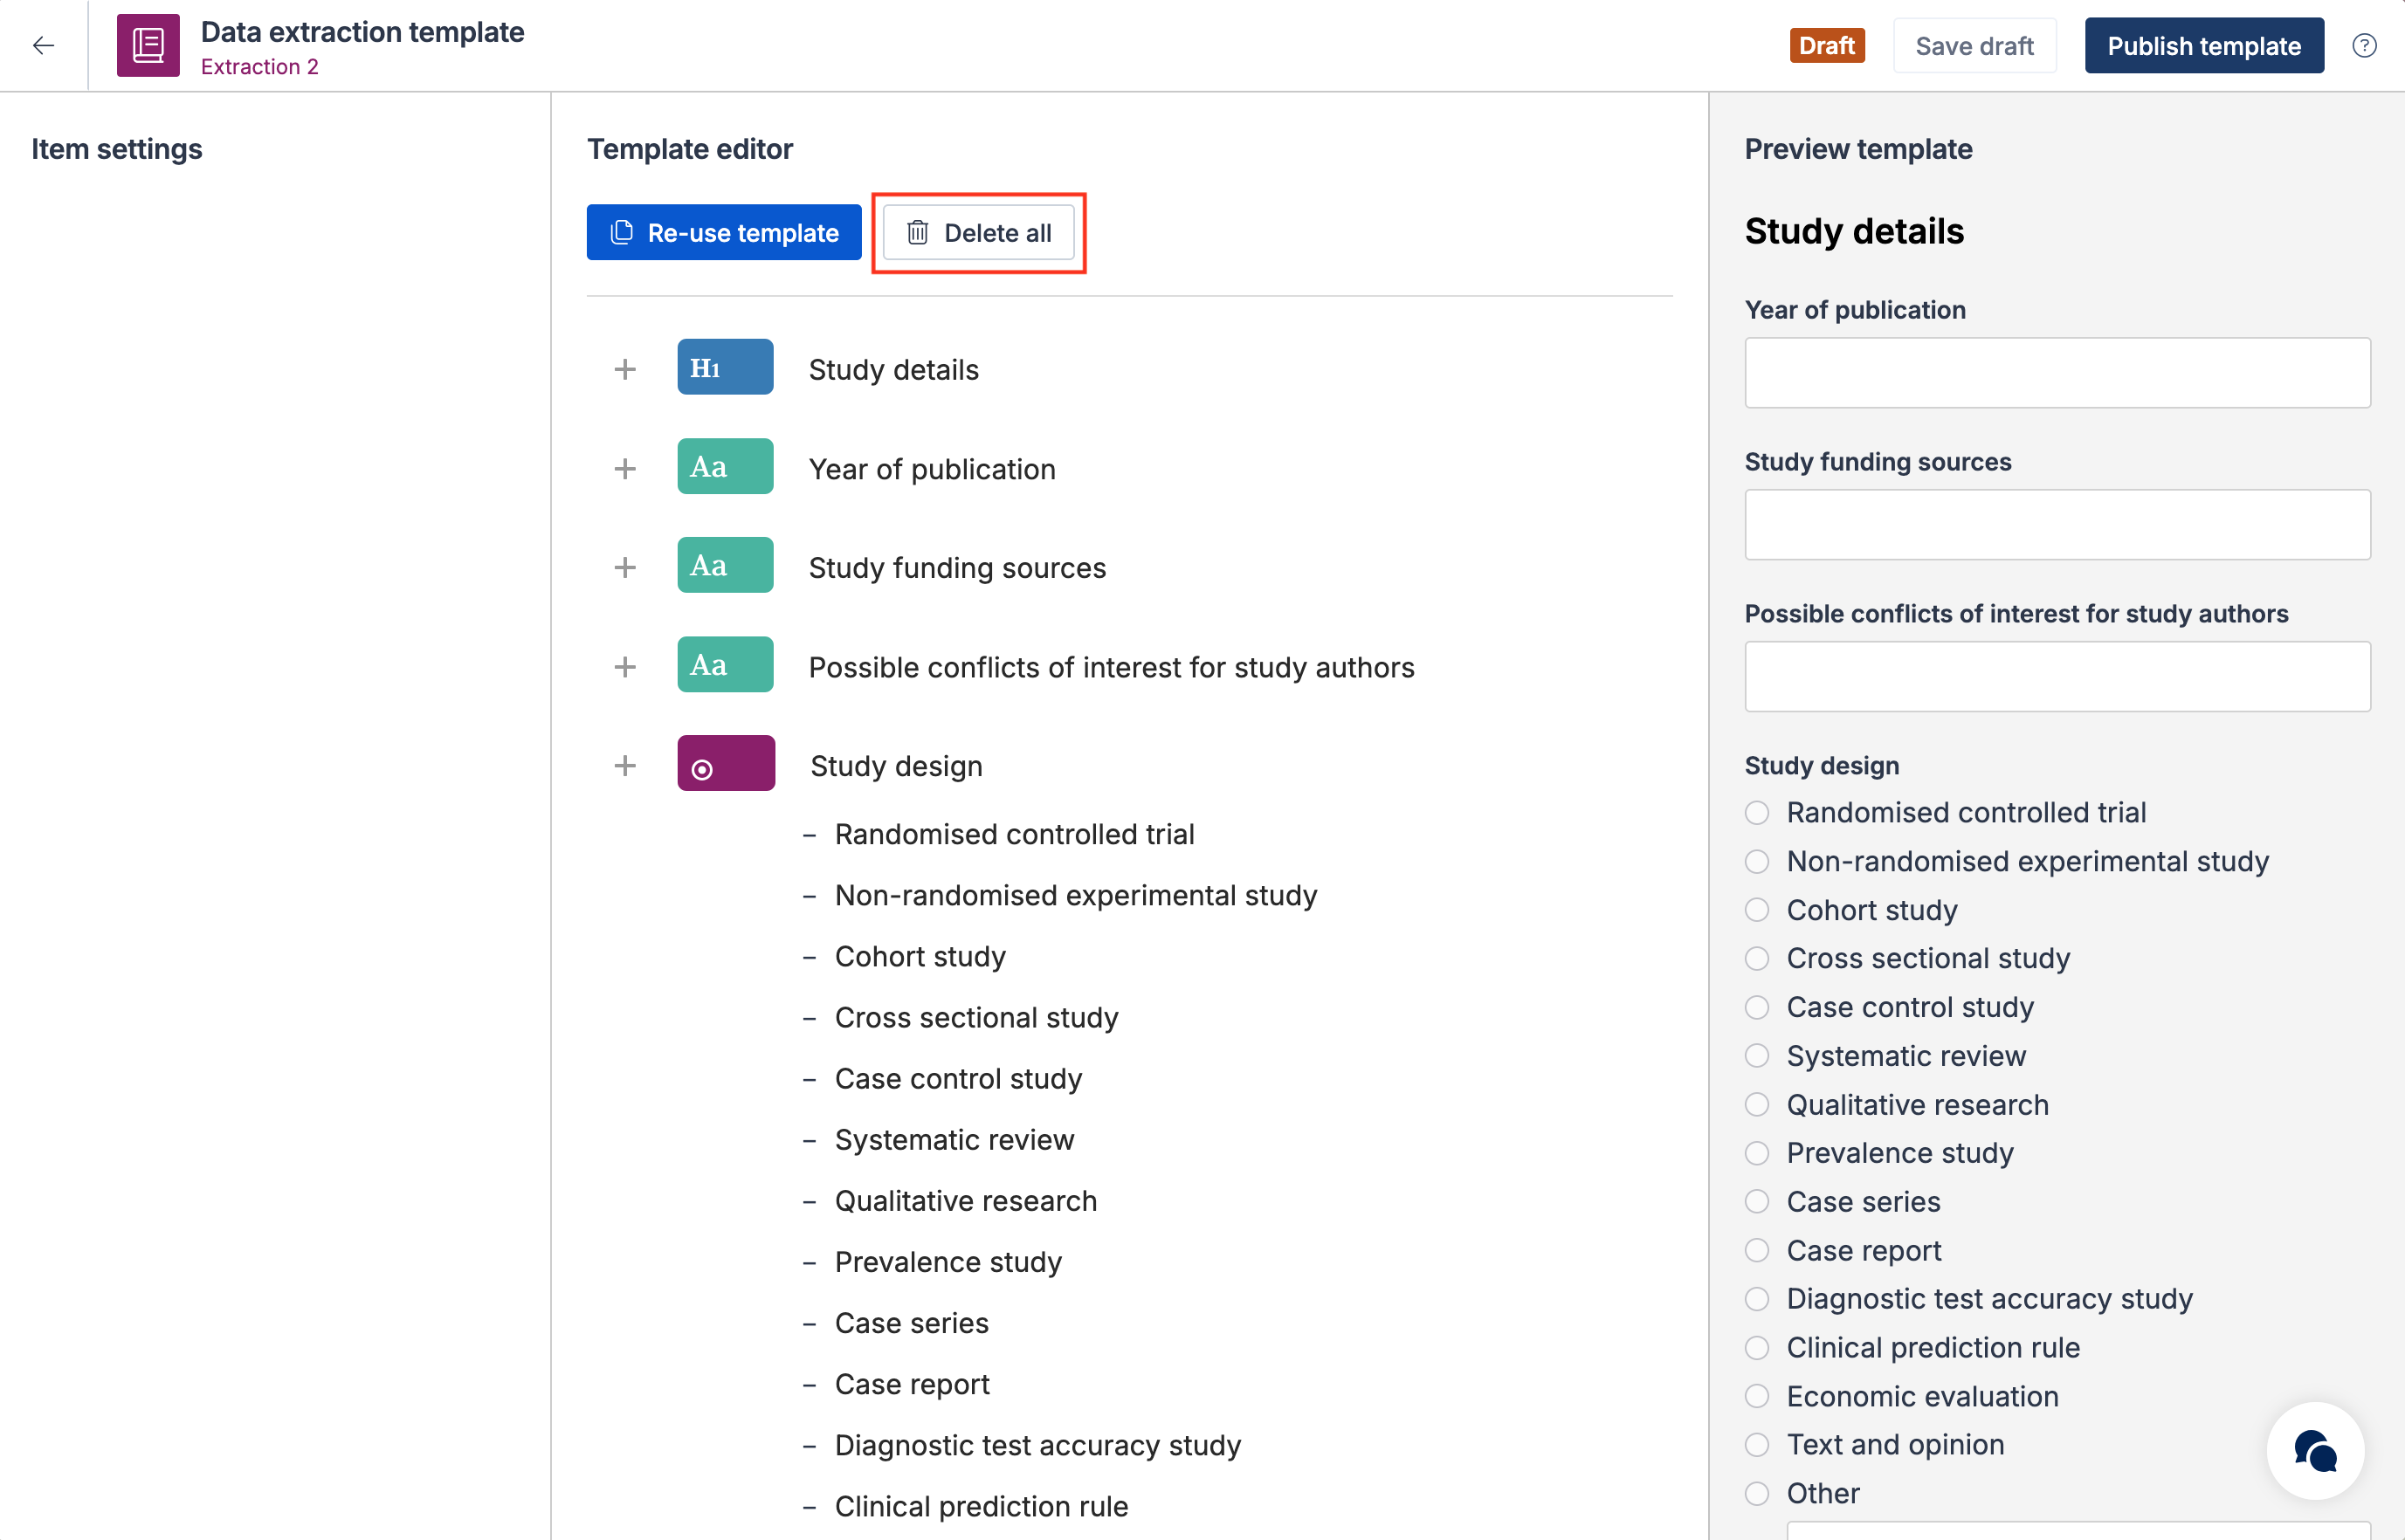
You’ll see a warning message confirming that all template items and extracted data will be deleted.
Building the data extraction template
Add new item
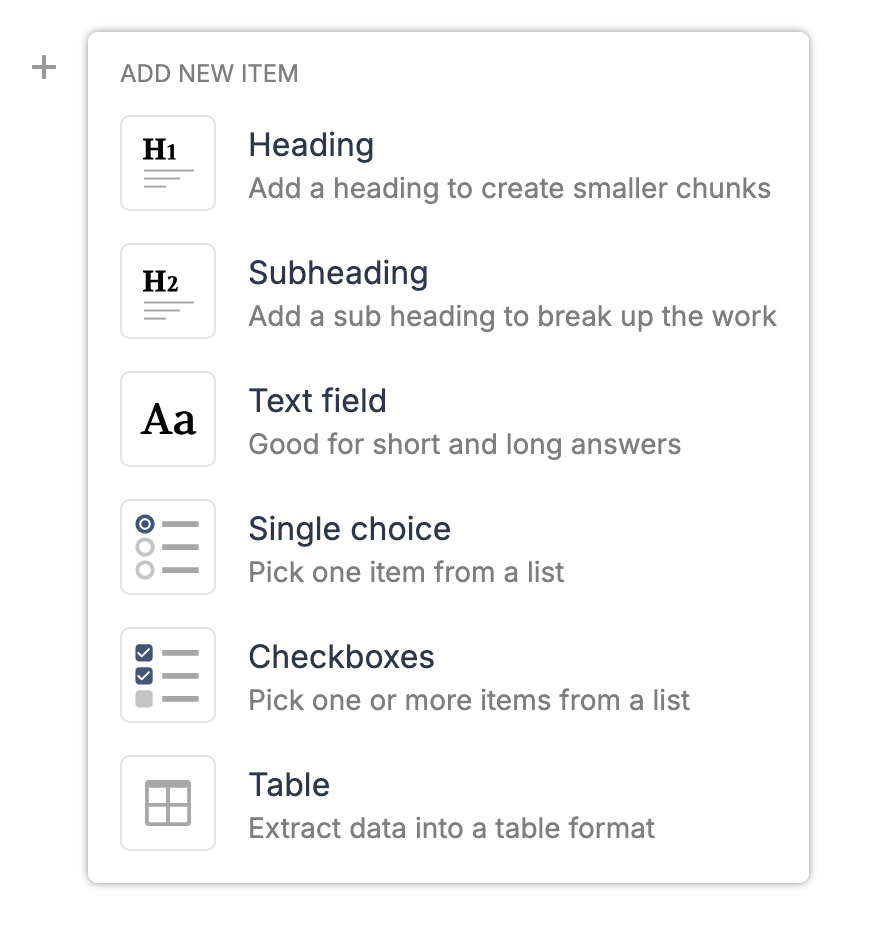
To add a new item, select the plus (+) button above where you want to insert it and choose one of the following options:
Text field - Use this to extract text or numbers. The field will automatically expand to fit the amount of text entered.
Single choice item - Use this when you have a defined list of options and want the extractor to select one.
Checkboxes - Use this when you have a defined list of options and want the extractor to select one or more.
Table - Use this to create a table for multiple data points. The default 2x2 table can be expanded, and row and column headings are customizable. We recommend following our best practices for tables in Extraction 2.
Heading or Subheading - Use these to group and separate your items for better organization.
Each item type has a distinct icon to help you quickly identify it.
Move an item
To change the position of an item in the template, click and drag the item’s icon.
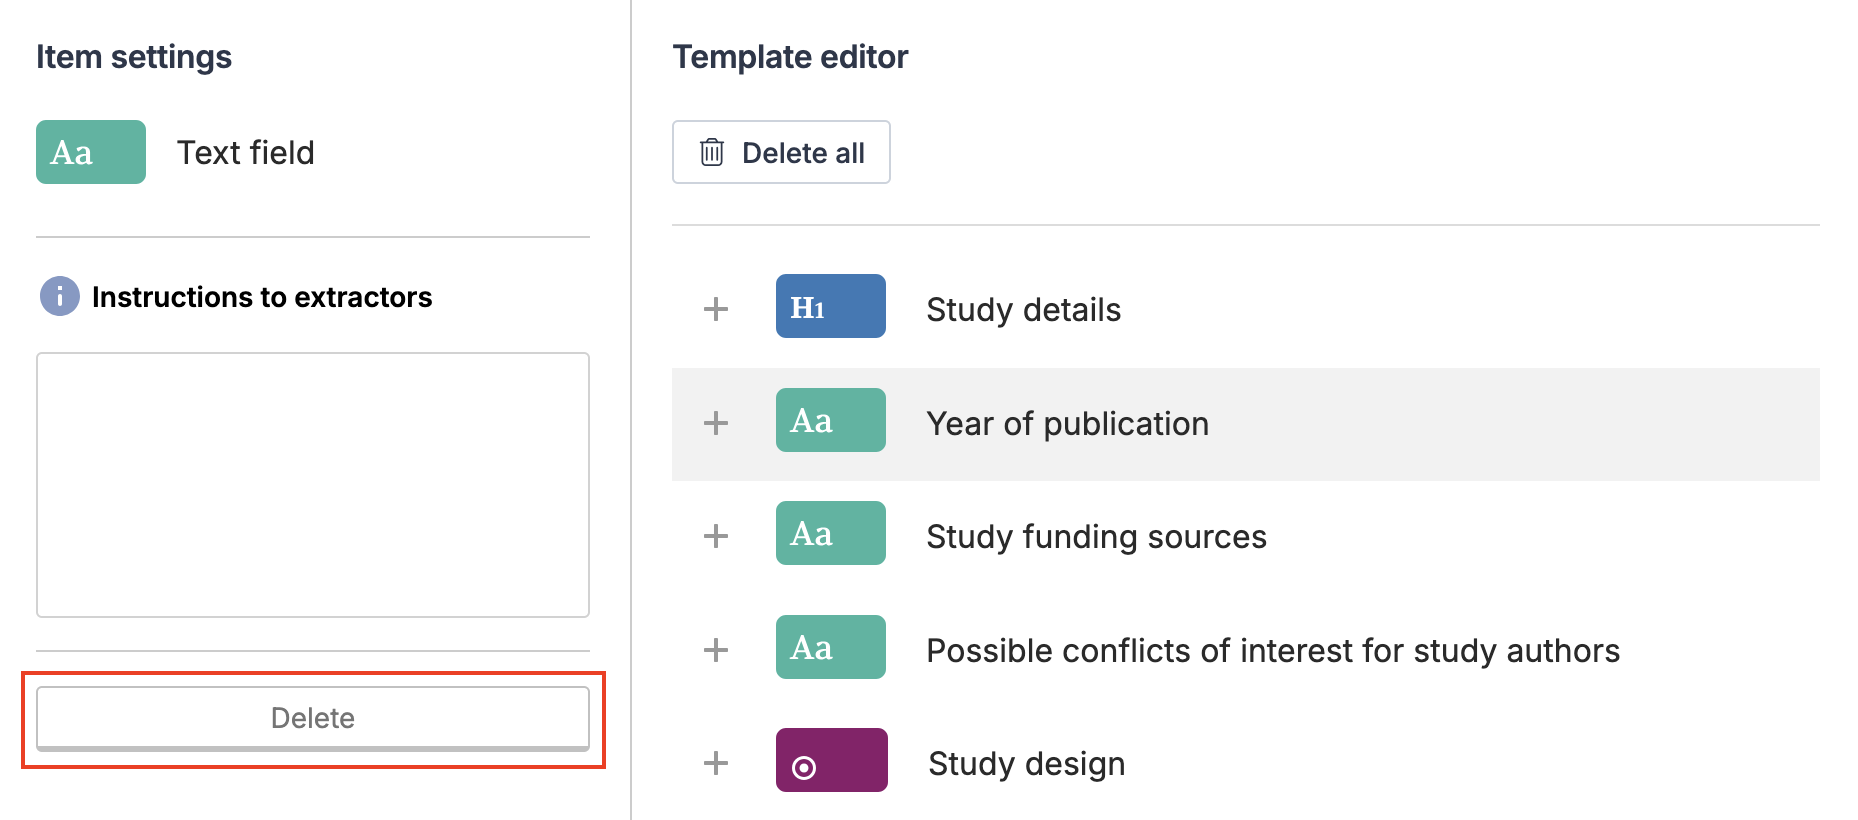
Delete an item
To delete an item, select it and then choose Delete in Item settings.
You can also remove an item by deleting its label. When the insertion point reaches the item’s icon, press BACKSPACE on a PC or DELETE on a Mac.
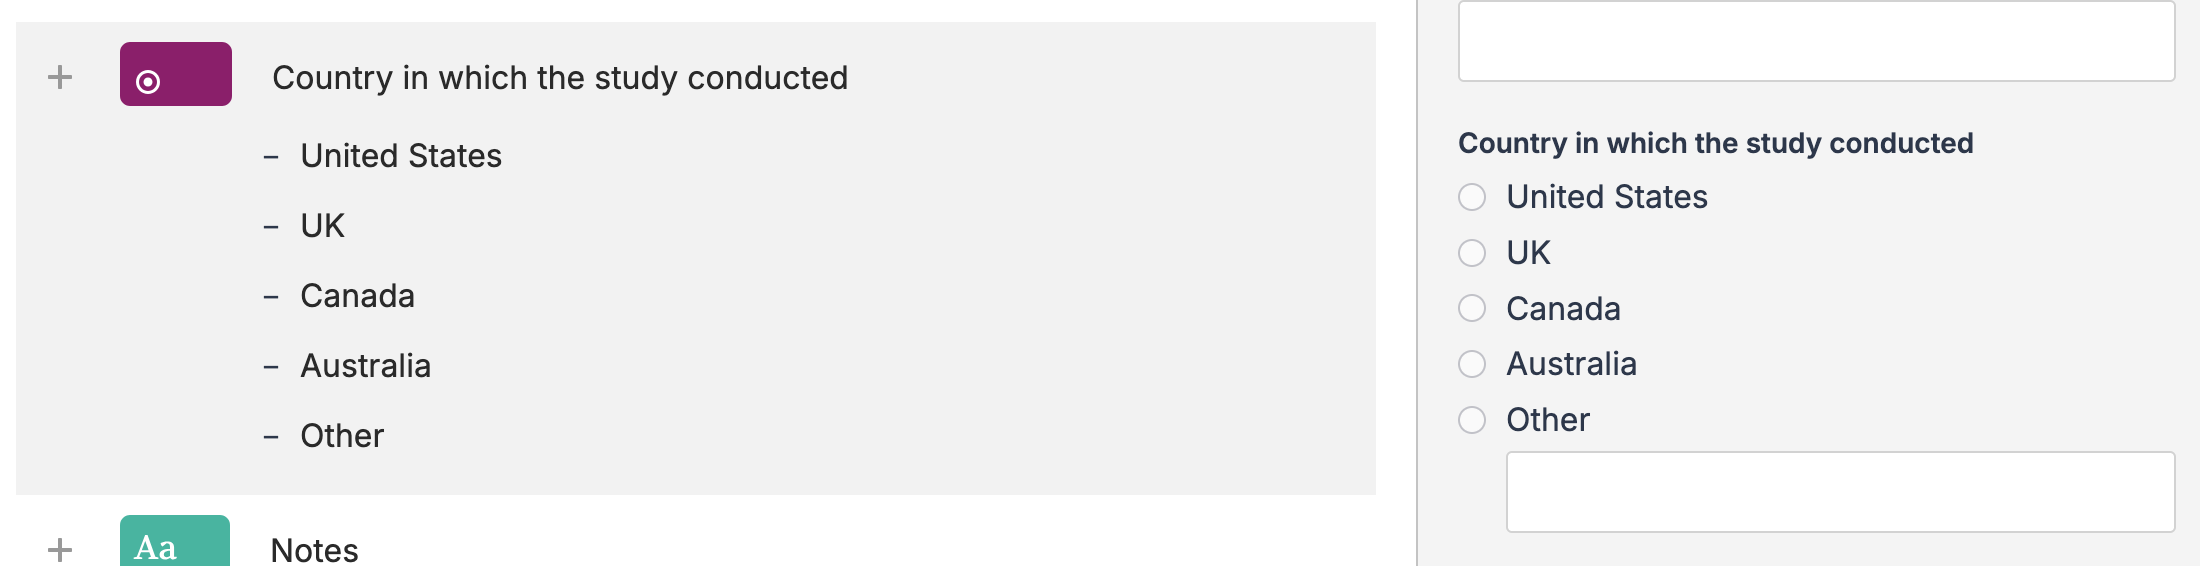
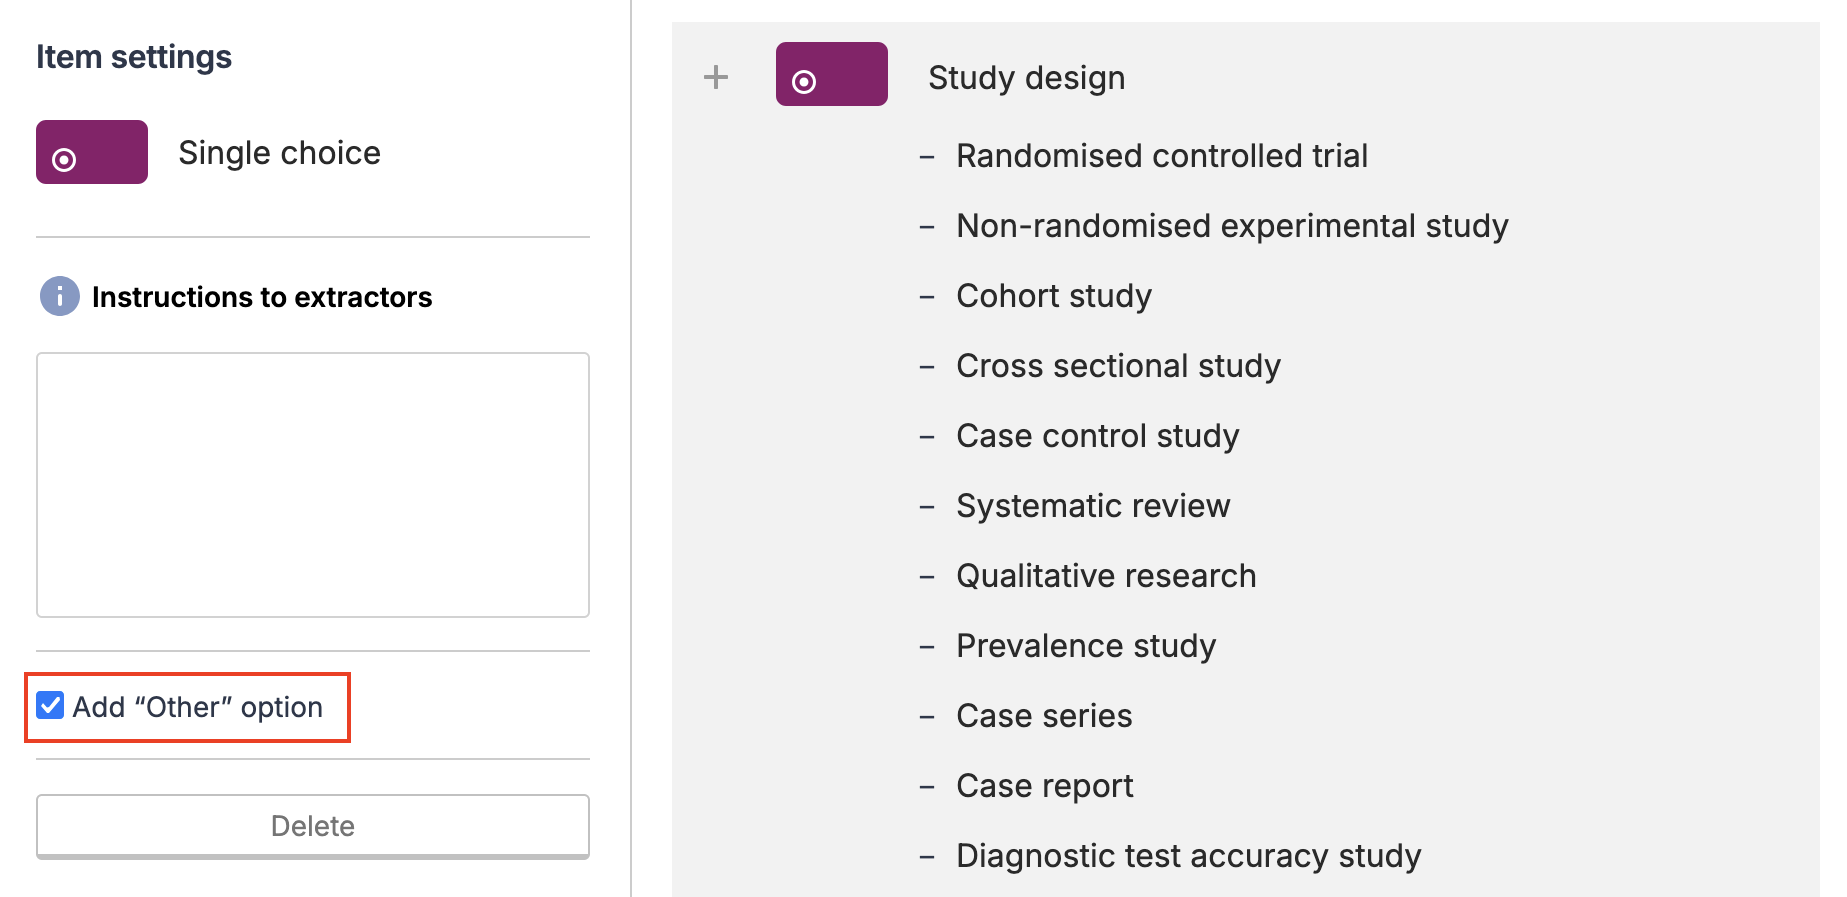
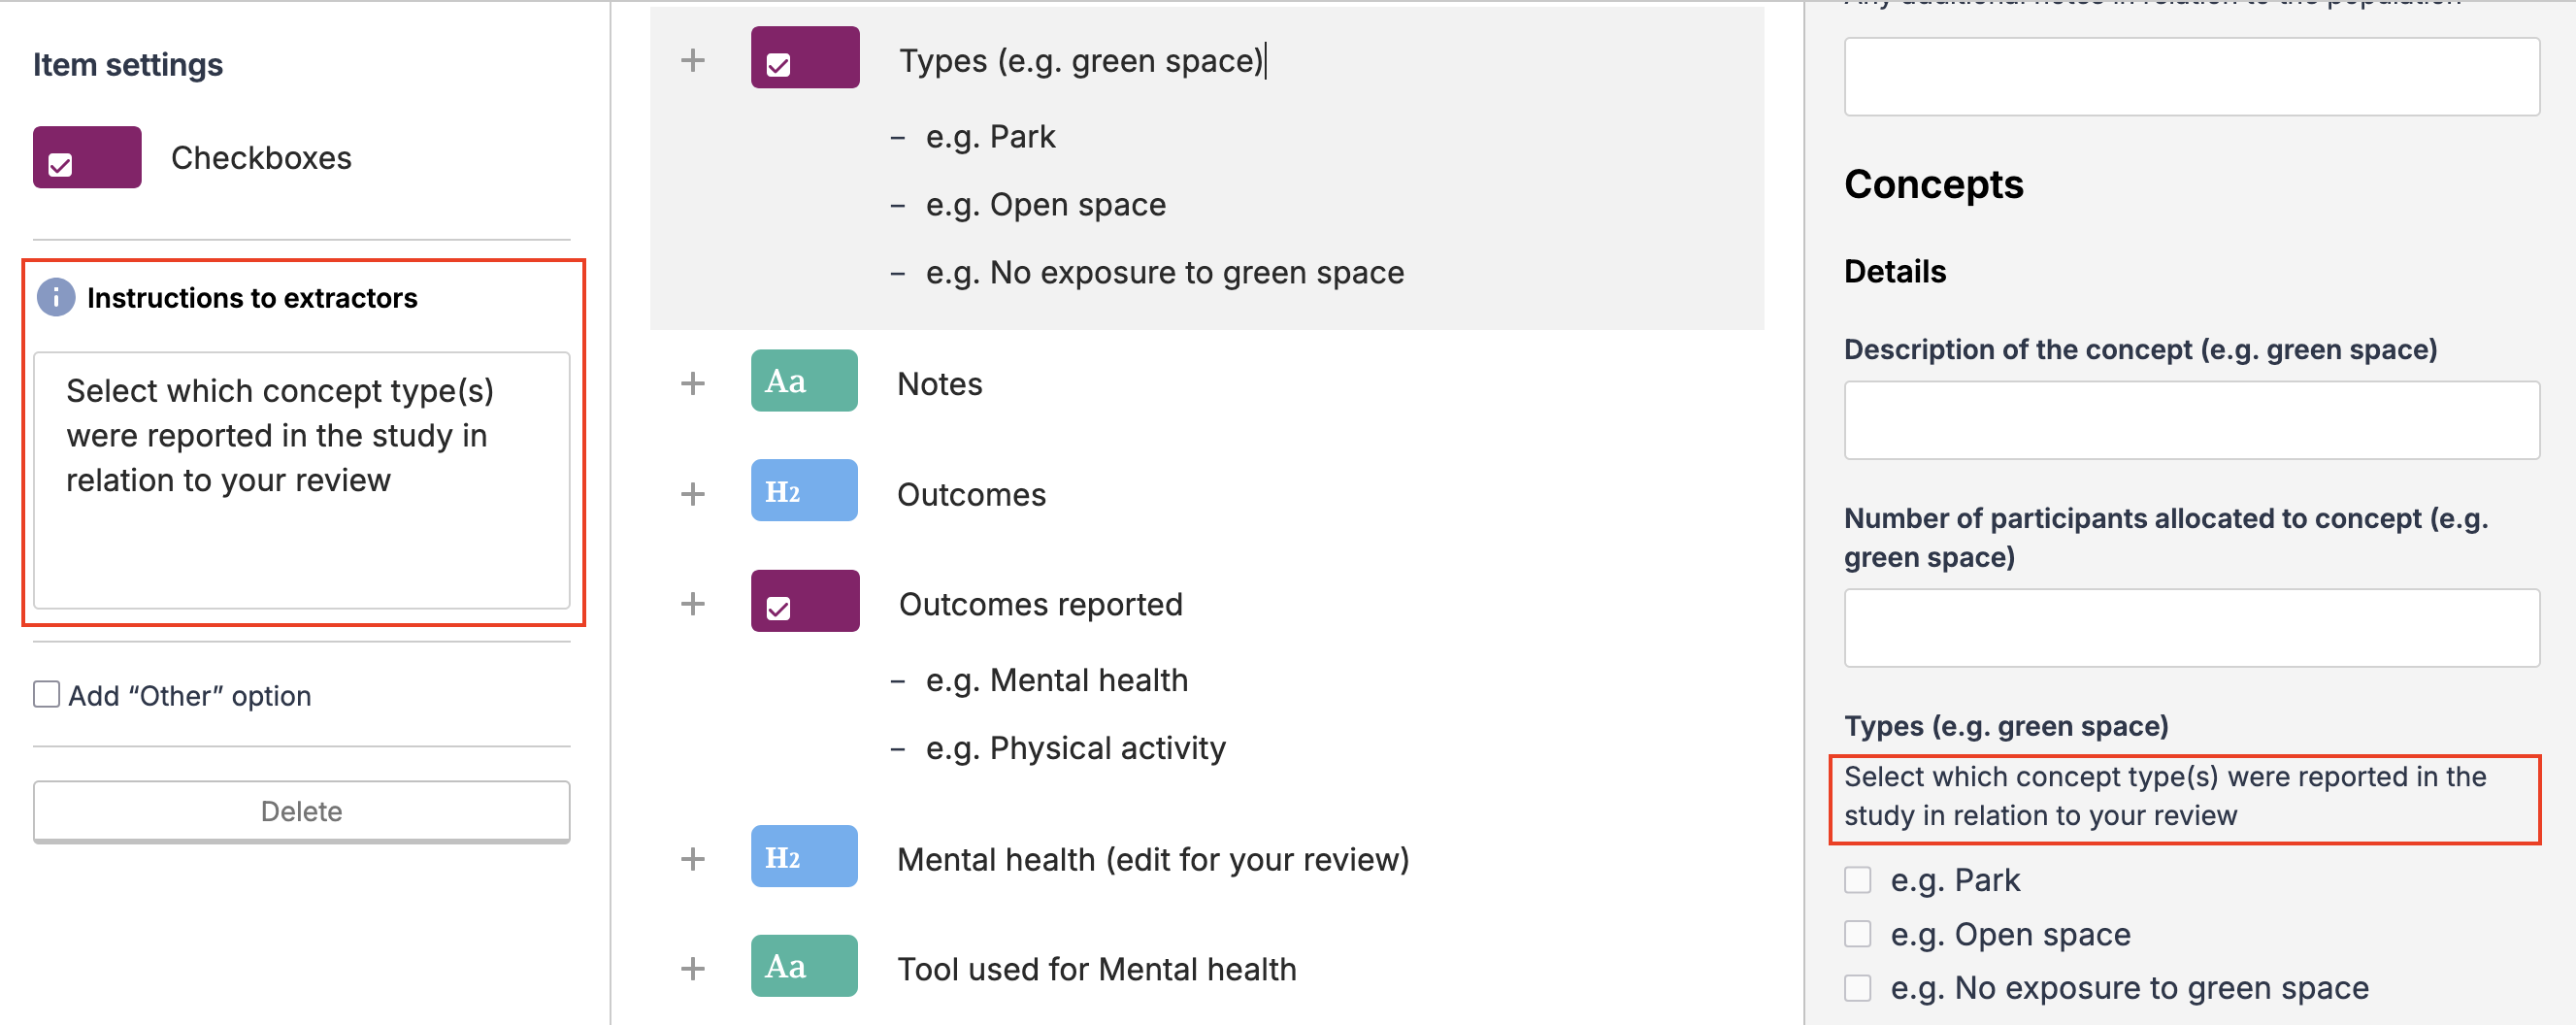
Single choice items
Use single choice items when you have a list of options and you want your extractors to choose one of the options.
You can add an option to a single choice item in the same way as you’d add a new line in Word. Move your insertion point to the end of one of your options and then press ENTER on your PC keyboard or RETURN on your Mac keyboard.
To delete an option, select the option and press BACKSPACE on PC or DELETE on Mac until it disappears.
You can give your extractors the ability to add their own option by selecting the Other checkbox in Item settings.
Instructions to extractors
Each field item allows you to add item-specific instructions for extractors. For example, for a single-choice item, you might specify that an option should only be selected if certain criteria are met.
To add instructions, select the item and enter your text in Item settings. The instructions will appear in the extraction form under the item’s label.
Save as draft and publish
When you first open your template, it will be in Draft mode. Select Save as draft to retain your changes.
To begin extraction, you must publish a data extraction template (quality assessment is optional). After you Publish the template, reviewers can start extracting studies.
Updating the template
Once your template is published, you can make further changes at any time by selecting Edit template on the study form.
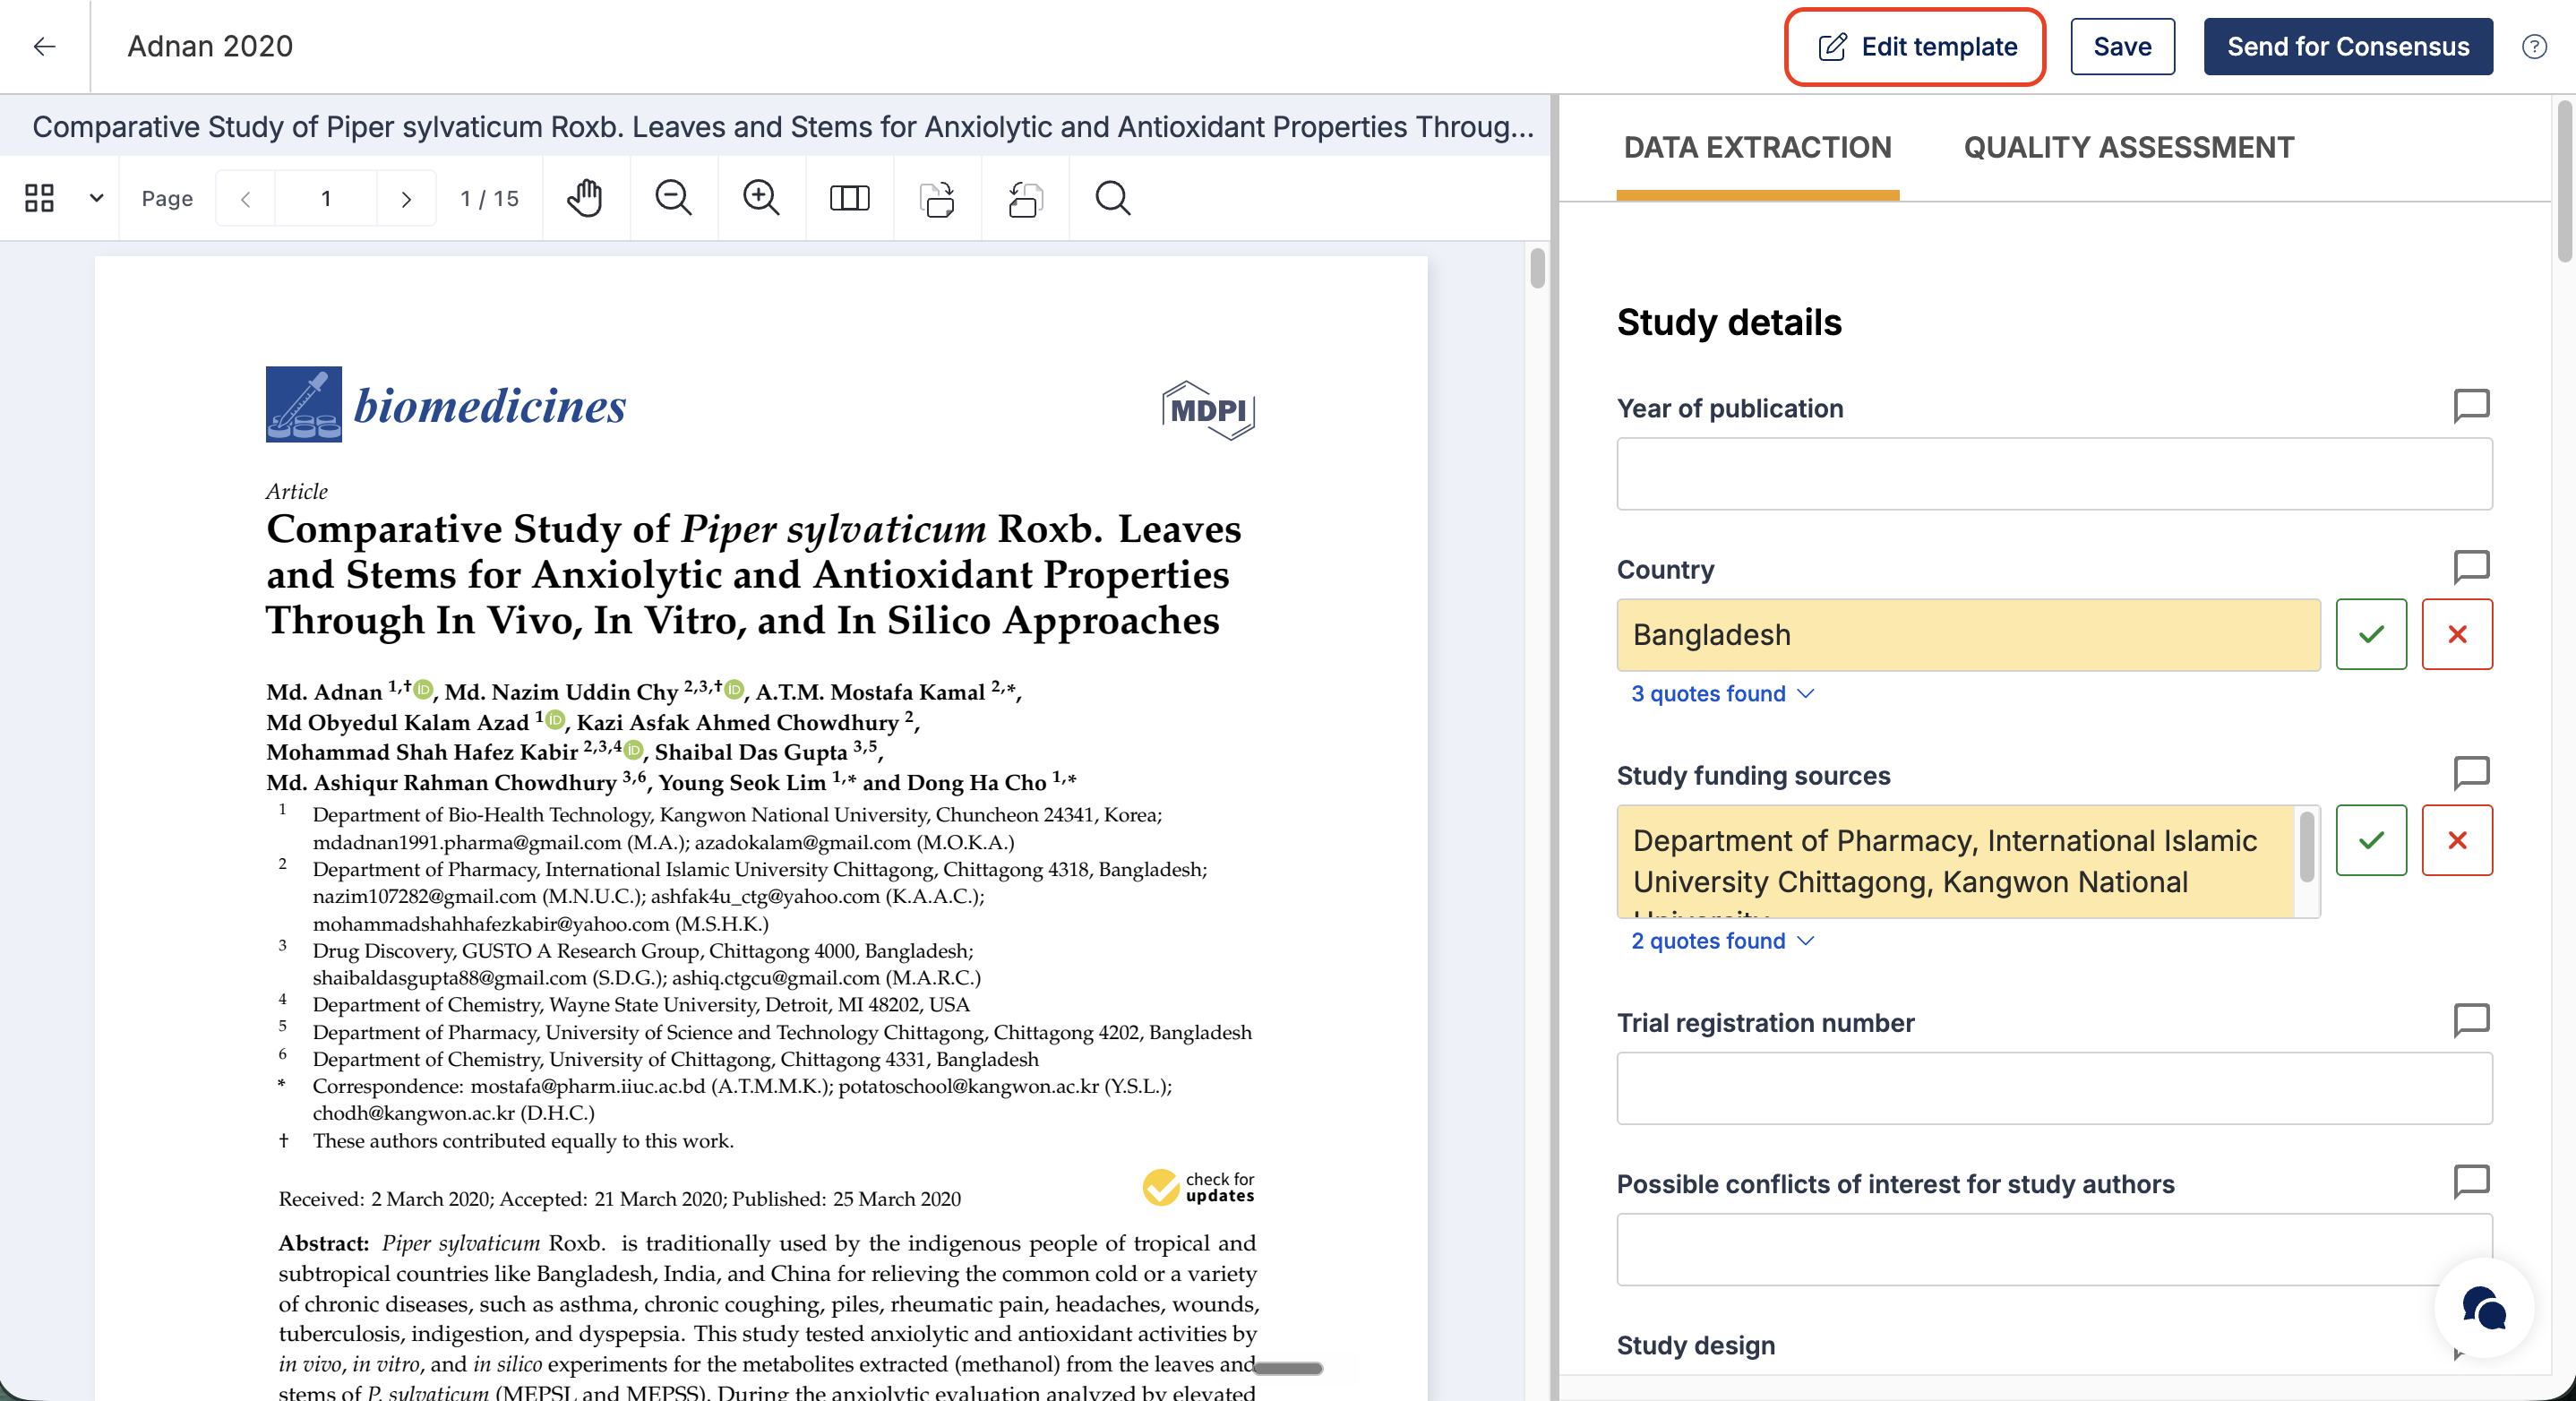
Only the published version of the template is visible to studies in extraction. You can make changes and save them as a draft without publishing, allowing you to return and continue editing at any time.
You can check the template status by opening it and looking for the Published or Draft label. The last updated date and contributor are also displayed. If the template is in Draft, any changes made since it was last published are not yet visible to studies in extraction.


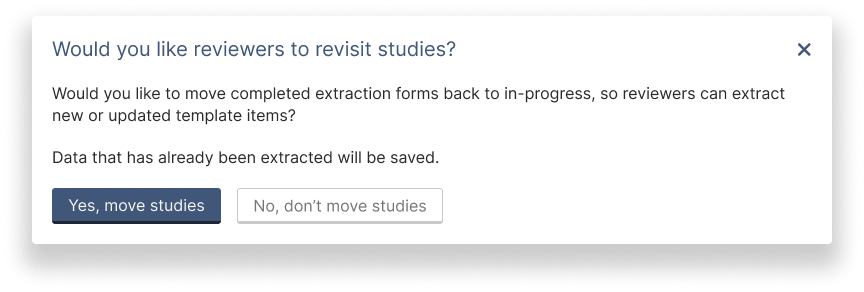
Once you re-publish the template, all changes are applied to all studies, regardless of their stage.
At that point, you can choose to:
Move completed studies back to in-progress, or
Leave existing studies unchanged if the new changes do not affect them
This gives you control over whether to revisit studies - for example, to extract data for newly added fields or redo consensus. When redoing consensus, any fields modified by either reviewer are highlighted (except within data tables).
When a reviewer saves changes to the data extraction or quality assessment template, the system will display the following message:
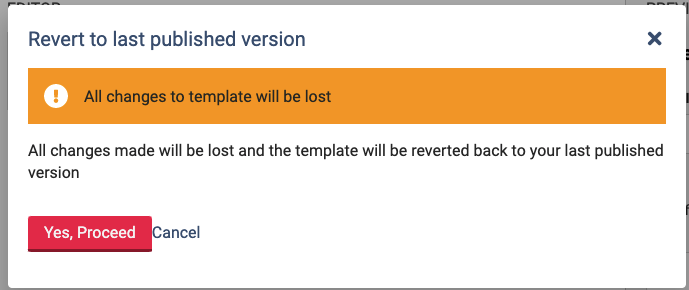
Revert to published version
If you’ve previously published your template, you’ll see an option to Revert to published version. This restores the template to the version currently visible to reviewers when extracting data, removing any changes made while in draft.
Before reverting, you’ll see a warning message confirming that any changes made in draft mode will be lost.