If you have not yet set up a data extraction template in Extraction 2, we recommend first reviewing the information provided in this article.
When you set up a data extraction template in Extraction 2, you have the option to include tables. The default data extraction template includes several basic table options:
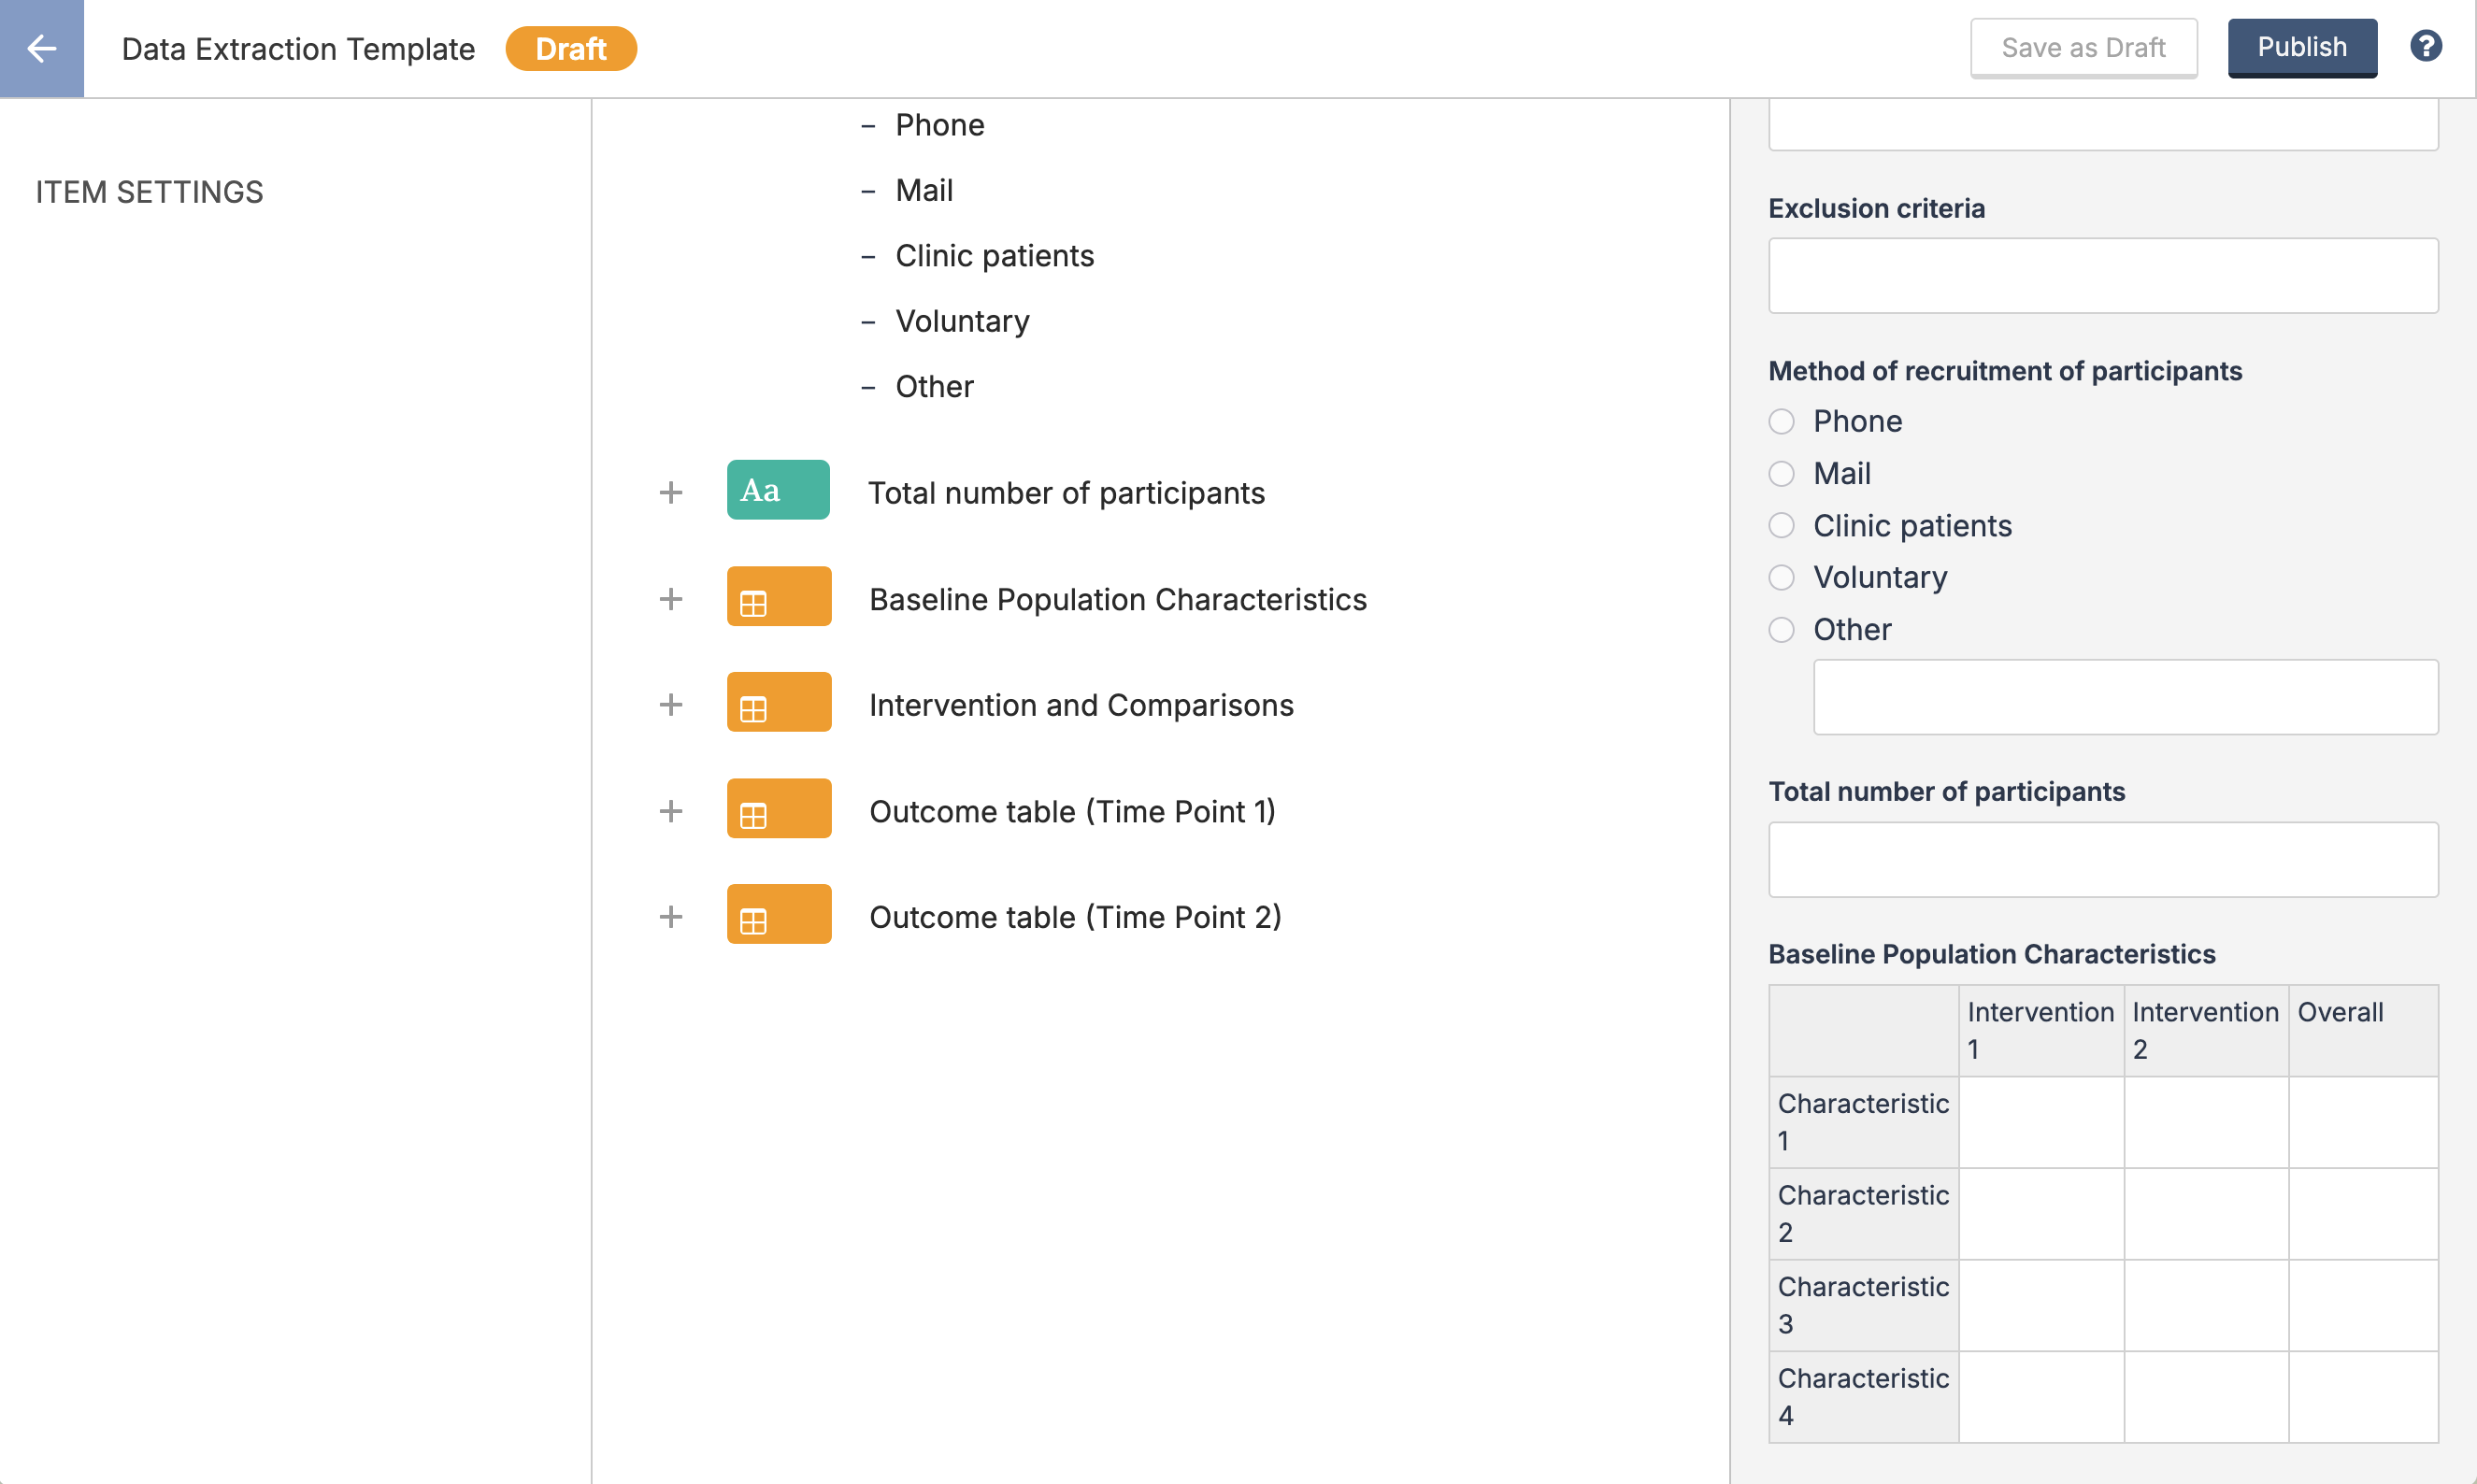
As with other elements of the data extraction template, you can modify these tables by customizing the row and column labels, as well as adding or removing rows or columns:

You will be able to make these changes in the 'Item settings' column on the left, and they will be visible as they are made in the 'Preview' column on the right. We recommend reading our best practice for tables which outlines how to define the row and column names for your review.
You can also add additional tables as needed in the middle 'Editor' section by pressing the + button next to any existing field:
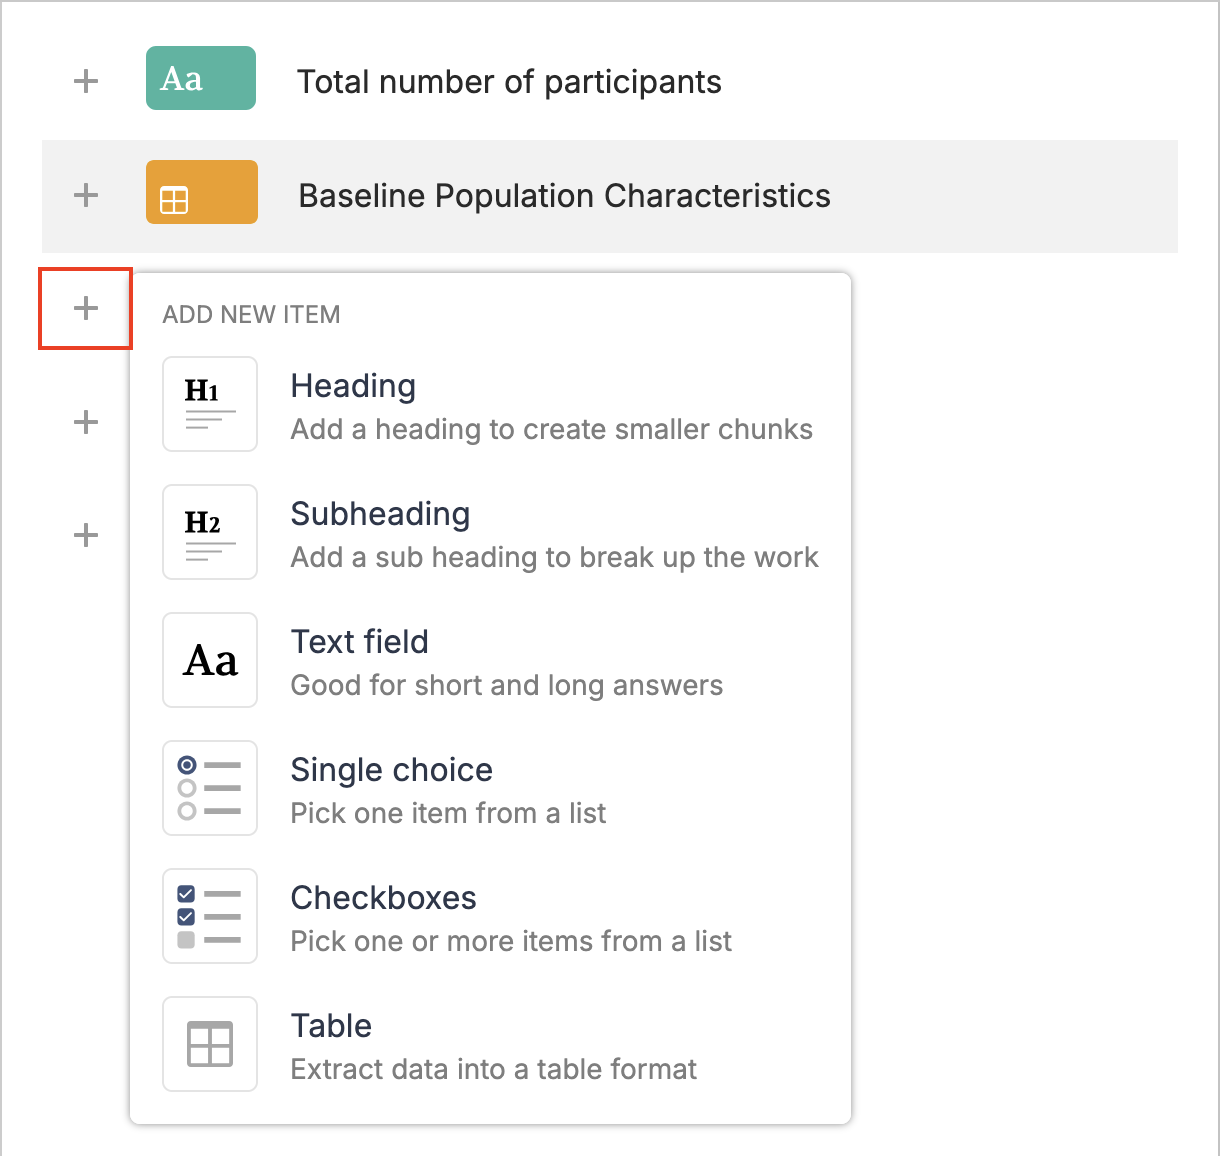
This will display the 'Add new item' pop-up, where you can select the type of item you would like to add.
For complete information on saving, publishing, and updating your data extraction template, including adding tables to new or existing templates, please review the guidance in our main article on creating and publishing a data extraction template.