If you have not yet set up a data extraction template in Extraction 2, we recommend first reviewing the information provided in this article.
When setting up an extraction template you can now add checkboxes which will allow reviewers to select one or more items from a list.
When opening your extraction template you can select to add checkboxes by clicking the ‘+’ icon and selecting checkboxes.
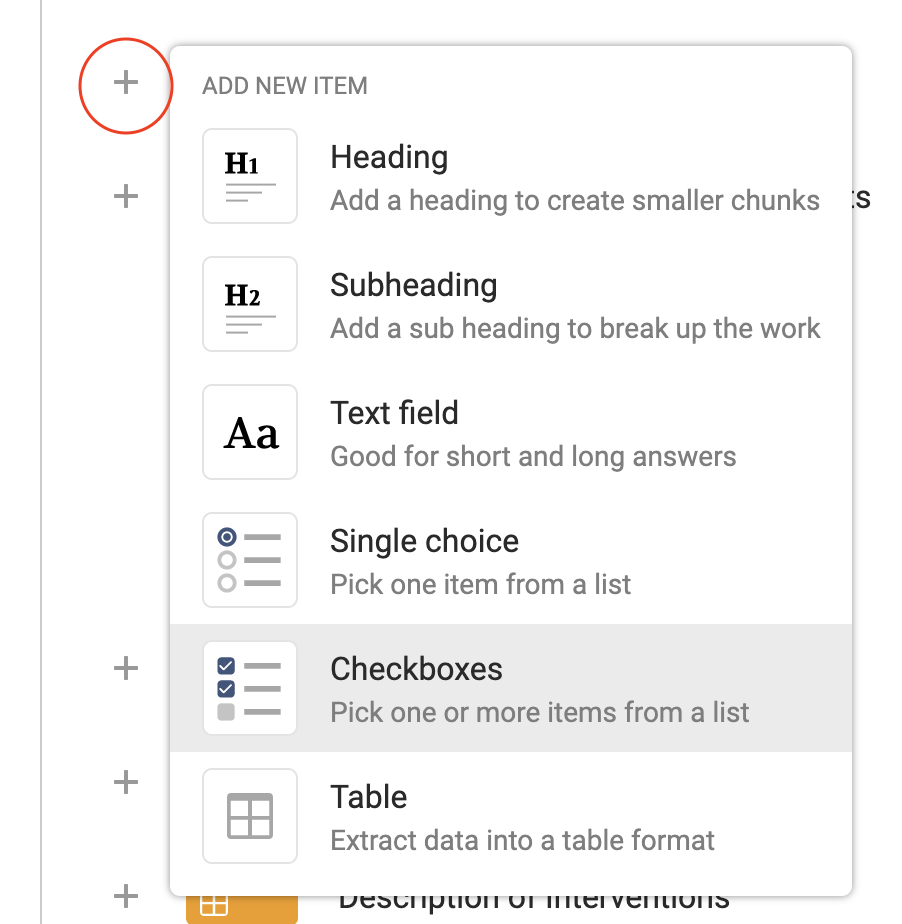
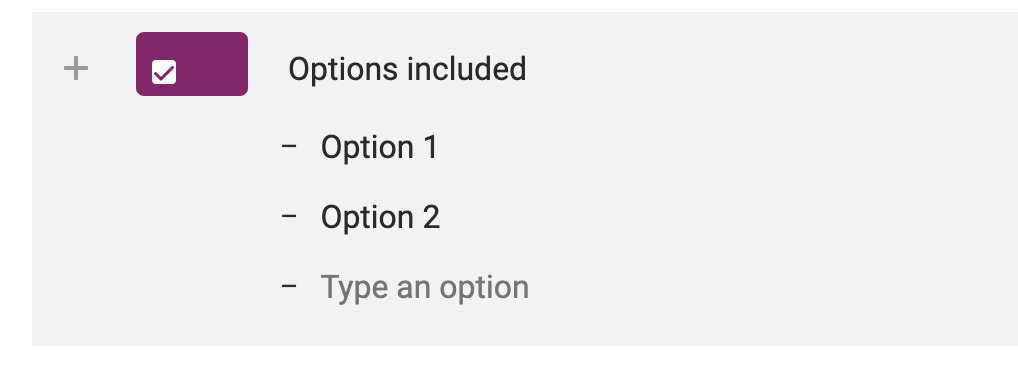
A field will be added to the template with an empty label and an empty option. You can enter a label for your new field and a new option.

You can add more options to the checkboxes in the same way as you’d add a new line in Word. Move your insertion point to the end of one of your options and then press ENTER on your PC keyboard or RETURN on your Mac keyboard.
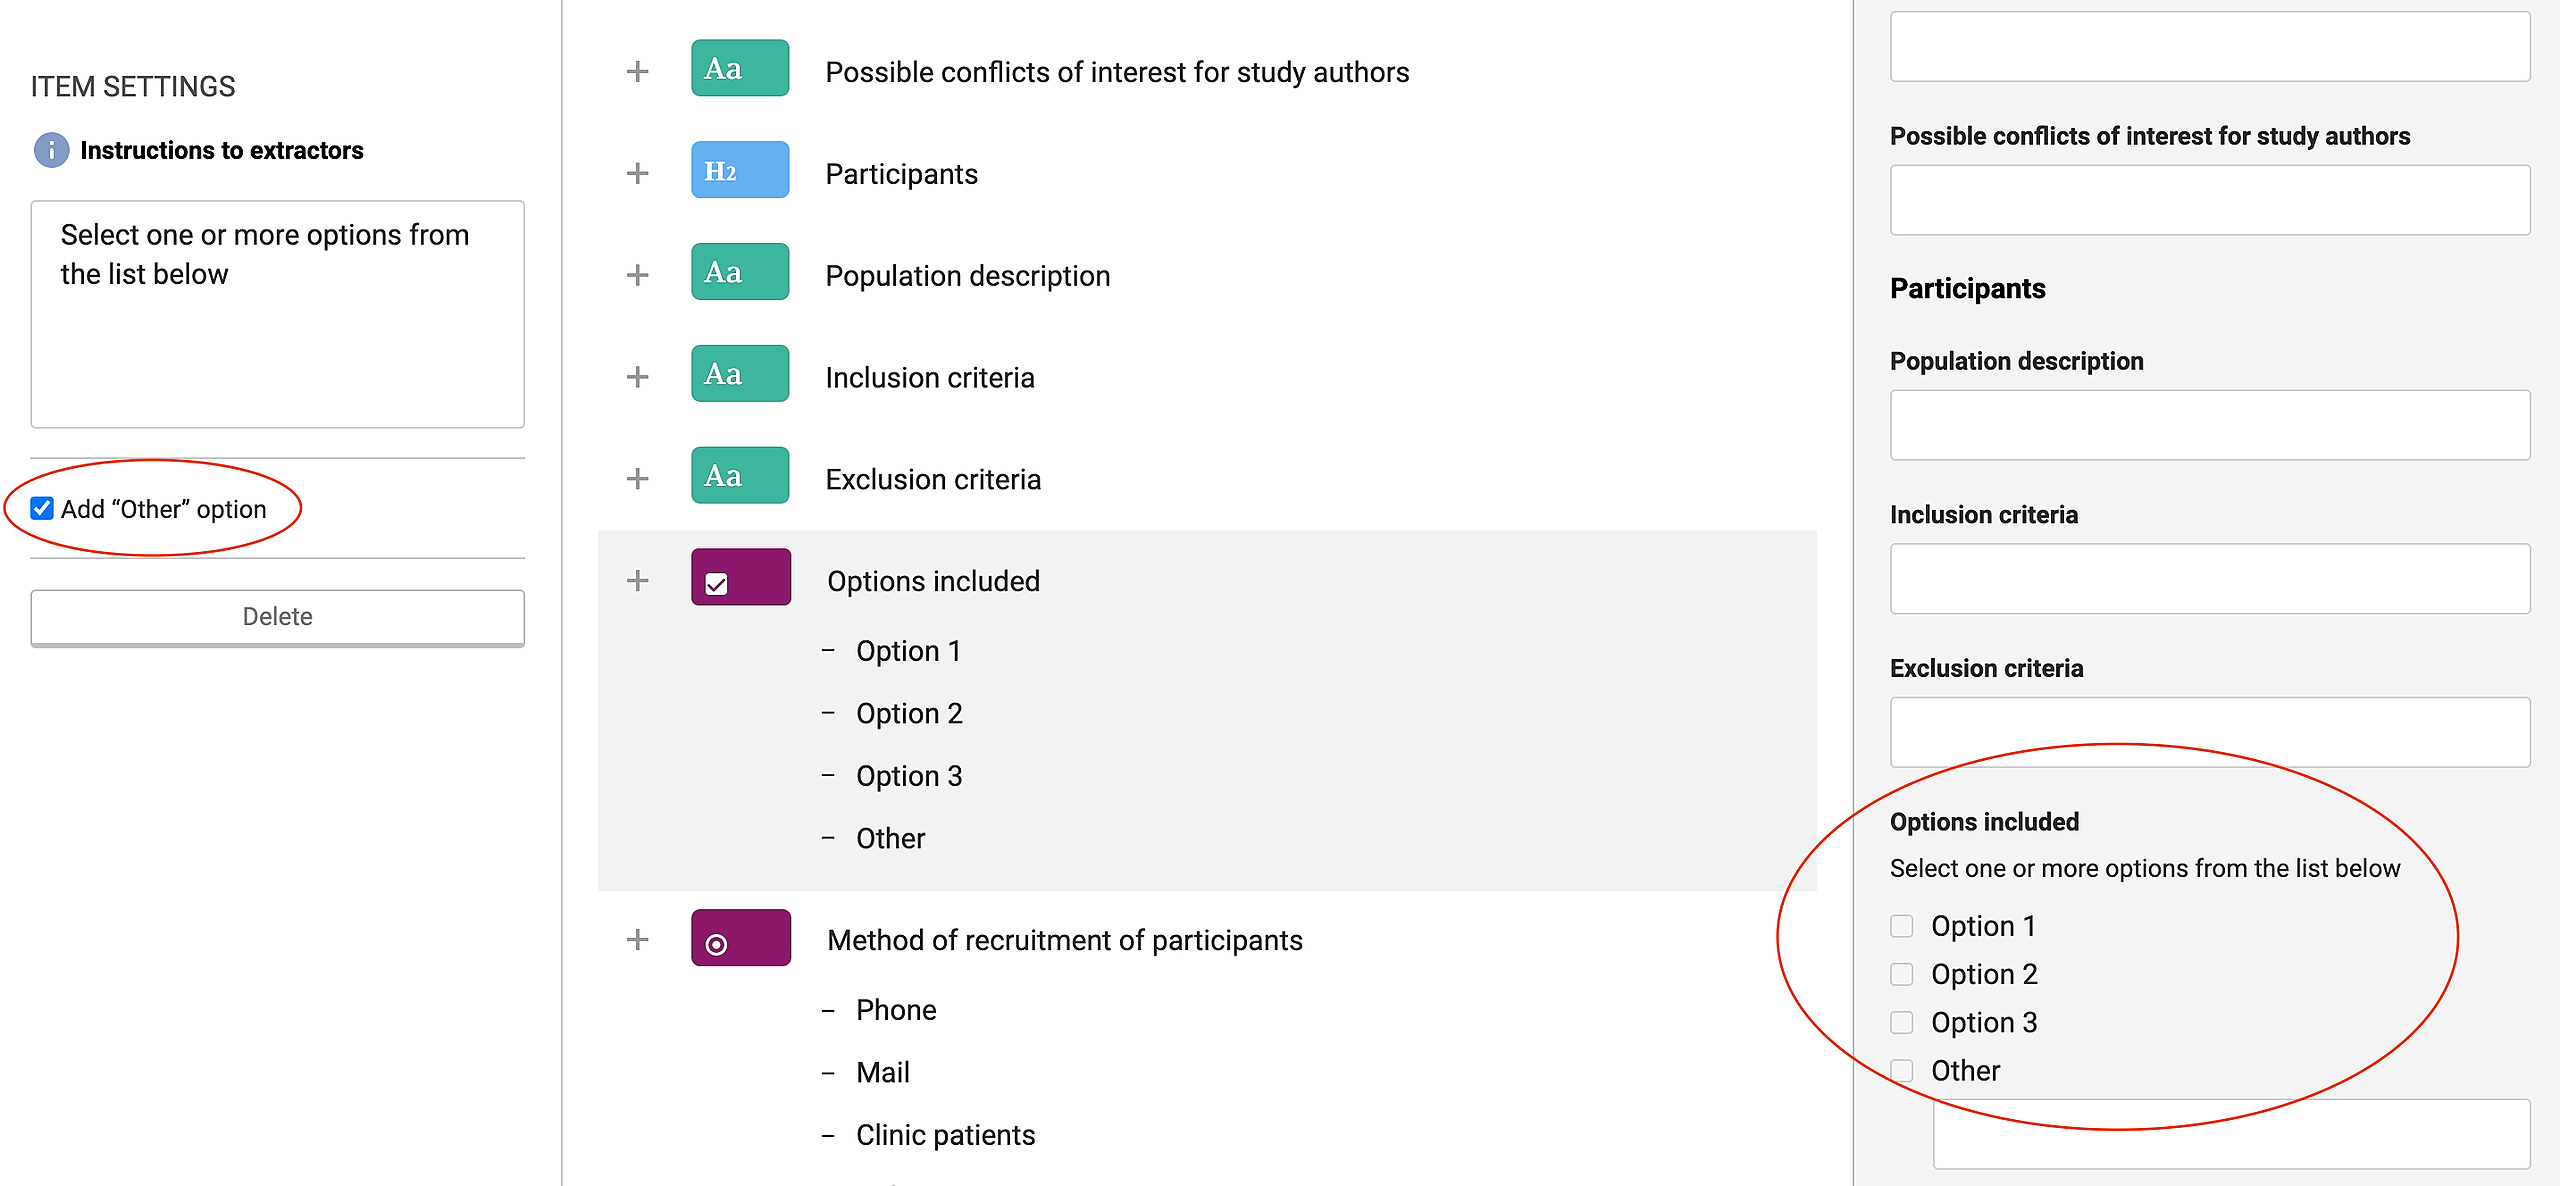
On the left side of the screen you can add instructions which will appear to reviewers when they are extracting data. You can also add an “Other” option to appear in the list of checkboxes. A preview of the field will show on the right hand side.
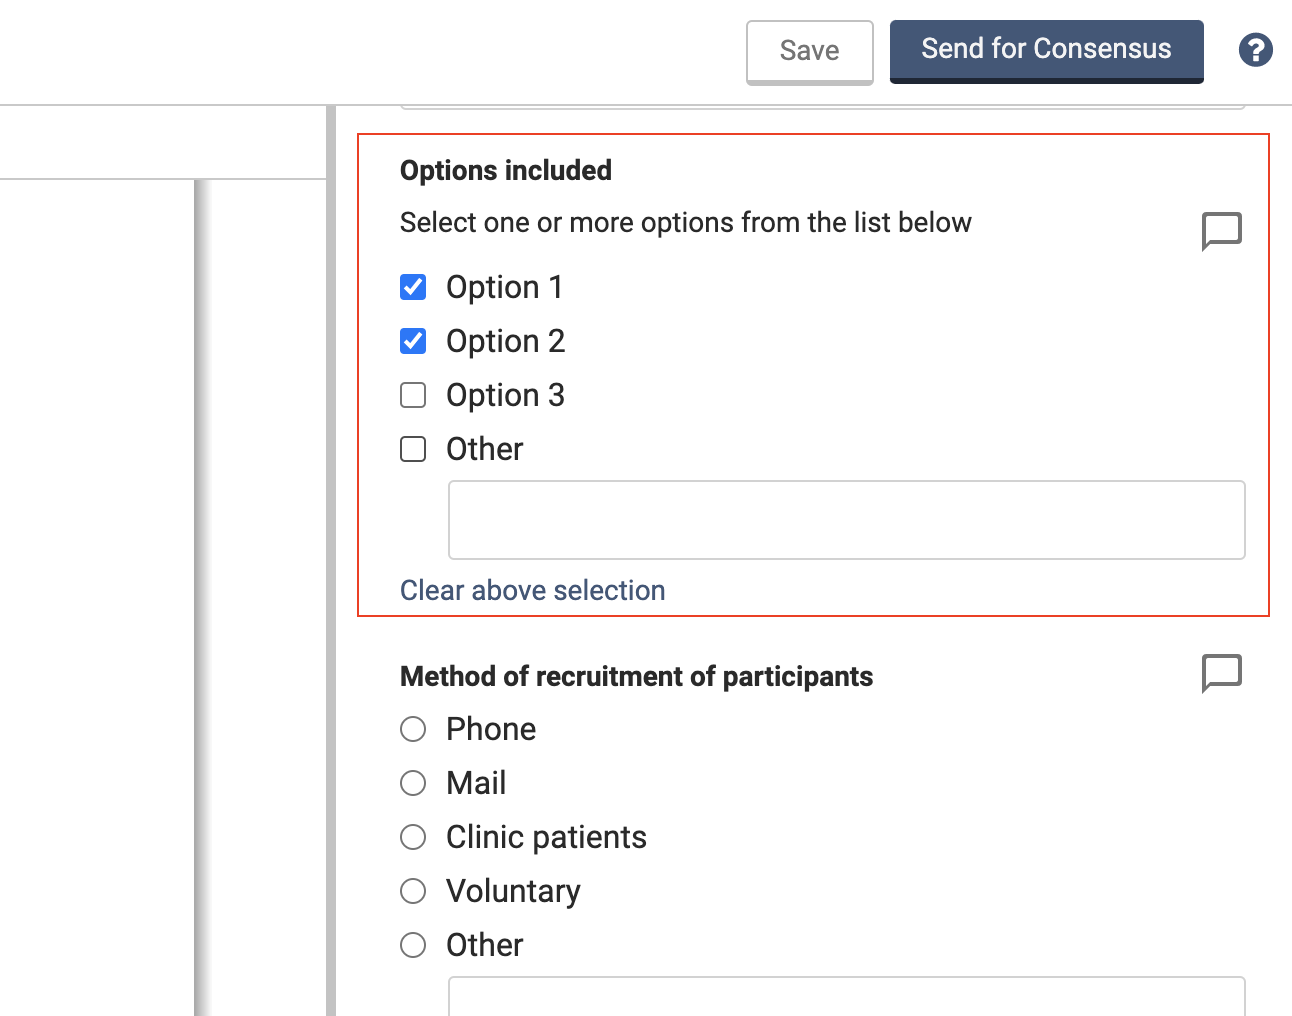
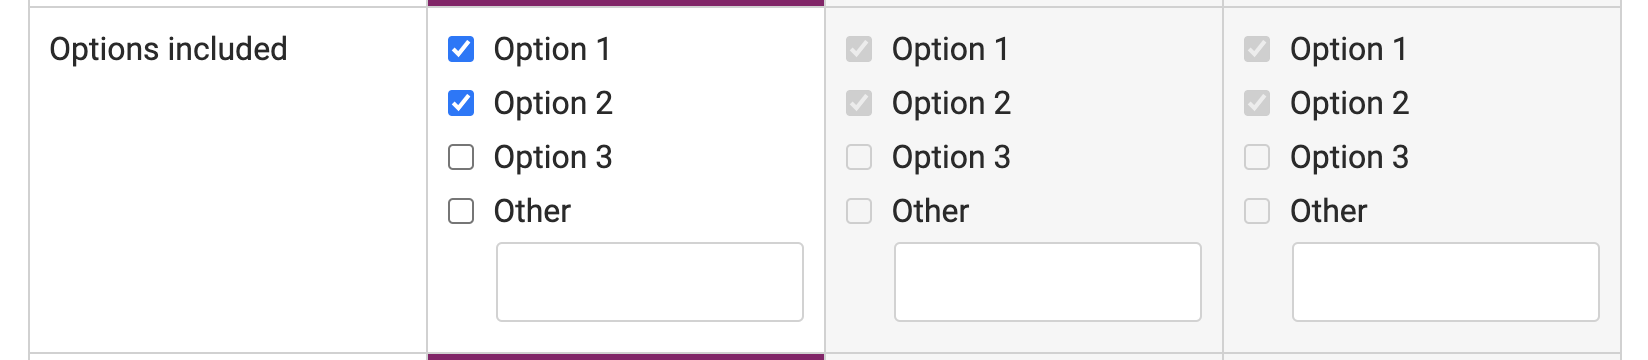
When extracting data reviewers can select one or more checkboxes.
If both reviewers enter the same inputs then in consensus no conflict will be raised and the system will default the consensus decision to be the same as both reviewers.
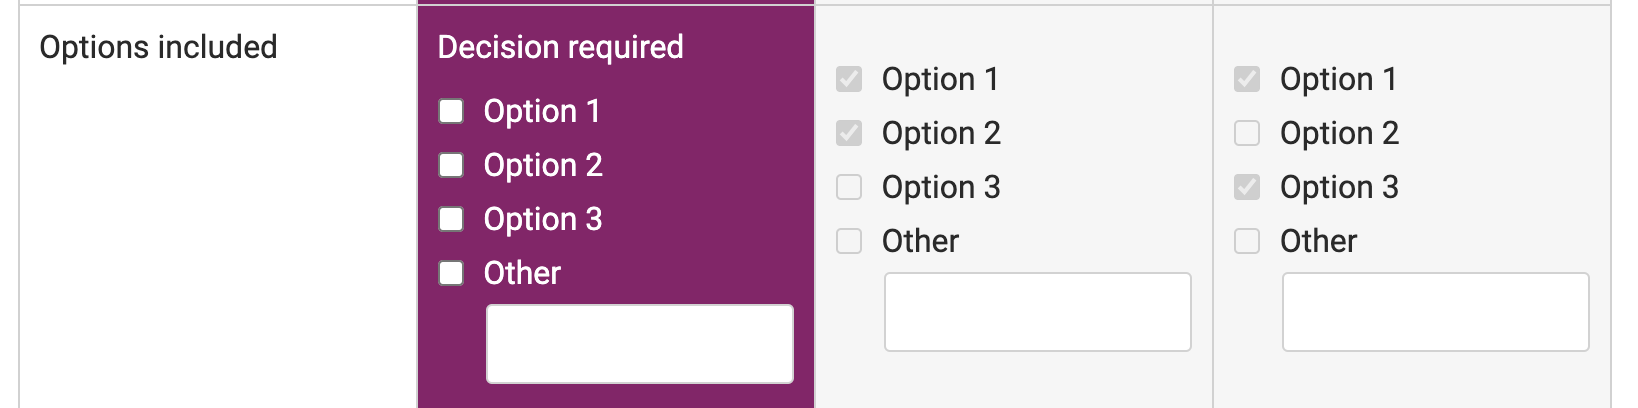
If the reviewers enter different inputs then a conflict will be raised and a decision will be required. Just like other fields, you can select to use either Reviewer 1 or Reviewer 2’s inputs by selecting them or alternatively you can edit the final decision in consensus.
In the csv export, the checkbox options will be separated by a ‘;’ symbol.

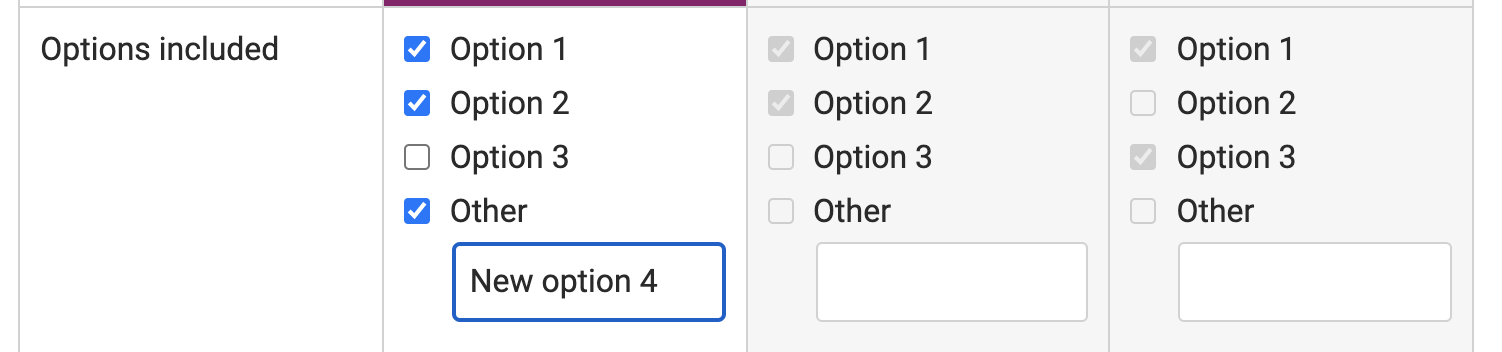
If “Other” is selected then the csv output will show “Other: New option 4” where “New option 4” is the text typed into the free text box.
Example of the csv export with “Other” selected:
