How to complete data extraction for a study using Extraction 1
Extraction 1 - Data Extraction
How to complete data extraction for a study using Extraction 1
Updated 3 weeks ago
Note: Covidence is making updates and improvements to Extraction 1. If you started extracting data in Extraction 1 before July 4th, 2023, you’ll be using the old version of Extraction 1. You can find support for the old version here.
Start extracting data for a study
If you're using a dual-reviewer workflow, two reviewers and a consensus reviewer must collect data for a study. Any member of the reviewing team can extract data unless you have defined rules in Settings > Team settings.
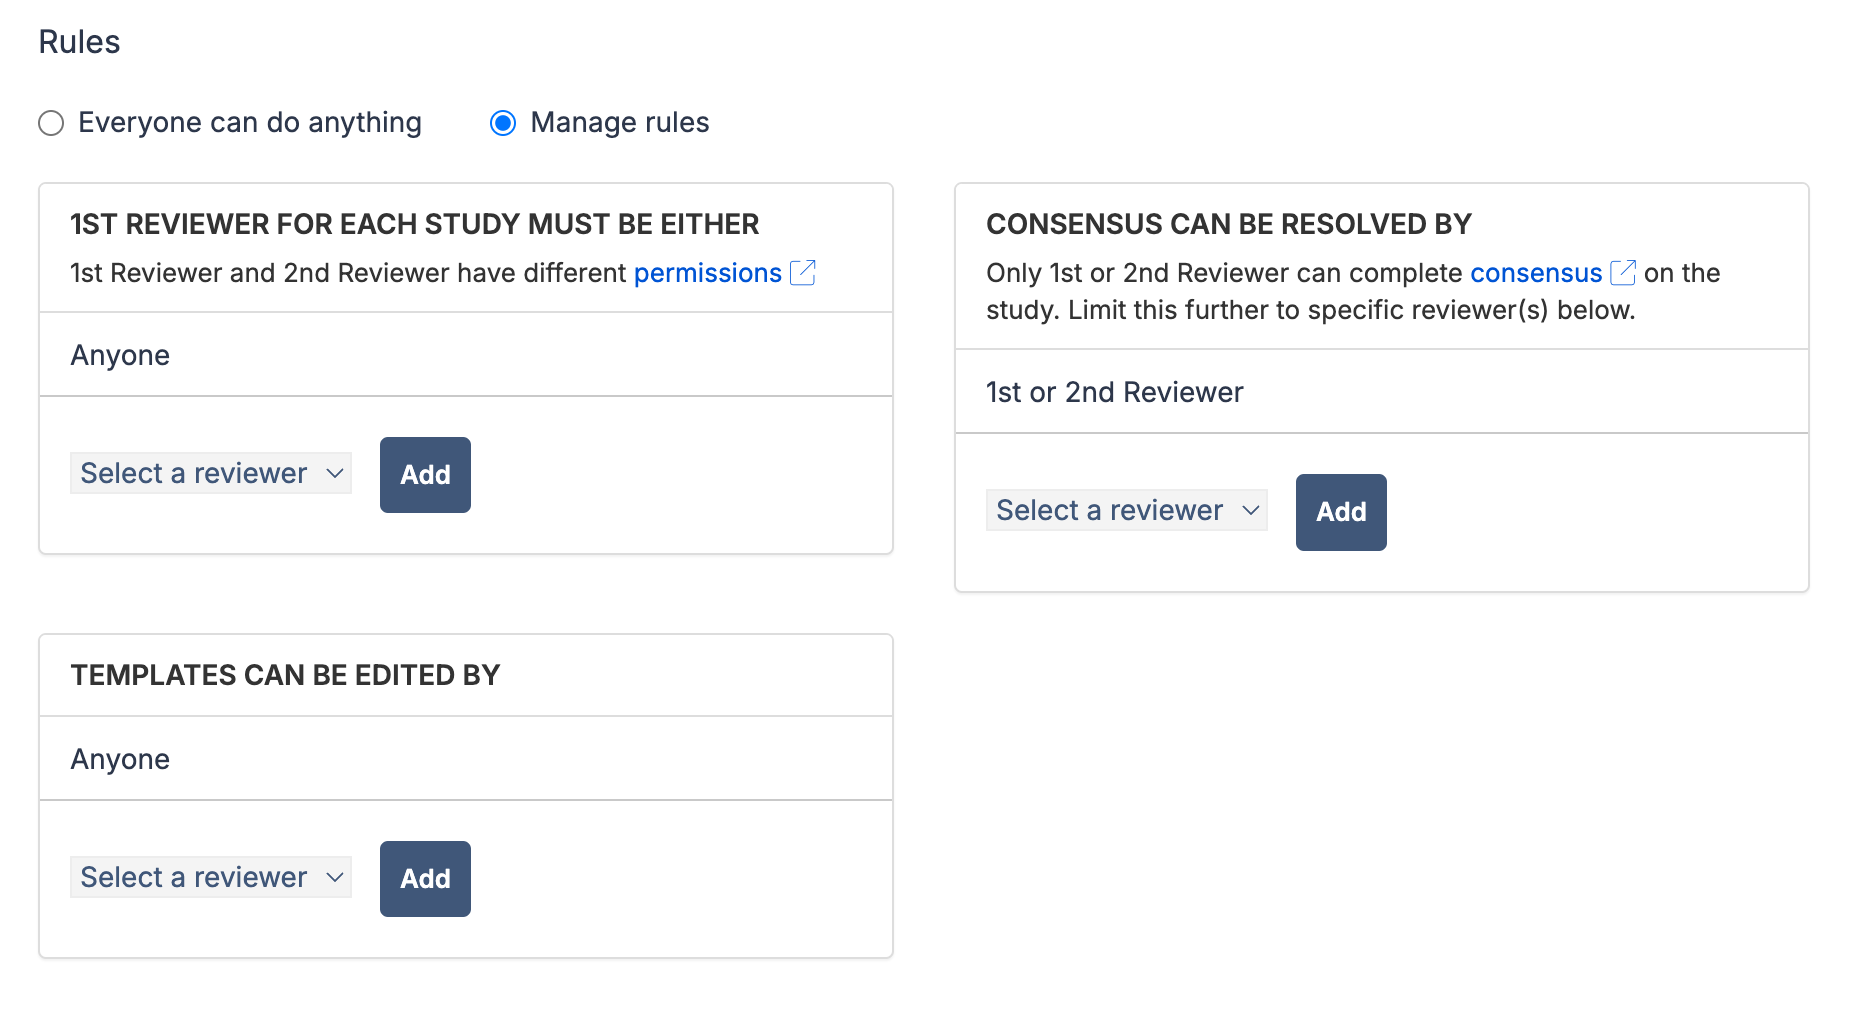
If you're using a single-reviewer workflow, only one reviewer must collect data for a study. Any member of the reviewing team can extract data unless defined otherwise in Team settings.

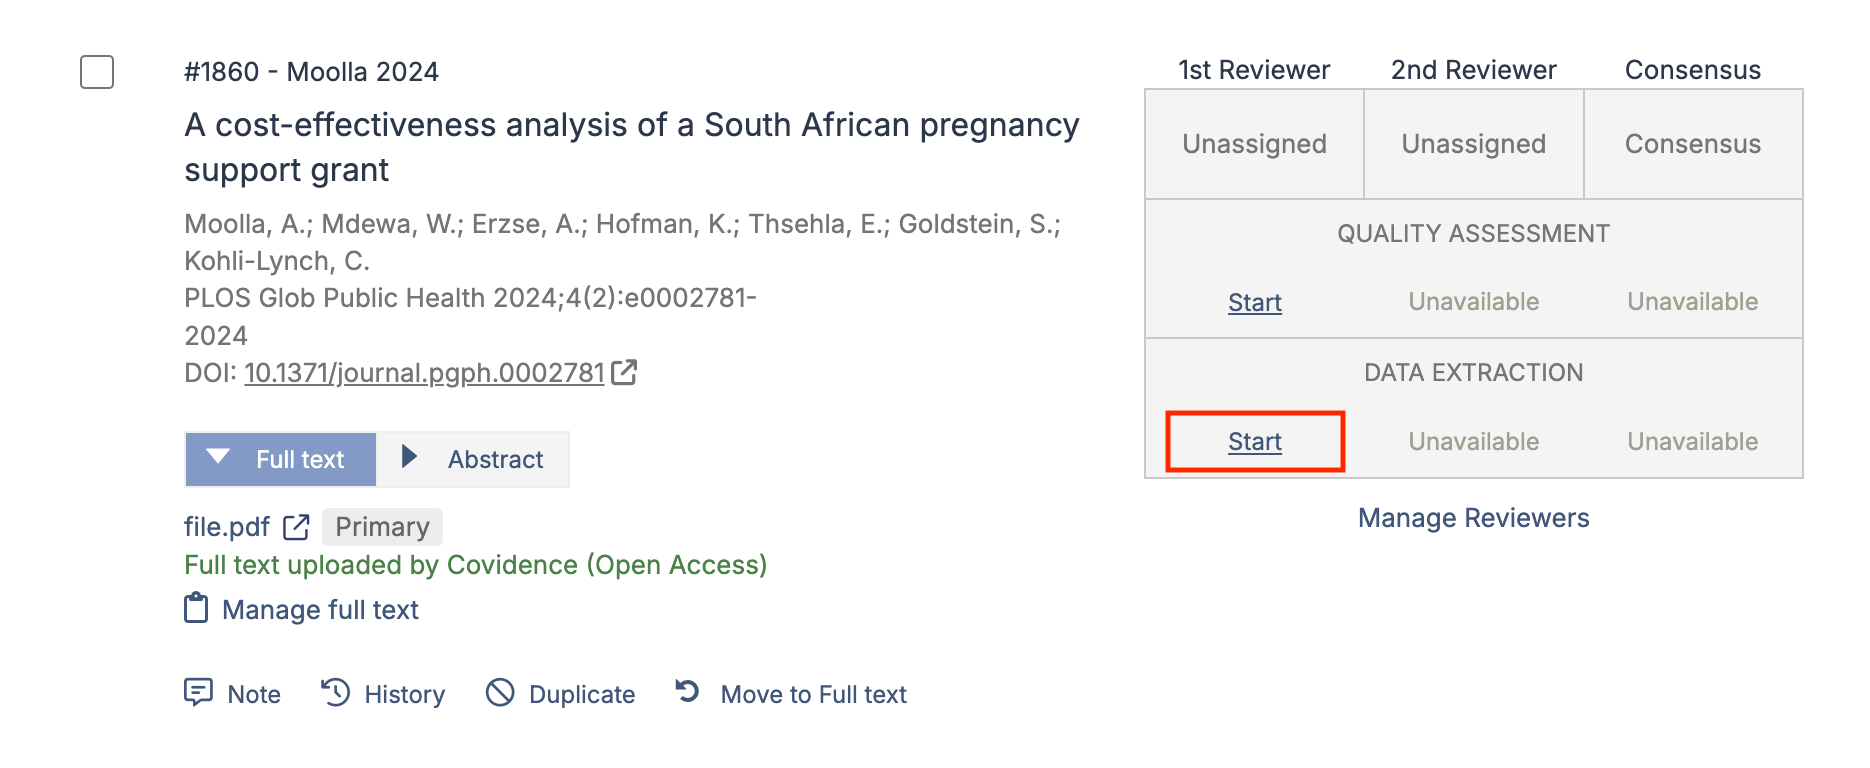
To begin extracting data, you must first publish a data extraction template. Once a template has been published, click “Start” on a study to begin extraction.
Status of a study
When you are completing extraction for a study, the status is displayed on the study list screen. These are explained below:
Start - You can start extraction for that study
Continue - You have started extraction but have not completed extraction for that study. Click “Continue” to continue extracting data.
In progress- Another reviewer has started extraction but have not completed extraction for that study.
Unavailable - Another reviewer has started extraction. You cannot open extraction for that study. “Unavailable” shows for the consensus reviewer until “Reviewer 1” and “Reviewer 2” has completed data extraction.
Completed - You have completed extraction for that study. If consensus has been reached then you can click on “Done” to see the final data for that study.
Collecting data
The extraction form for a study has multiple sections; summary, identification, methods, population, interventions, outcomes and results data. All fields, characteristics, interventions and outcomes that have been defined on the data extraction template are shown on each study extraction form.
Covidence provides automatic extraction in Extraction 1 (DE1) where we can source reliable suggestions, provided that a DOI is available. These suggestions are enabled by default for all users in DE1. Extraction suggestions will show for all users in DE1, requiring them to either accept or reject each suggestion individually (through the tick and cross actions). If no suggestion can be found, the field will remain as a normal input (no suggestion).
Currently, the data sources include:
• Study metadata from external repositories (for both open and closed access studies)
• Large Language Model (LLM) extraction from full-text articles (both open and closed access studies)
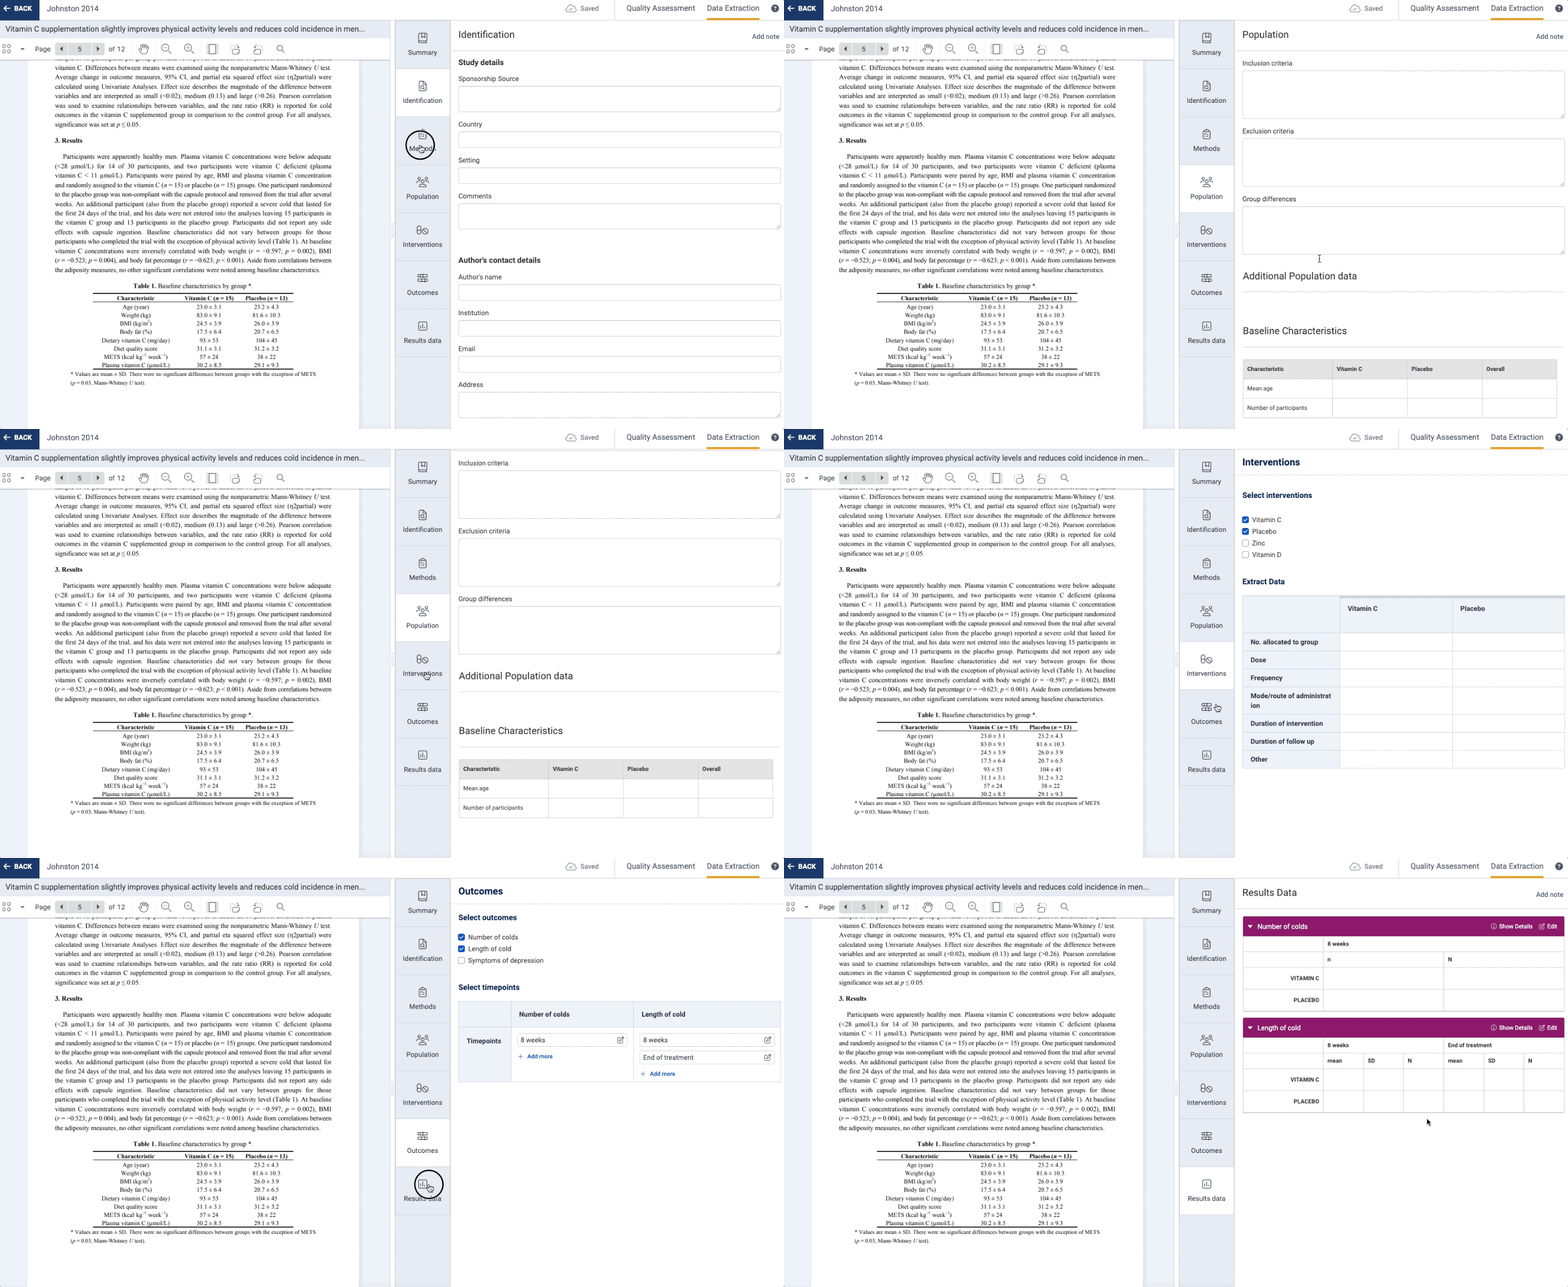
If you want to update the extraction form for a study then you must update the template. We recommend that you speak to the template creator and/or lead reviewer before updating the template as all changes made to the template will be promoted to every study in data extraction. This is so consistent data can be collected across all studies.
Selecting interventions
When you open the interventions section, you’ll find a list of all interventions that have been defined on the template.
Interventions need to be selected before they appear on the population, interventions and result sections. Once an intervention is selected, a table will appear allowing you to extract intervention details. You can optionally add a group name and add multiple groups per intervention.
A banner at the top of the page will display a summary of interventions identified in the full text. The interventions are detected by a Large Language Model (LLM) from the full-text PDF, using the full-text PDF uploaded for closed-access studies or the associated open-access PDF in the study’s full-text.
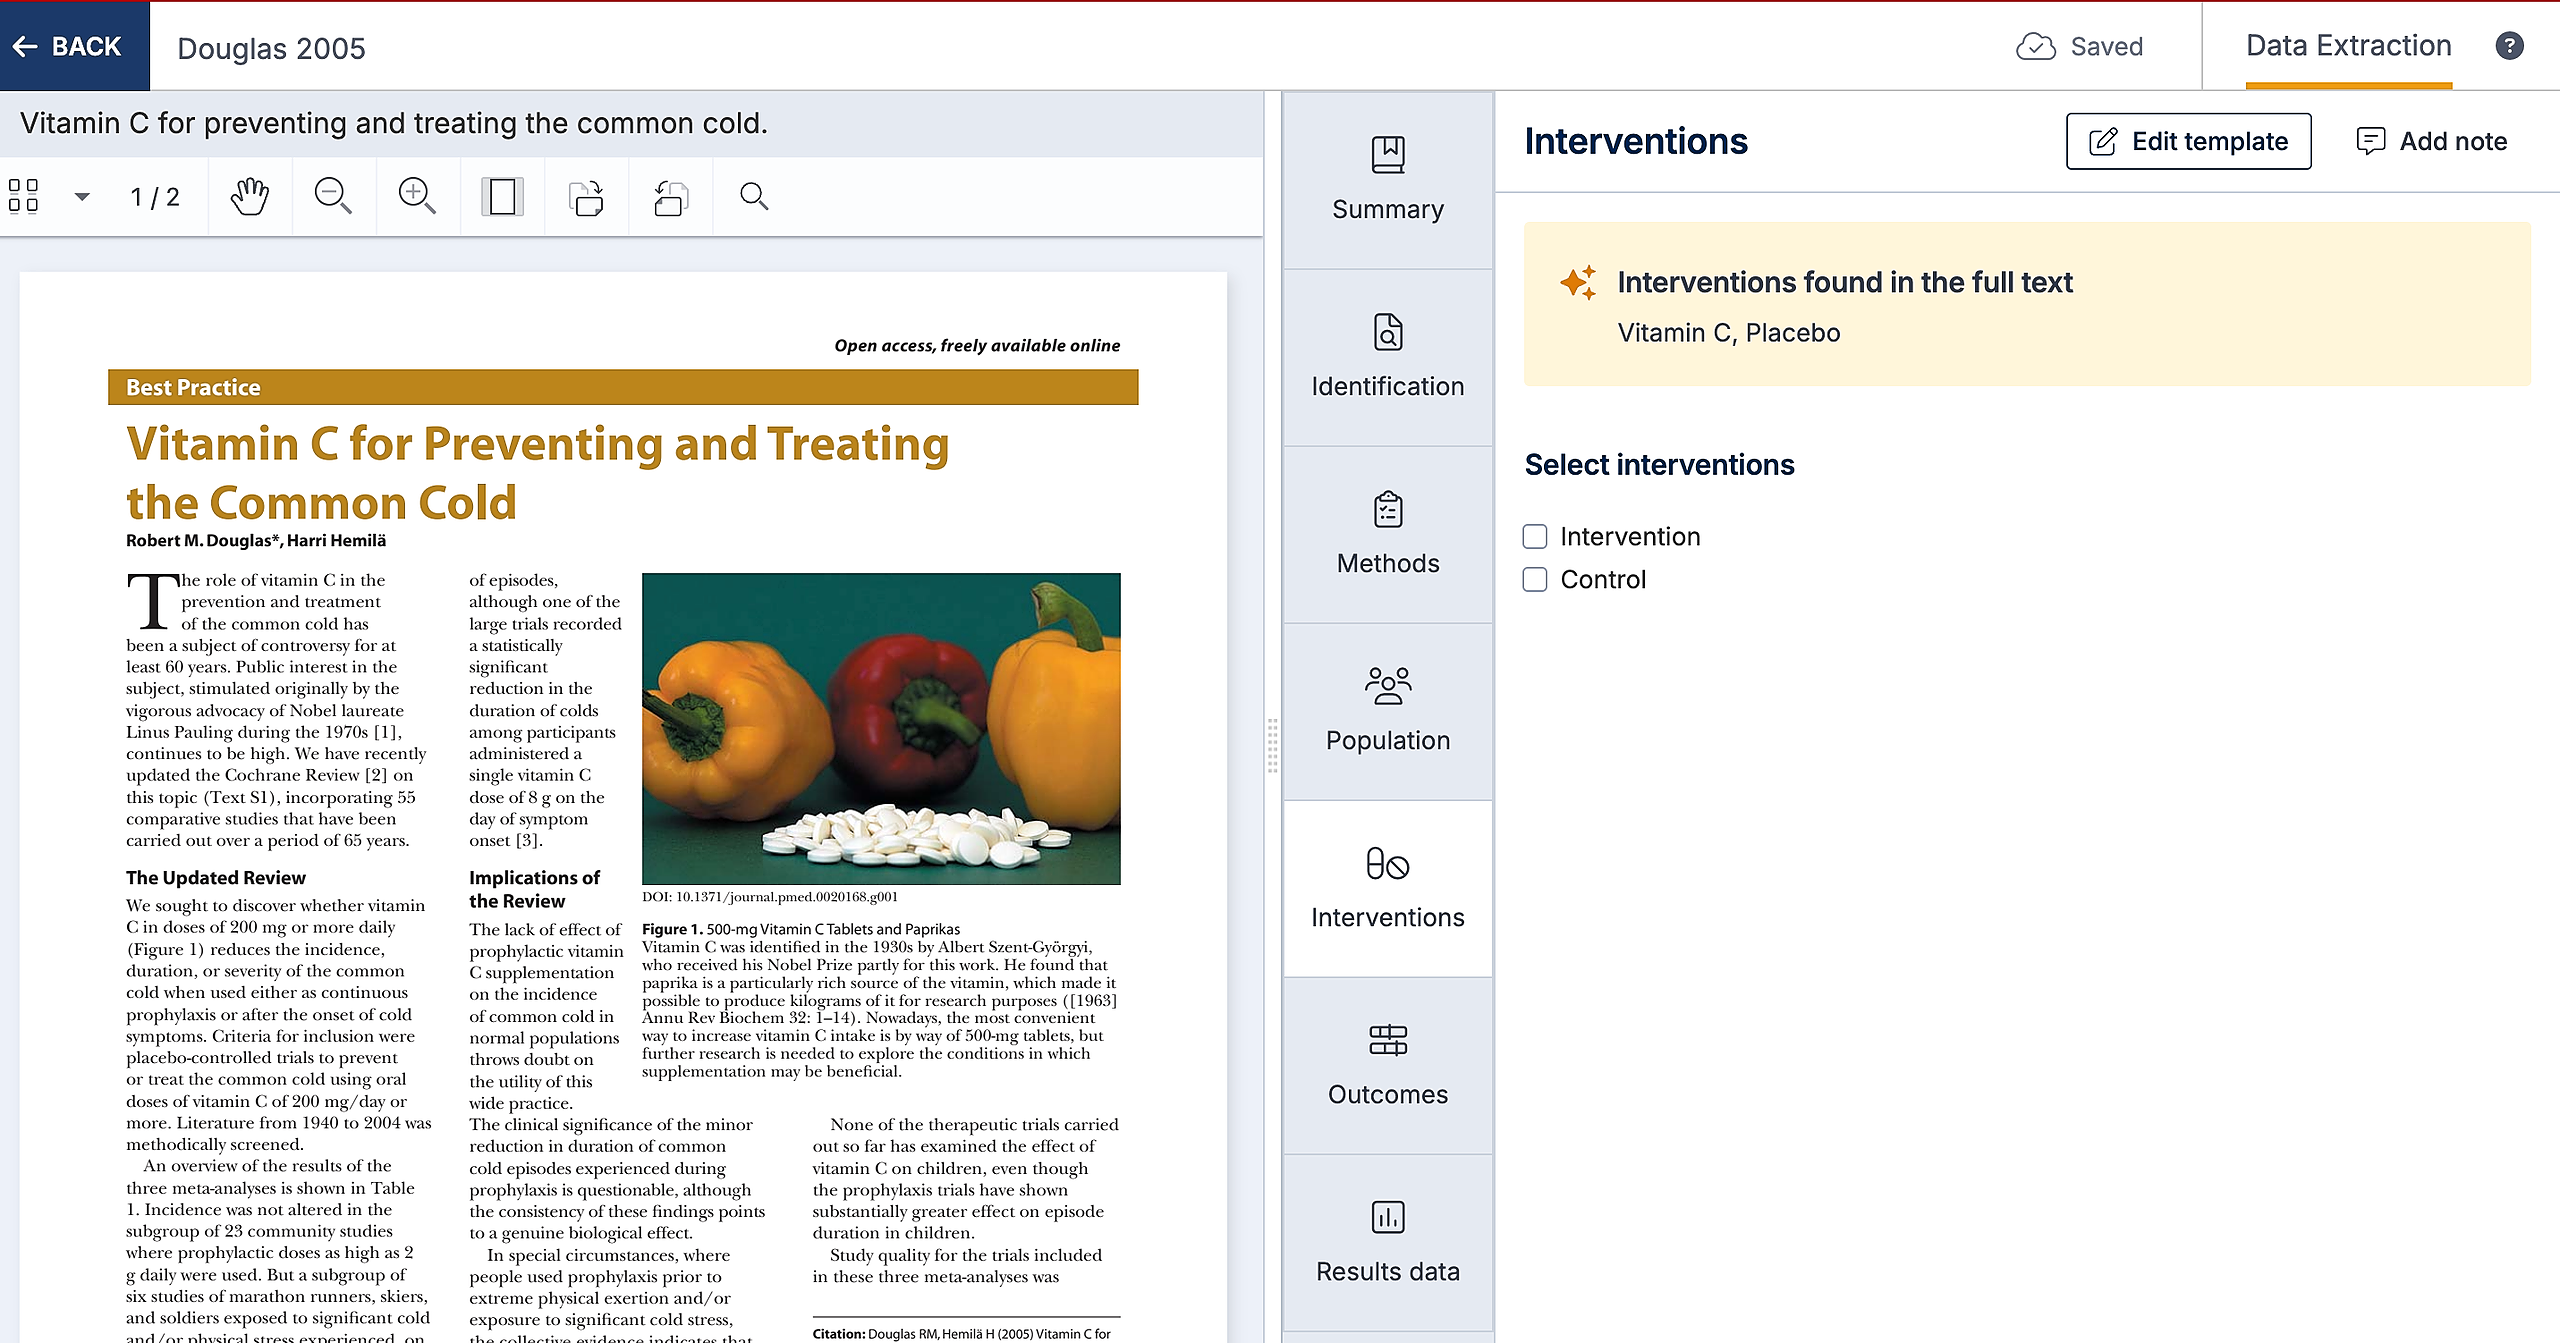
Once you click on an intervention in the template, the 'Link to Suggestion' field will display a dropdown list of suggestions based on the intervention groups (arms) identified in the study's full text.
Select the suggestion that best matches the chosen intervention. For example, if your template intervention is "Intervention", you might select "Vitamin C" as the most relevant option.
Similarly to other suggestions, these features will also only work for when the study has a DOI provided.
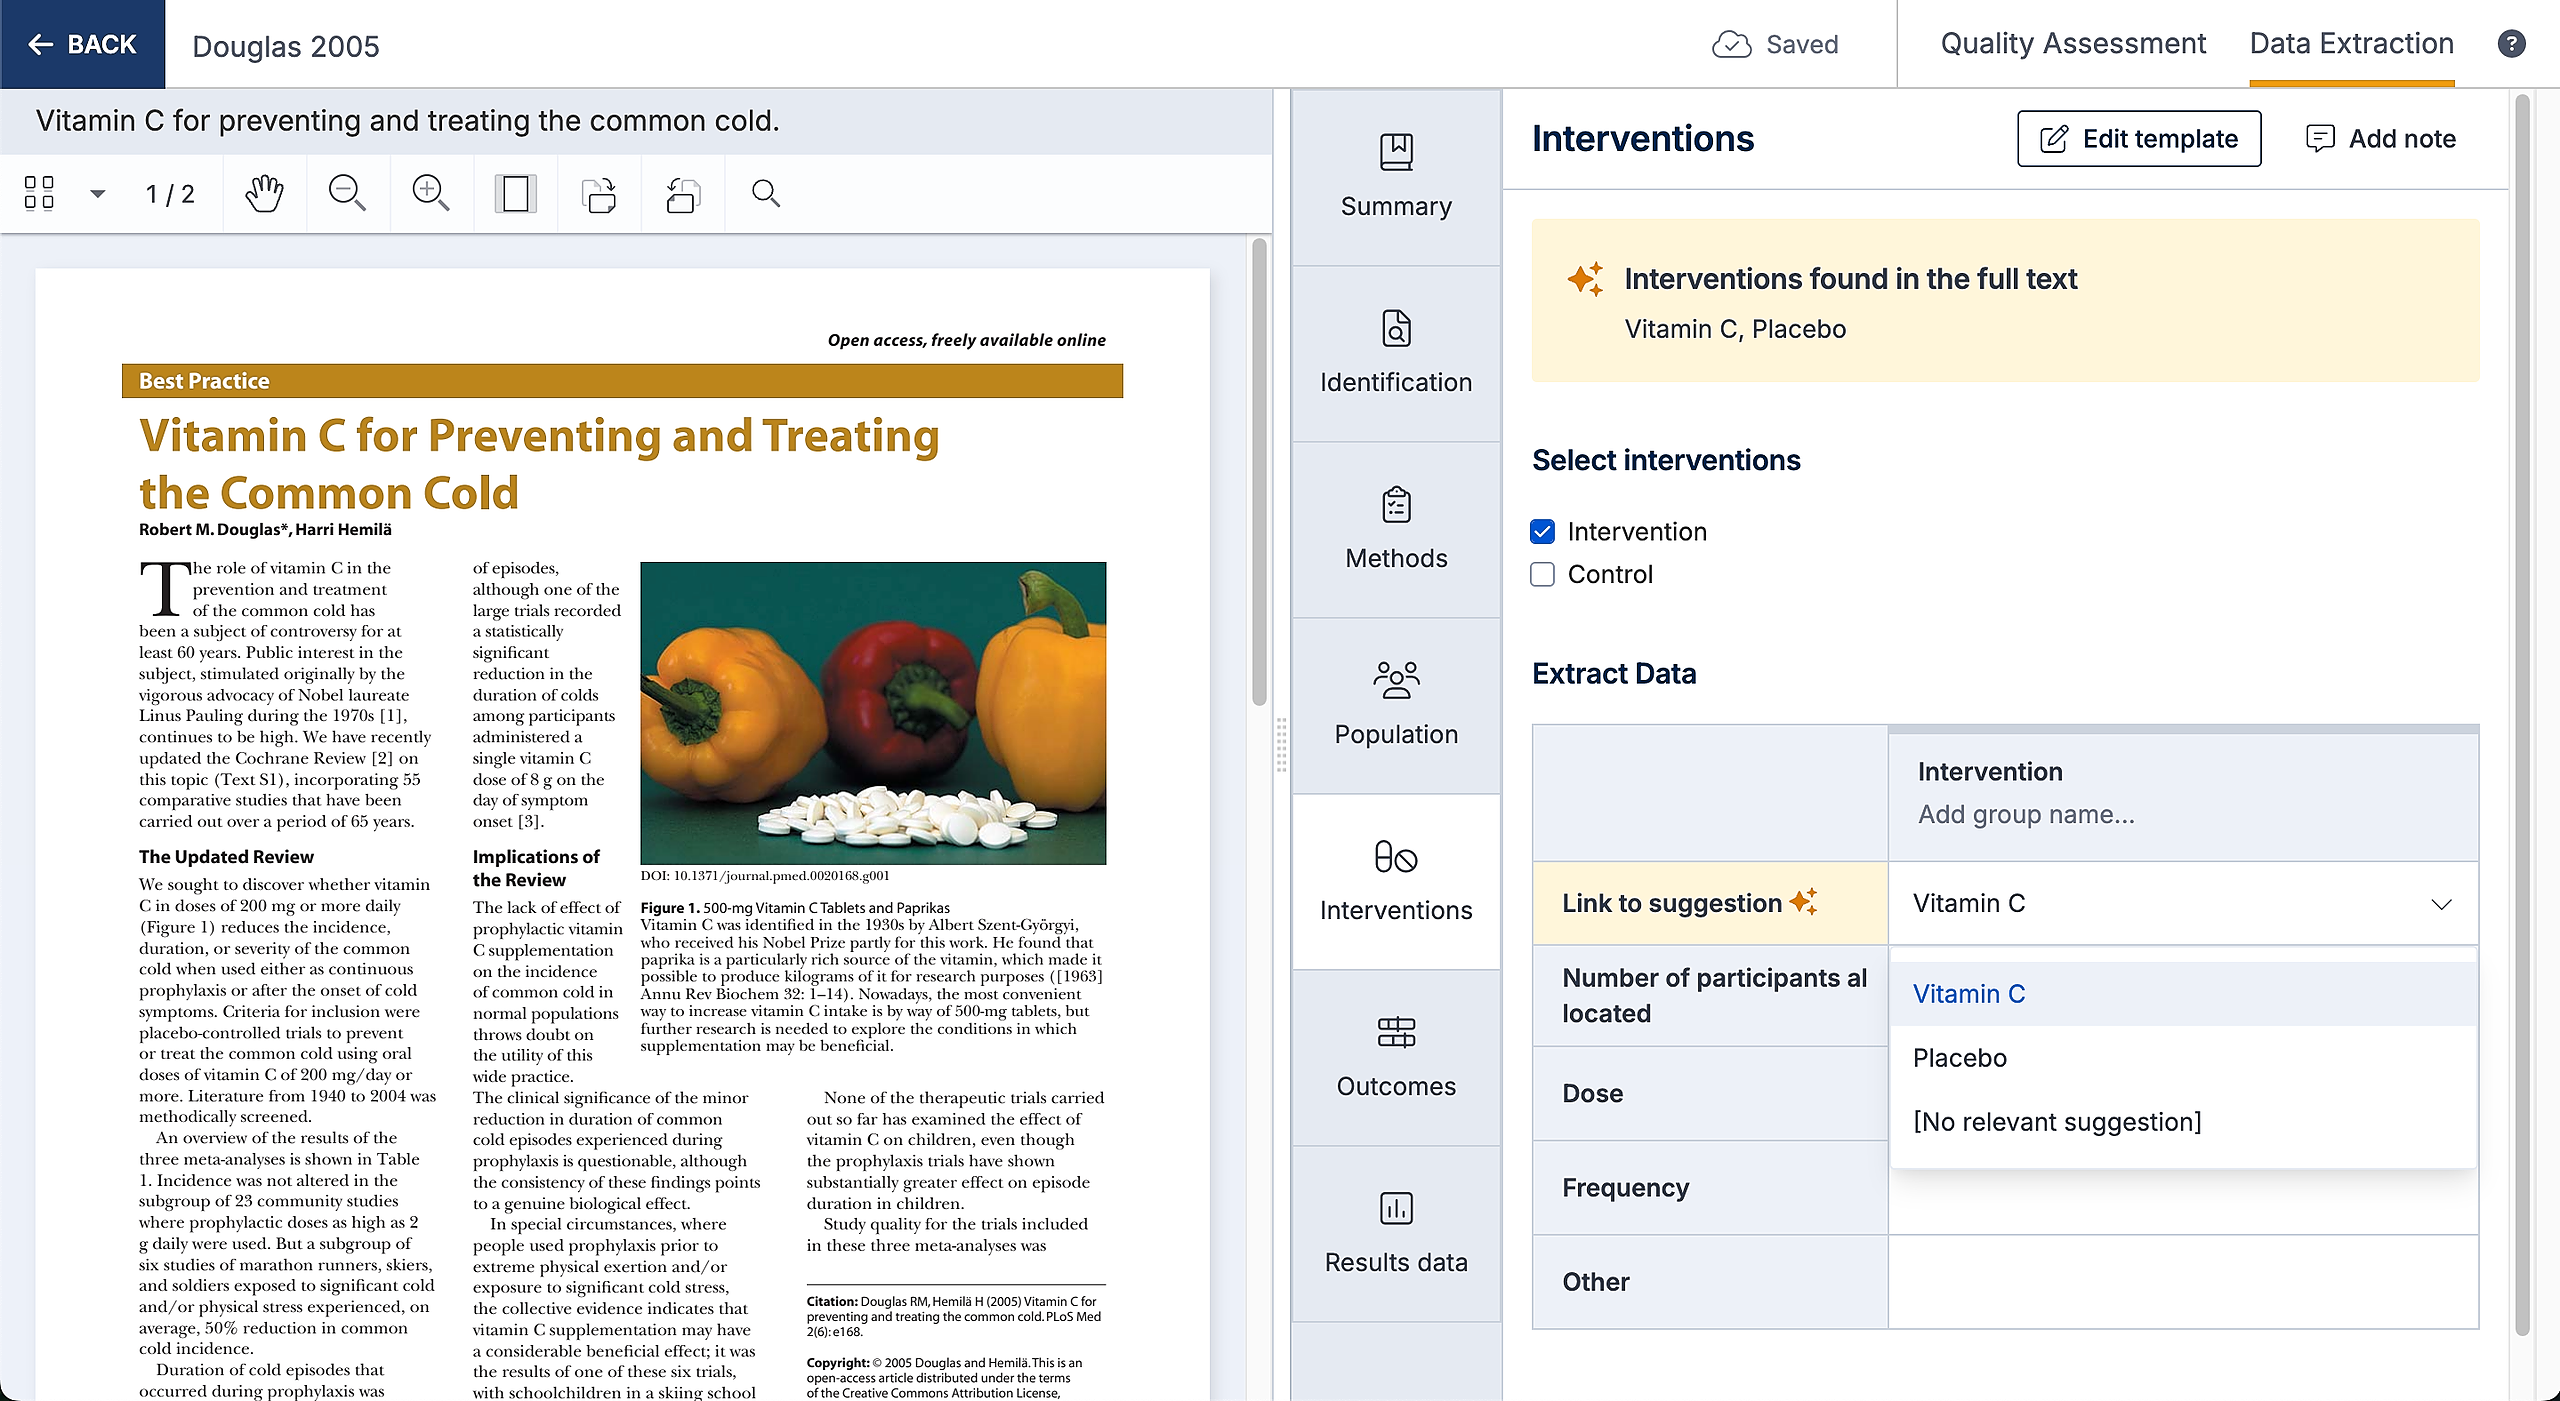
If none of the suggestions are relevant, please select 'No relevant suggestions' from the dropdown menu.
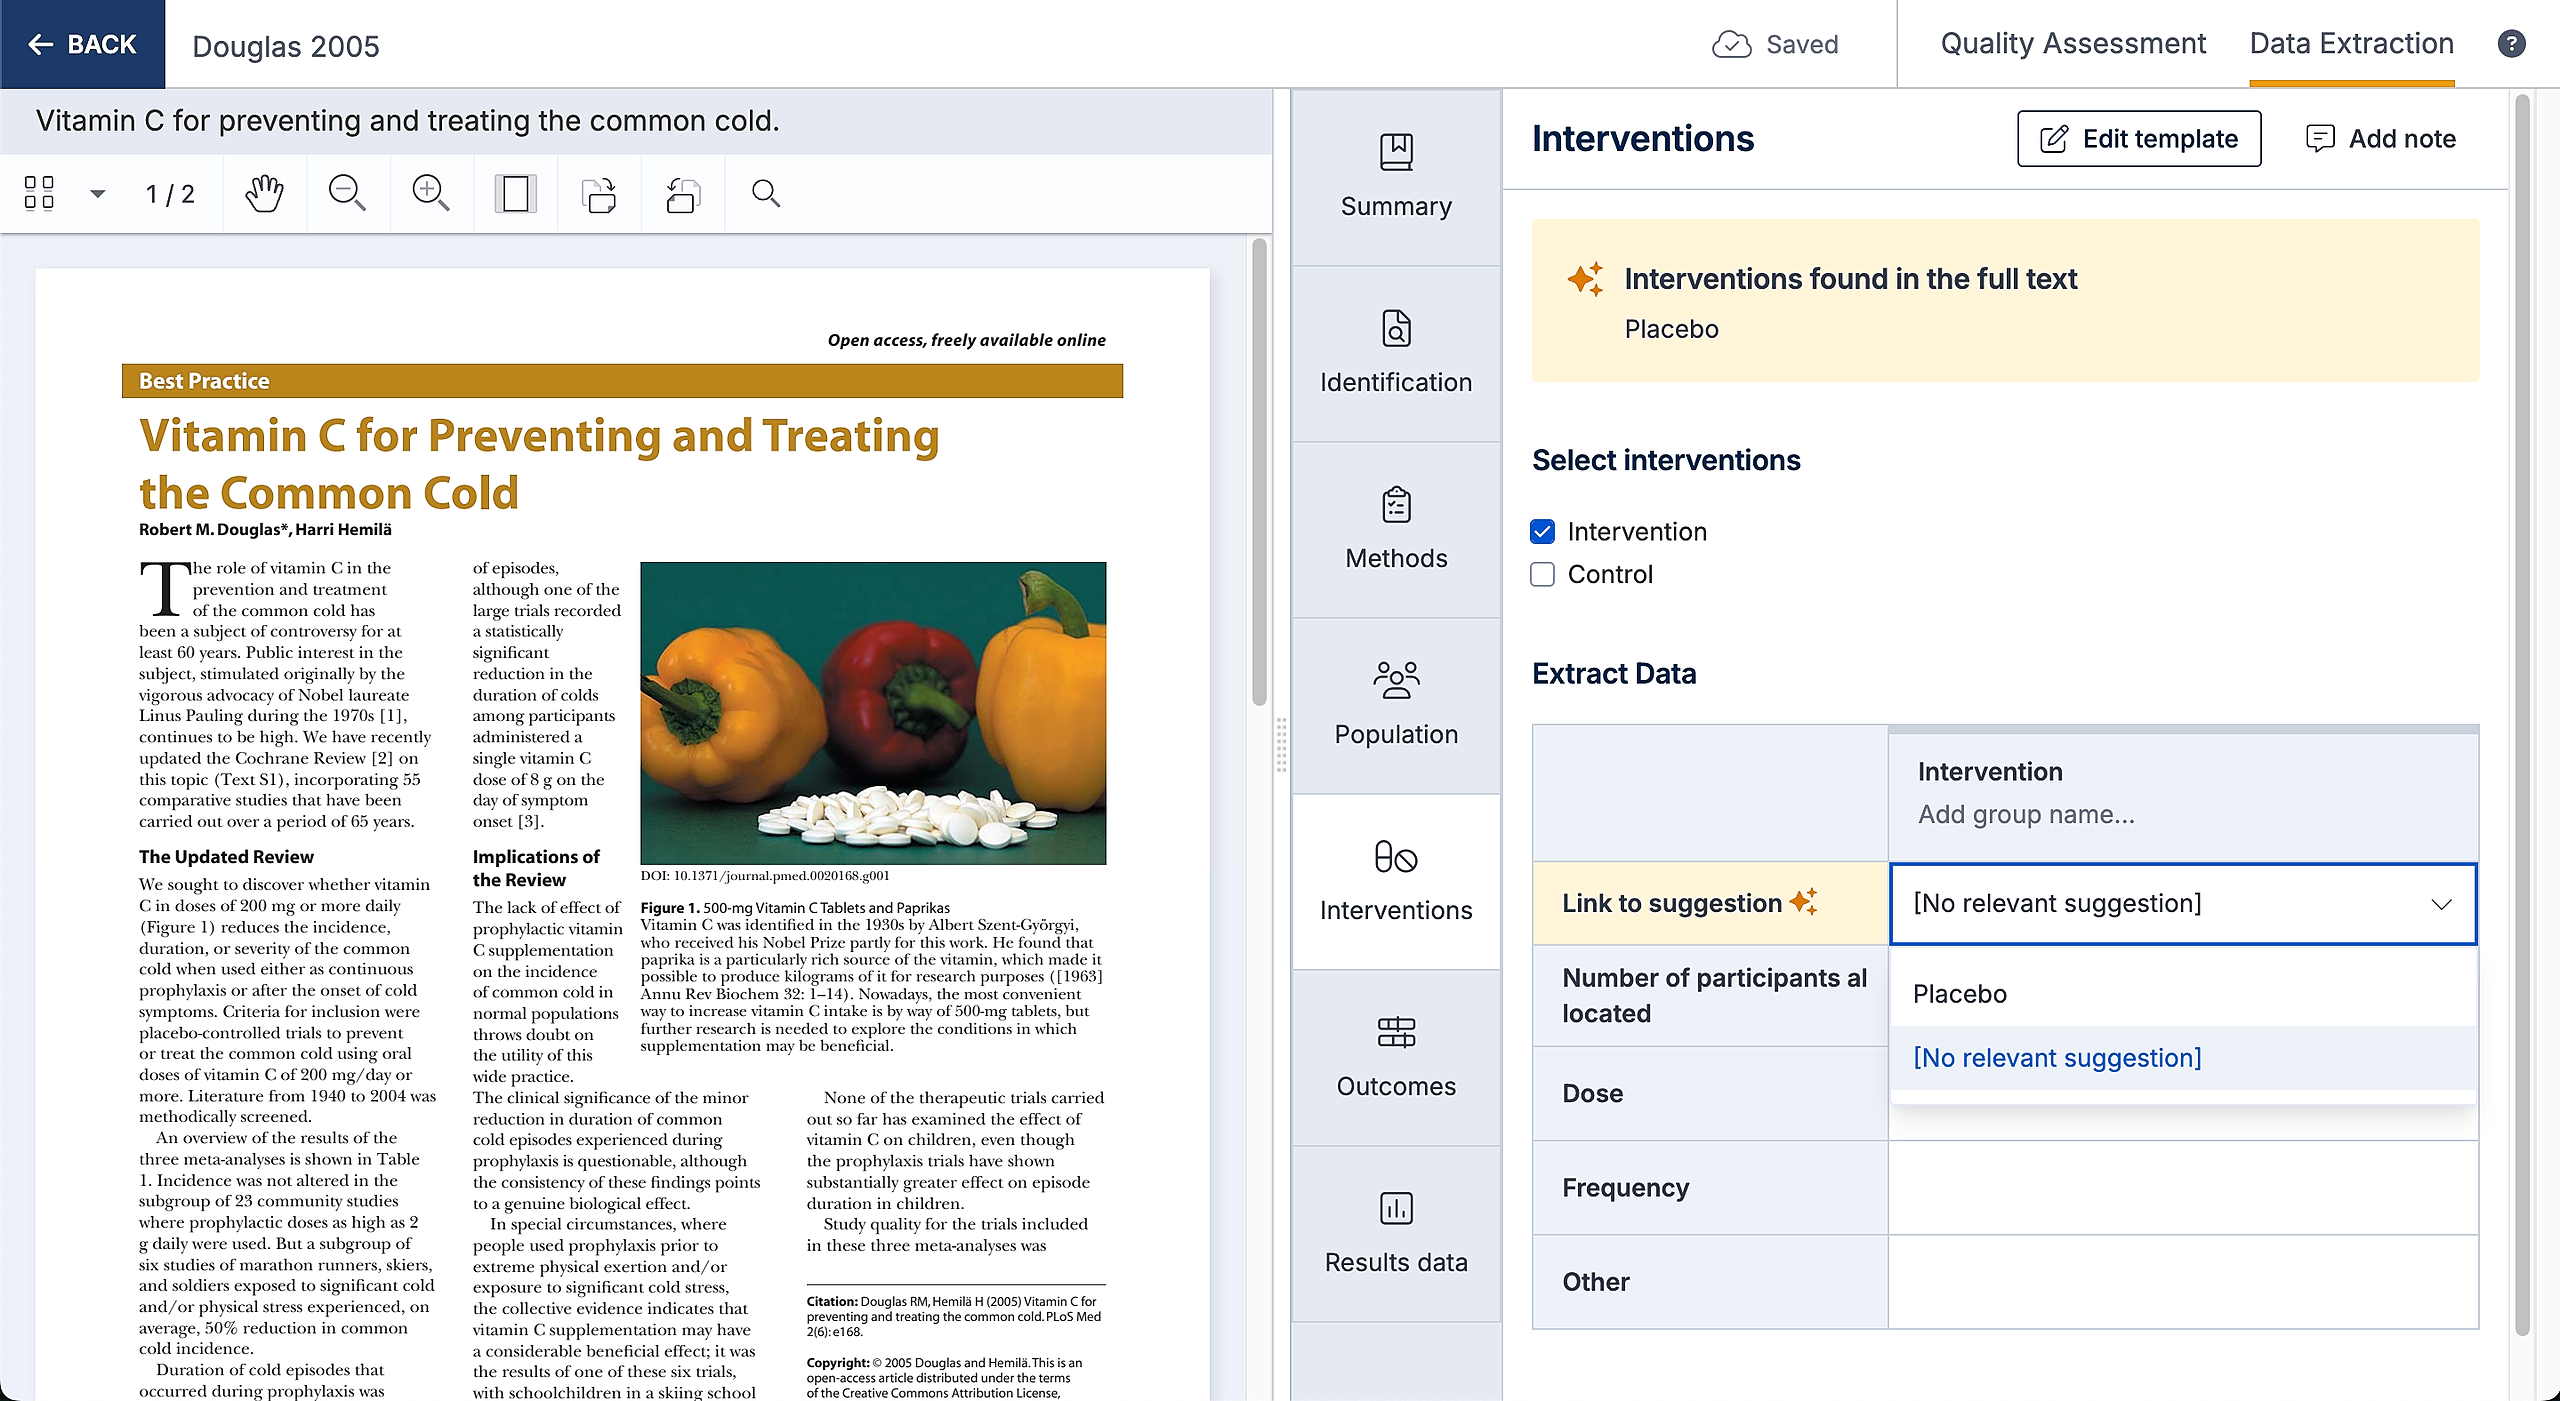
Optionally you can add multiple groups linked to the template-defined interventions and add a group name for accurate reporting. Adding multiple groups and capturing group names will allow you to accurately report how the intervention or comparator groups have been described in the study.
Intervention characteristics defined in the template will appear as rows within the table when completing data extraction for each study, with columns for each intervention group.
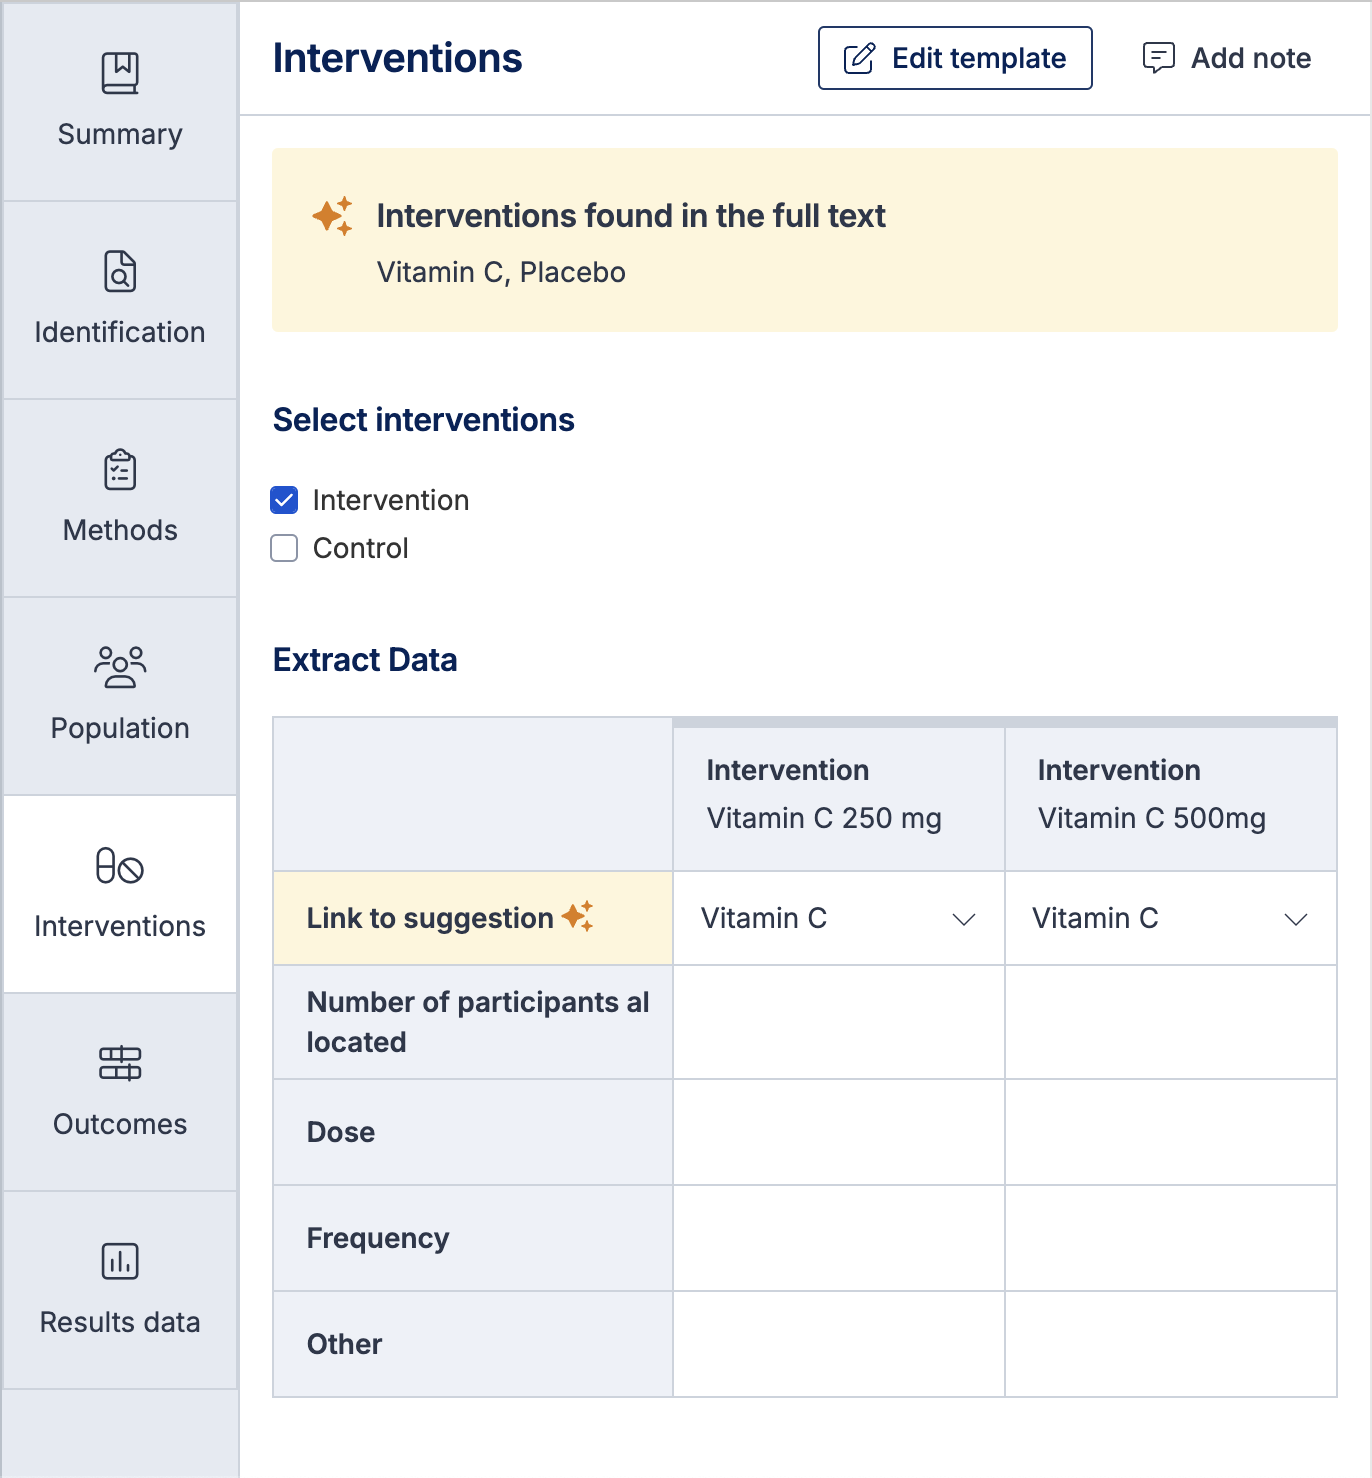
If you deselect an intervention it will be removed from the population, intervention and result sections for that study. It will also be removed from exports for that study only. Selecting and deselecting interventions will not impact other studies.
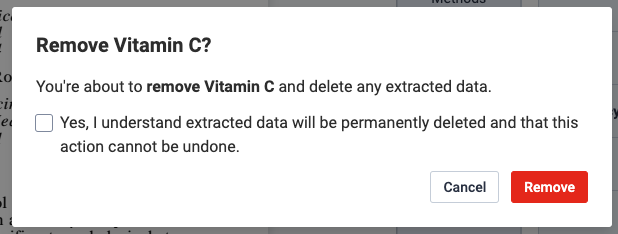
If data has been collected against that intervention on that study and you deselect it, then a warning will appear. You can decide to remove the intervention and all data extracted against the intervention or you can decide to keep the intervention and extracted data.
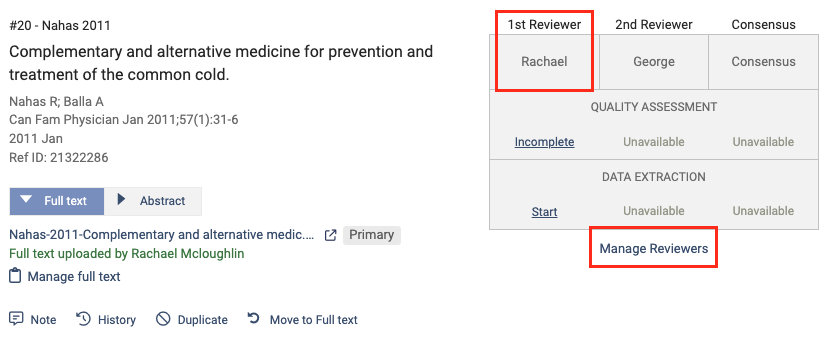
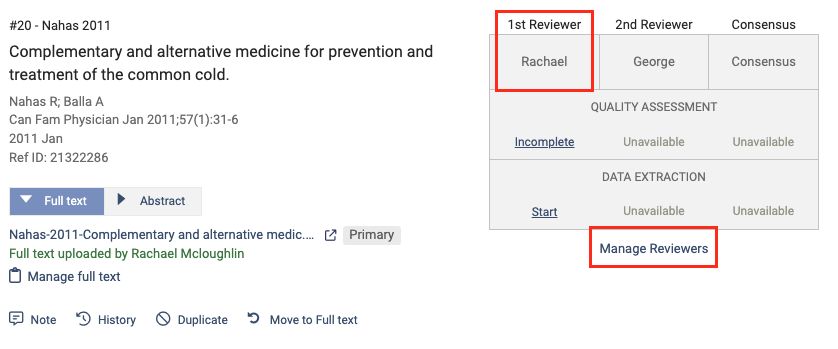
Only the 1st Reviewer can select interventions and add a group name. If you are the 2nd Reviewer and want to make changes you can check who the 1st Reviewer is on the study list and ask them to make any relevant changes. If needed, you can change the 1st Reviewer by clicking "Manage Reviewers".
Selecting outcomes
When you open the outcomes section, you’ll find a list of all outcomes that have been defined on the template. The 1st Reviewer can select which outcomes were included in the study.
Once an outcome is selected, a table will appear with the timepoints that have been defined on the template. You can then remove timepoints if they weren’t included in the study. Selecting and deselecting outcomes and timepoints will not impact other studies.
For each outcome you can optionally add a reported name, to accurately capture how the study reported the outcome. You can also add a reported time against any relevant timepoints.
Outcomes need to be selected before they appear on the result section. Only the 1st Reviewer can:
Select outcomes and remove timepoints
Add reported names and reported timepoints
Collect outcome details
Note: outcome details will export to RevMan and CSV but not into the Excel file.
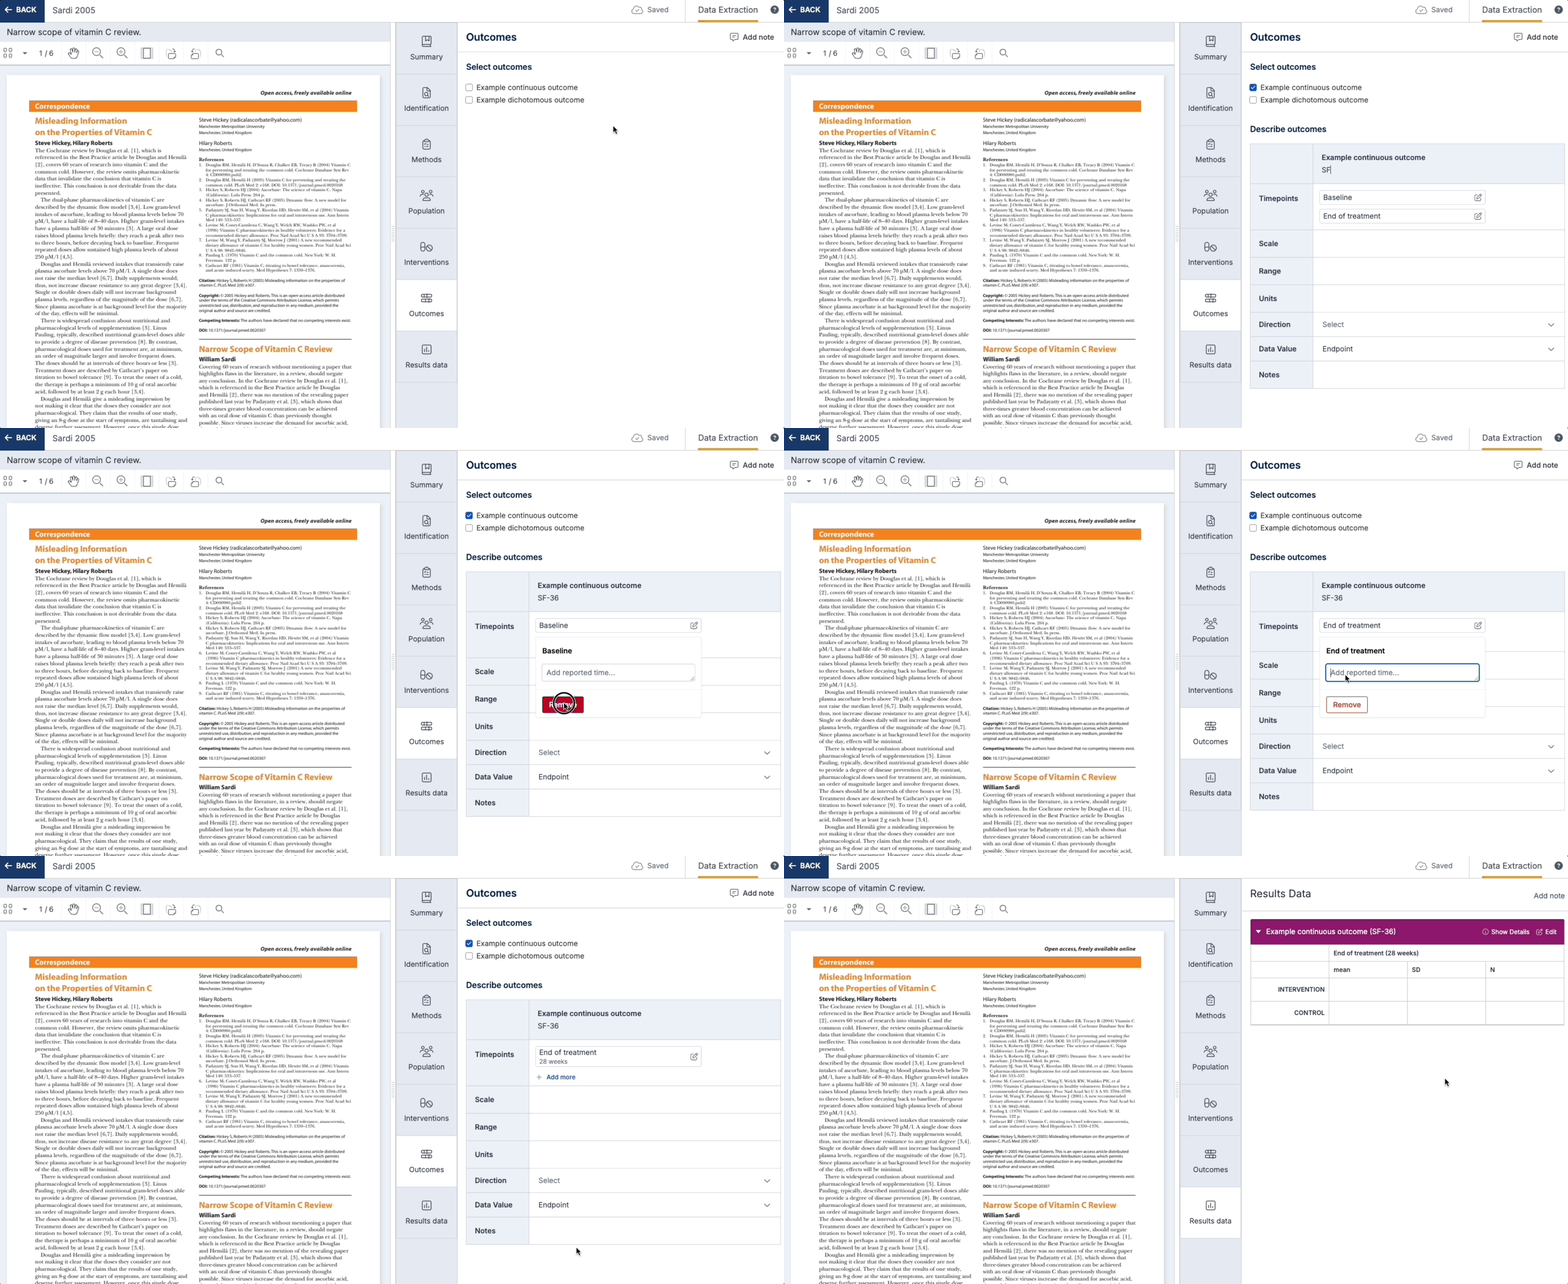
If data has been collected against an outcome or timepoint on the study and you remove that outcome or timepoint, then a warning will appear. You can decide either to remove the outcome or timepoint and all data extracted against it, or to keep the outcome or timepoint and extracted data.
Collecting result data
When you first open the results data section, you’ll find a table for each outcome that has been selected on the outcomes section for that study with default measures.
If you are completing a Non-Cochrane review and you created a data extraction template after the 5th of November you will be using the new version of the results data tables. You can find detailed information on the new version of the result tables here.
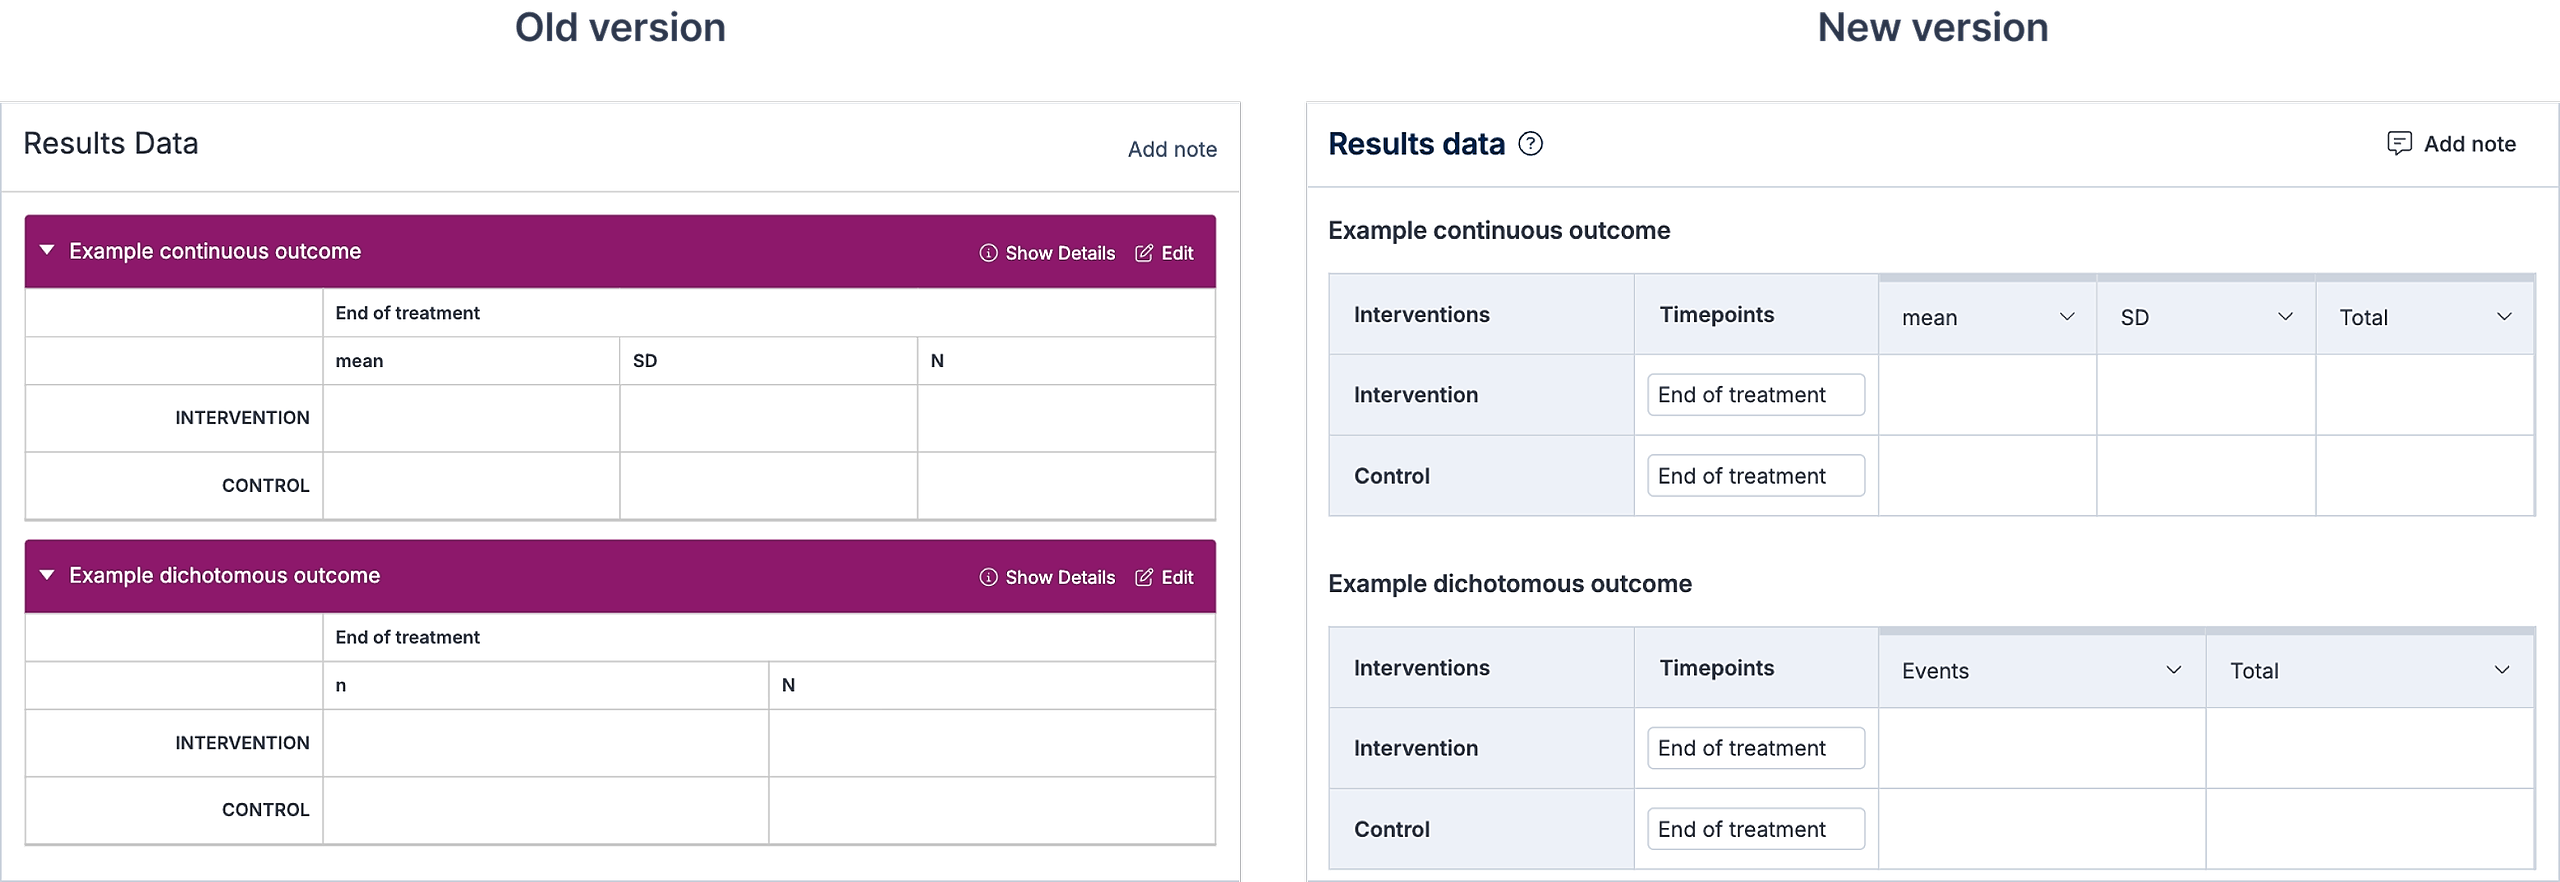
For Cochrane reviews or reviews that have created a data extraction template before the 1st of November you can find support for the old version of the result data tables below.
The interventions will appear as rows, and timepoints as columns. These need to be defined on the template, however you can select which ones are included in a study.
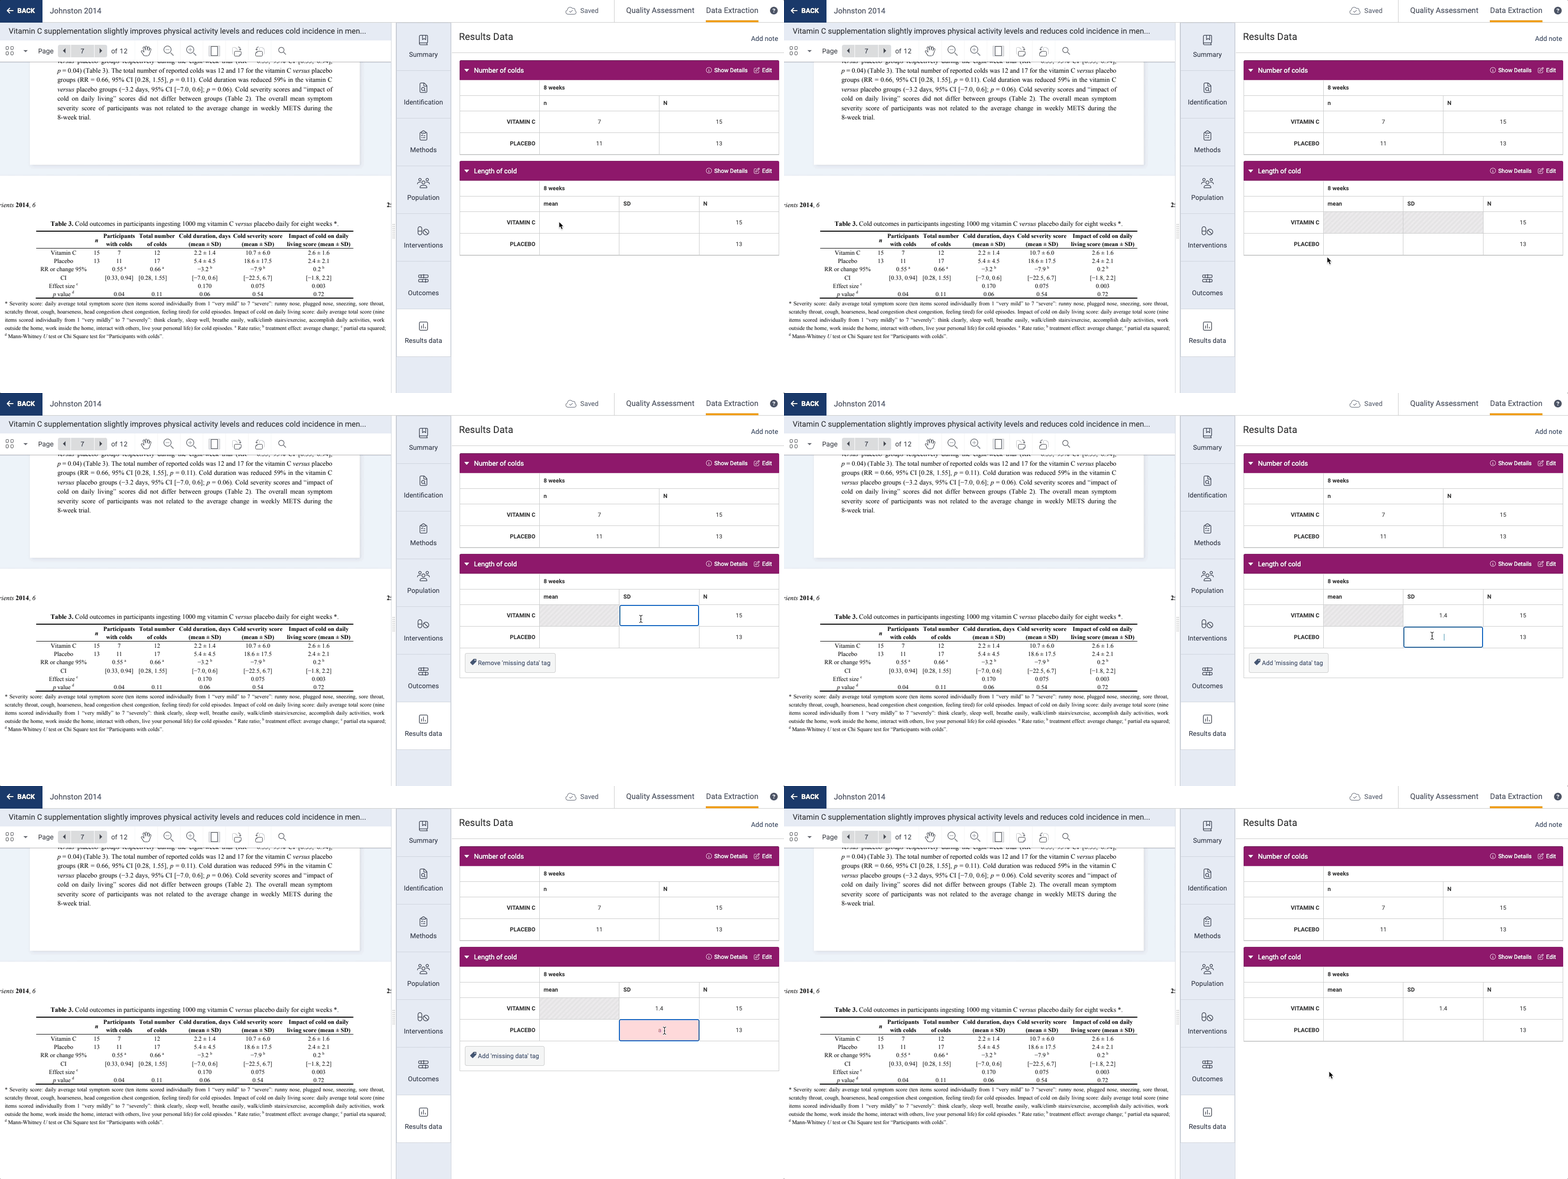
If you need to indicate missing data, click the "add 'missing data' tag" button below the table. Missing data cells will appear as grey. To remove this tag, click into the greyed out cells and click "Remove 'missing data' tag".
If you enter data in a format that is different from what is expected, then Covidence will display a red box around that entry. This data will not save or be available at the point of consensus. It will also not export to both CSV/Excel and RevMan.
Editing measures
If you need to change the measures for an outcome then you can click the edit icon.
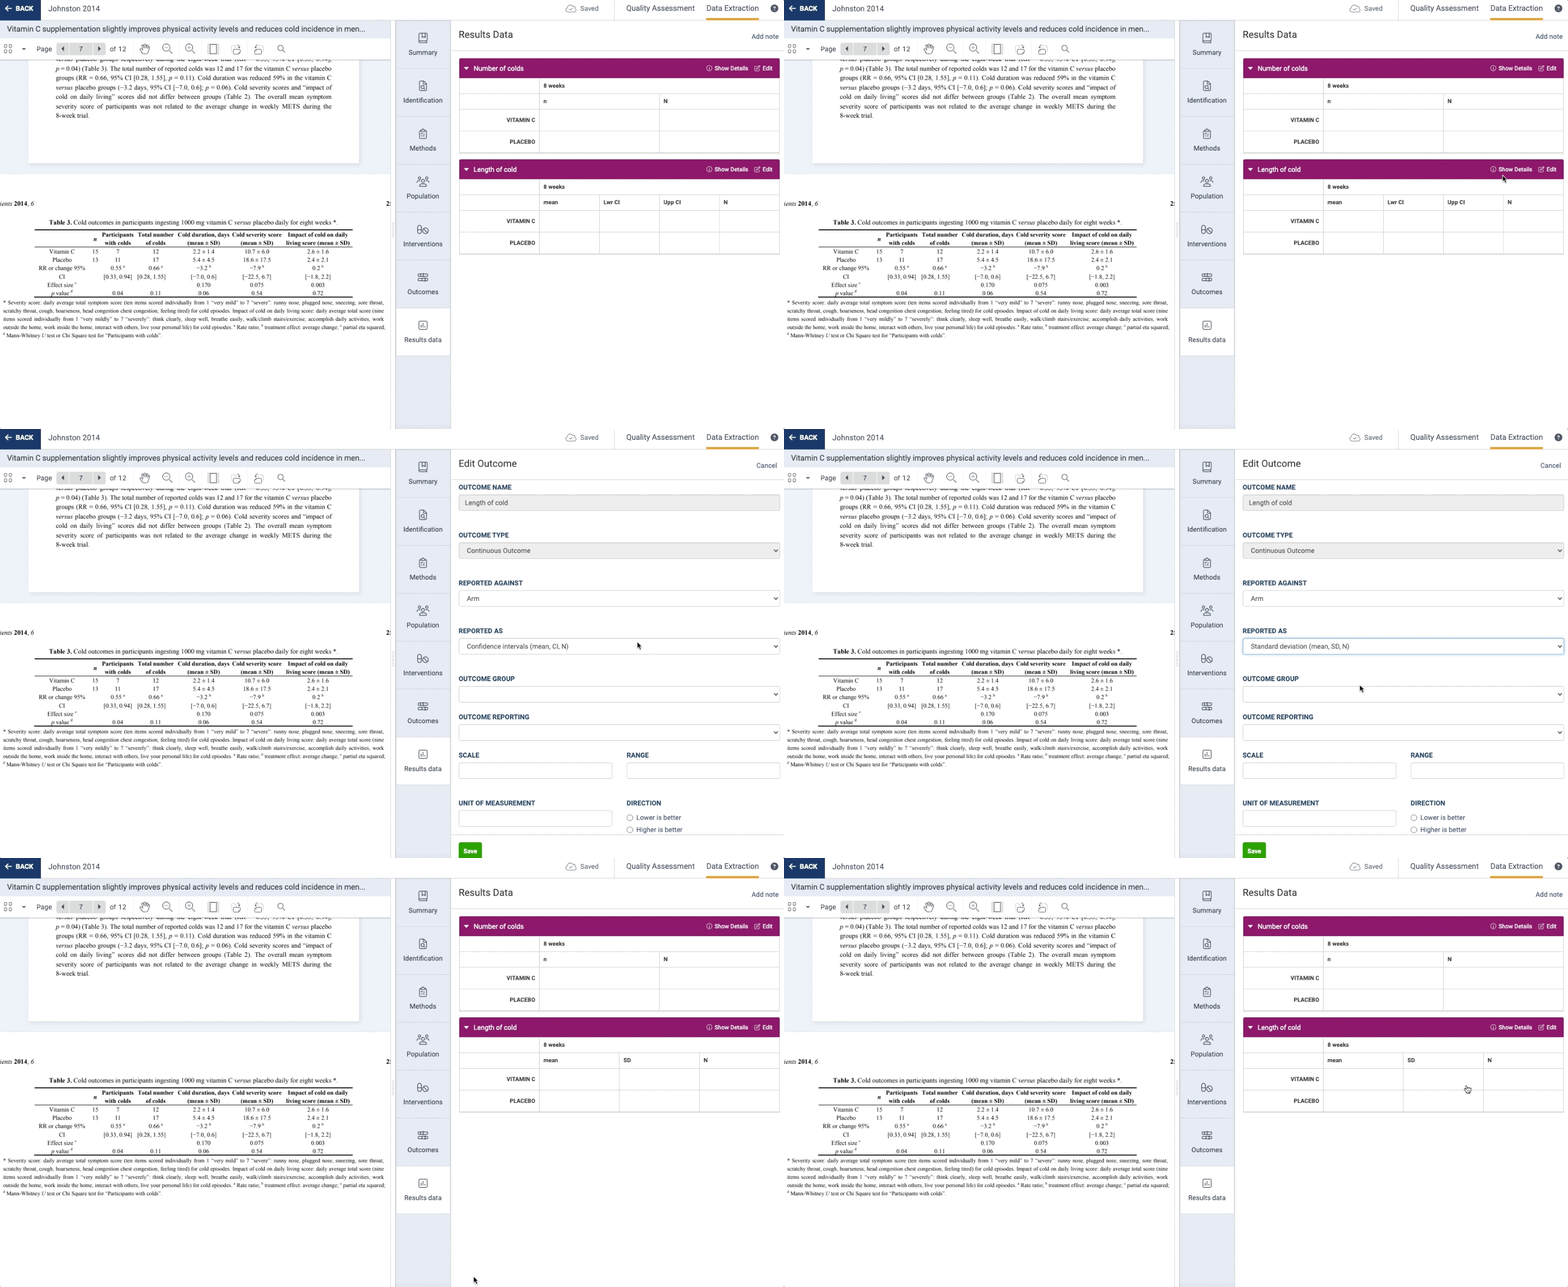
Only the 1st Reviewer can edit the result tables. If you are the 2nd Reviewer and want to edit the result tables you can check who the 1st Reviewer is on the study list and ask them to make any relevant changes. If needed, you can change the 1st Reviewer by clicking "Manage Reviewers".
Different measures will show in the “Reported as” field and you can select to report an effect estimate instead of raw data by changing the “Reported against” field. If you add an effect estimate, you’ll need to select a reference arm before saving the outcome.

Custom measures
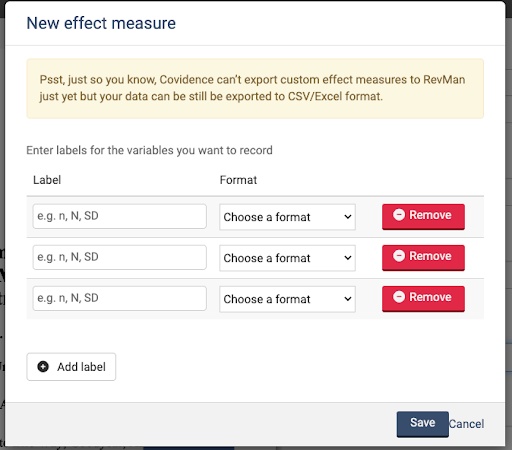
If study data have been reported differently from any of the standard option choices, you can create a custom measure.
