Extraction 1 - Data Extraction
How to set up the outcomes section
Last updated on 28 Oct, 2025
Setting up the template
This section helps you define the outcomes you want to collect across your included studies. Think of it as your guide, defining what outcomes are relevant for you to collect to answer your review question.
Adding your review outcomes
Start by adding the primary and secondary outcomes you need to collect to answer your review question (e.g. Quality of life, Mortality, Adherence to treatment).
For each outcome add:
Name: Use the outcome name from your protocol or review plan.
Result data type: Select if the result data you want to collect for this outcome is continuous, dichotomous or qualitative. If you’re not sure what the result data will be for an outcome, you can add multiple outcomes per result type (e.g. one for continuous and another for dichotomous)
Timepoints: Add key timepoints you want to collect for that outcome (e.g. Baseline, 12 weeks, End of treatment). Or you can keep it broad if you like (e.g. Reported time). If timepoints aren’t relevant, you can enter “N/A” or leave a placeholder like “–”.

Outcome details
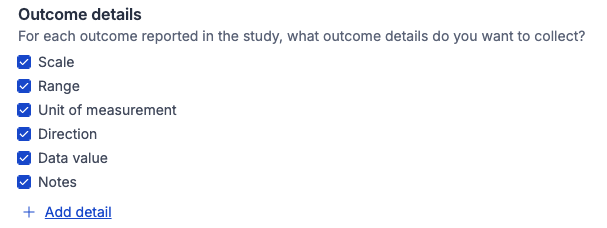
Add the outcome details that will allow for a meaningful comparison later, like how it was defined and measured in each study. We have the following default fields but these can be turned on/off as needed:
Outcome reporting – Was it fully reported or partial?
Scale – The measurement scale used (e.g. SF-36, VAS).
Range – Upper and lower limits of the scale.
Unit of measurement – e.g. days, mmHg, cm³.
Direction – Does a higher score mean improvement or deterioration?
Data value – Are results reported as change from baseline or as endpoint scores?
Notes – For anything extra you want to capture.
You can also add any other outcome detail that you want to collect from each outcome.

Result data
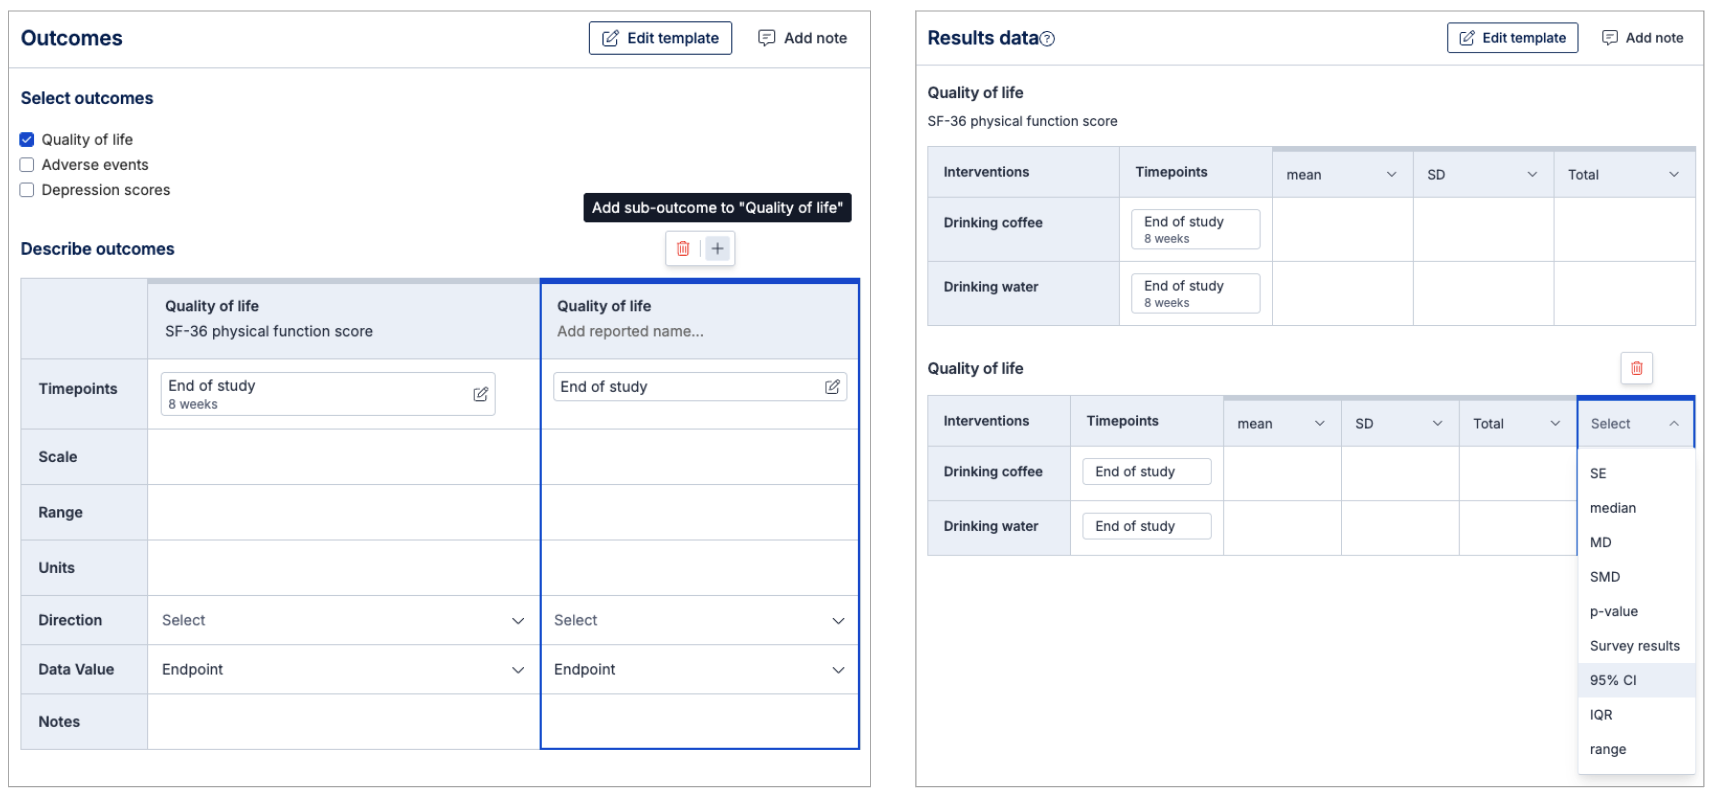
For each outcome reported in a study, you can collect result data. We have a standard list of common data types (e.g. Mean, SD, N, n) that you can select from when extracting, if you need to collect other data types you can add custom data types to the template.

Extracting data from studies
When extracting data from a study:
The 1st Reviewer will select which template defined outcomes and timepoints were reported in that study.
You can add the study’s reported outcome name (e.g. “SF-36 physical function score”) and link it to your template outcome (e.g. Quality of life).
The same applies to timepoints (e.g. “8 weeks”) to your template timepoint (e.g. End of treatment)
If a study reports multiple variations of an outcome e.g. both SF-36 and AQLQ scores for quality of life. Then you can add multiple outcomes and link it to your template defined outcome (e.g. quality of life).
For each outcome reported in a study, a result data table will be created automatically allowing you to extract qualitative and quantitative data. You can add, edit and delete the columns in the table to suit what's reported in the study. If you need to add more custom data formats, you can add them to the template at any time.

FAQs
How do I collect result data when it's reported as a comparison between groups?
If you want to report between group results e.g. “Intervention vs Control” where “Control” is the reference group, then we recommend leaving the reference group cell blank. You can make a note of which group is a reference group in a custom data format.

What if I'm using the old version of results data?
If you are completing a Cochrane review or you created a data extraction template before the 5th of November you will be using the old version of the results data tables. Result tables will look like the image below. You can edit the result data table by clicking the edit icon in the top left of an outcome table, as circled below. Custom data formats can also be added and they can be anything you like, to allow you to capture qualitative results. If you edit the data formats shown on the result data tables, this will only change the tables for that study.

Why can't I select outcomes/timepoints/data types on the extraction form?
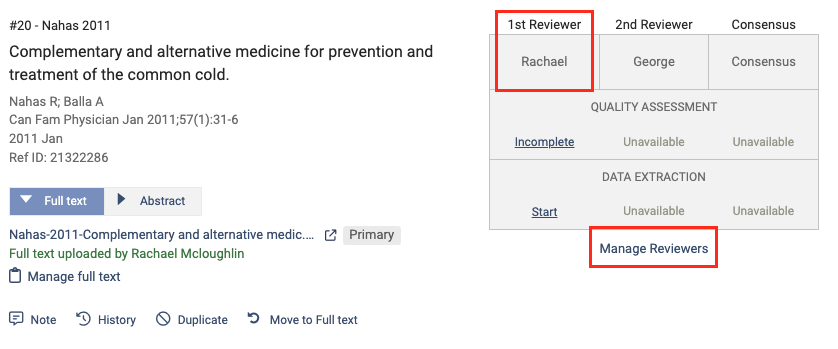
Only the 1st Reviewer can edit the results data table. If you are the 2nd Reviewer and want to edit outcomes, timepoints or result data types then you can check who the 1st Reviewer is on the study list and ask them to make any relevant changes. If needed, you can switch the 1st and 2nd Reviewer by clicking "Manage reviewers" and the data they have collected will be transferred along with the reviewer.

Help for setting up each section of the template
Below are step by step guides providing tips on how to set up your template for each section:

